Following our post about Improving Google Chrome Update Success Rates, we are going to look deeper into scenarios where doing a full Chrome remediation is required. We will start with identifying the common installation failures that will prevent Chrome from installing successfully. Then we will outline what steps should be performed to fully clean up all blockers that could cause installation issues. Just as an advance warning, we will be delving deeper into Windows Installer and the Google Chrome Enterprise Msi, so this post will be quite long and technical.
What are the common Chrome installation issues?
There are wide range of problems that can prevent Chrome from installing successfully. We are going to focus on the failure scenarios that we have seen most often, particularly with updating devices to the latest version of Chrome using the Google Chrome Enterprise Msi installer file. Google also provides this help document that covers Fixing problems installing Chrome - Google Chrome Help.
The MSI 1603 error
When you look at the listing of Microsoft Installer error codes (MsiExec.exe and InstMsi.exe error messages (for developers) - Win32 apps | Microsoft Learn), we can see that the description for 1603 is “A fatal error occurred during installation". This is a generic error and unfortunately does not really provide any direction as to what the root cause of the failure is. In our experience with the Google Chrome Enterprise Msi, we know that 1603 errors are typically related to failures generated by custom actions within the Msi.
If we open the googlechromestandaloneenterprise64.msi file with an Msi editor like Orca or InstallShield, you can see that there is a custom action named DoInstall that executes the GoogleChromeInstaller included within the Msi file. We've found that if the googlechromestandaloneenterprise64.msi failed with a 1603 error, 90% of the time, it is related to the DoInstall action and the GoogleChromeInstaller failing to complete successfully.

If you see Chrome failing to install and the msiexec process is returning a 1603, check the log file, you will likely see a similar error to the one below from the DoInstall custom action.

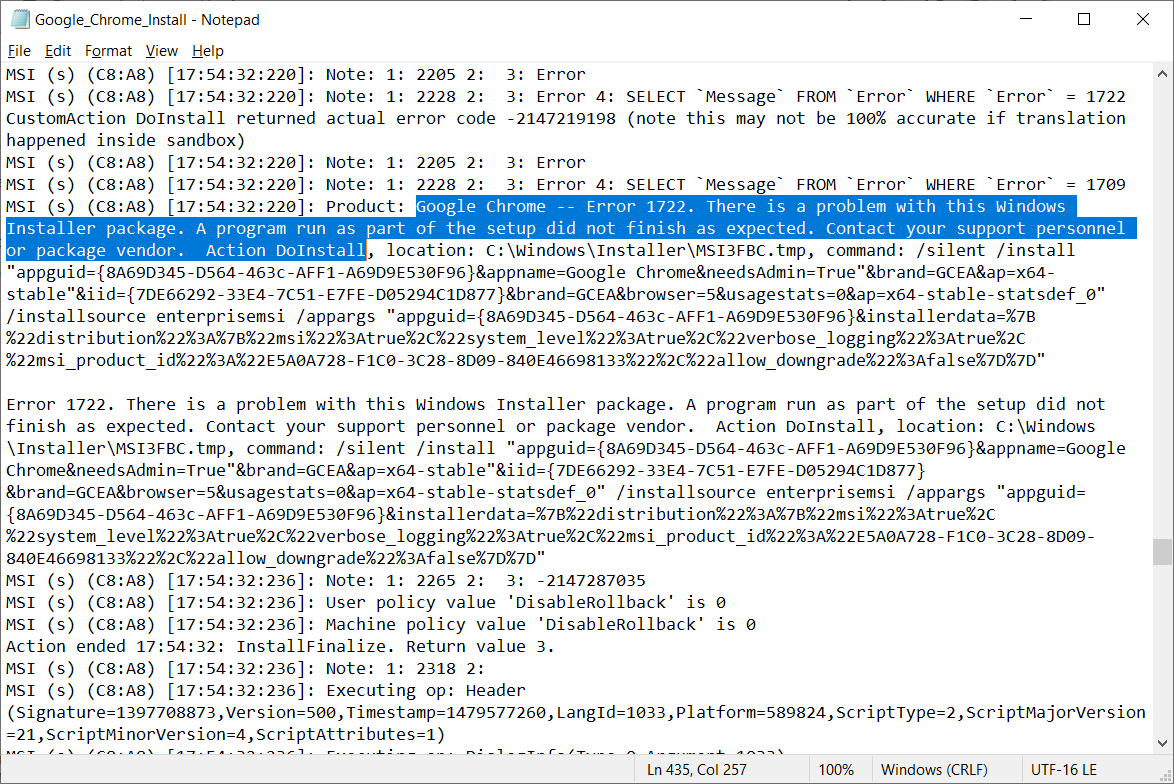
Installer Artifacts
There is another scenario where the 1603 error can occur, specifically when an uninstall of Chrome is performed before the install/re-install. If there are any Microsoft Installer artifacts left behind after the uninstall then the install could fail with the 1603 error.
The googlechromestandaloneenterprise64.msi file has a similar custom action for the uninstall named CallUninstaller, which you can see in the picture above of the custom actions displayed in Orca. We have encountered older versions of Google Chrome Enterprise that does not entirely clean up all remnants of Chrome during the uninstall process. In some cases, files and folders are left behind due to file locks. In the worst cases, we have found artifacts left behind in the registry in the following locations:
- HKEY_LOCAL_MACHINE\SOFTWARE\Classes\Installer\Products
- HKEY_LOCAL_MACHINE\SOFTWARE\Classes\Installer\Features
- HKEY_LOCAL_MACHINE\SOFTWARE\Classes\Installer\UpgradeCodes
- HKEY_LOCAL_MACHINE\SOFTWARE\Microsoft\Windows\CurrentVersion\Installer\UserData\S-1-5-18\Products
- HKEY_LOCAL_MACHINE\SOFTWARE\Microsoft\Windows\CurrentVersion\Installer\UserData\S-1-5-18\Components
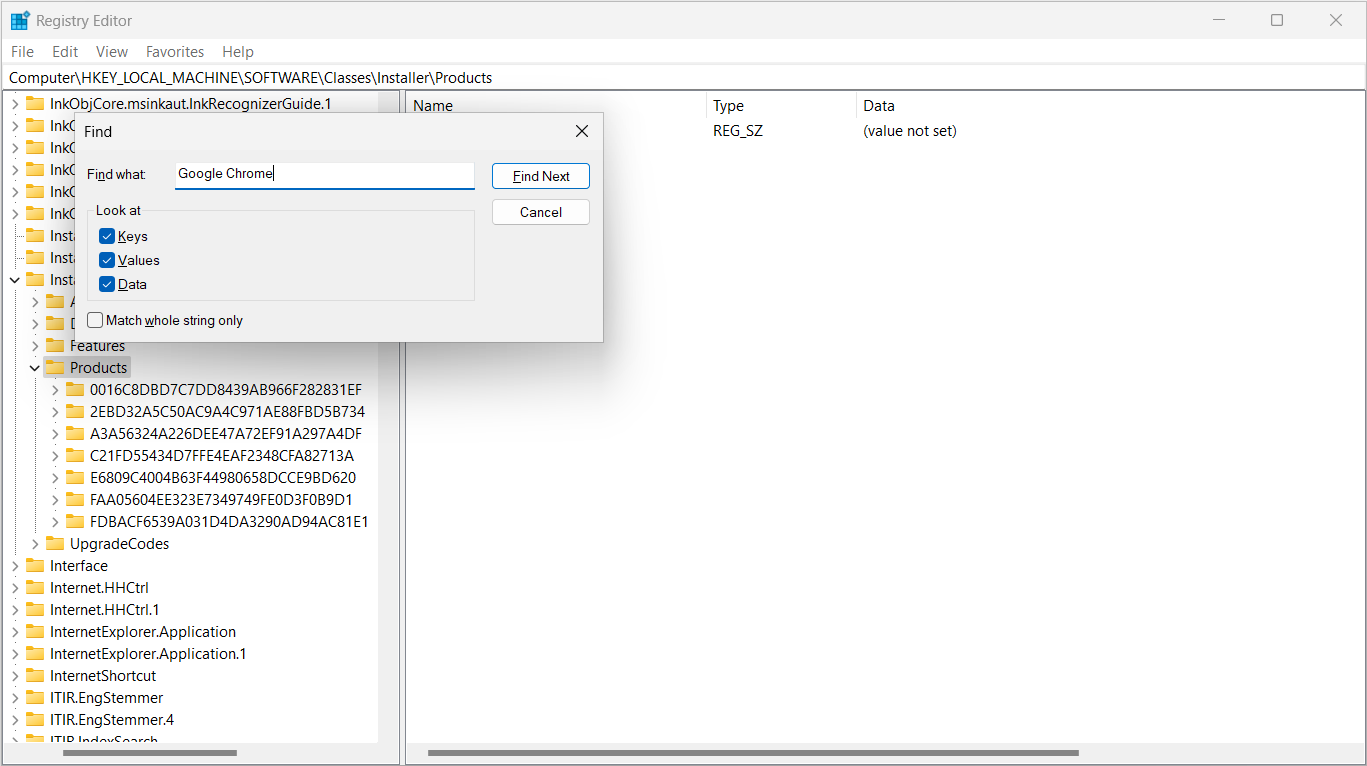
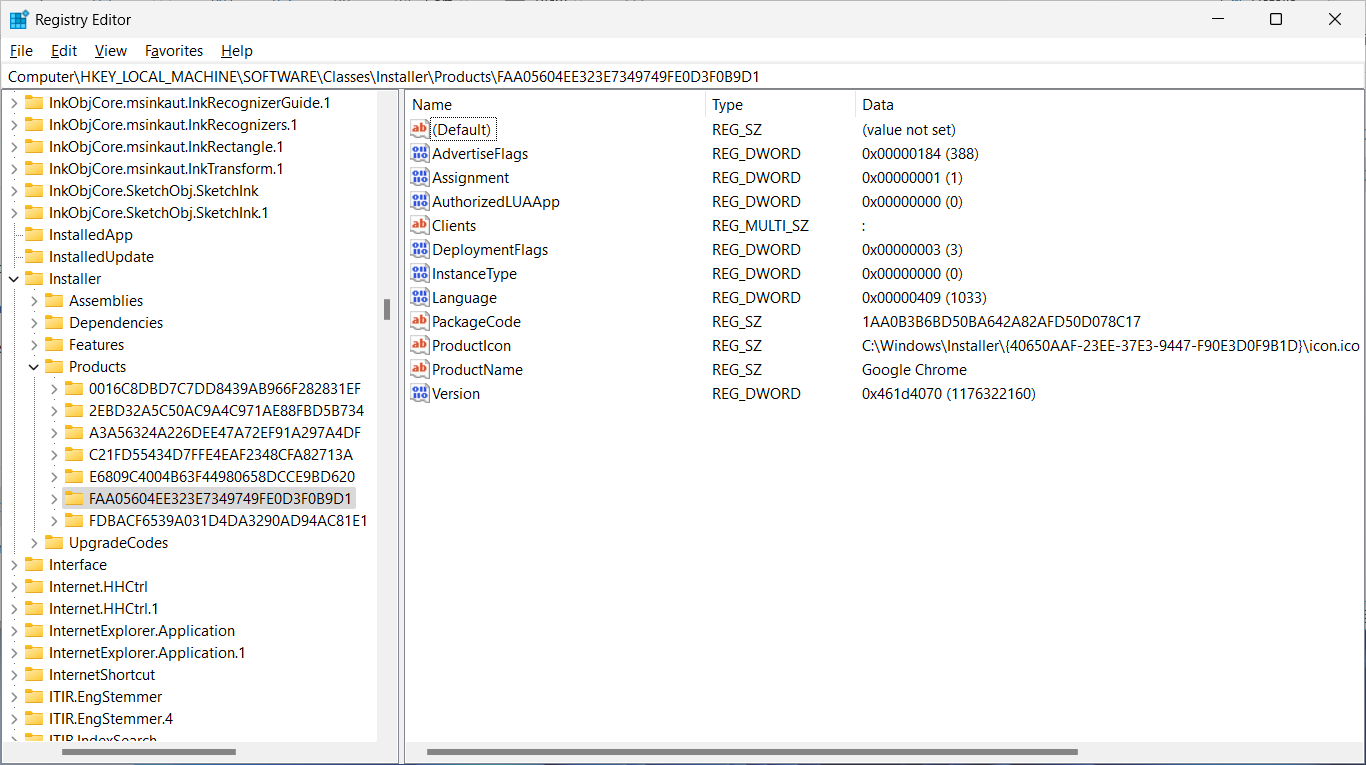
After an uninstall, search for Chrome in HKEY_LOCAL_MACHINE\SOFTWARE\Classes\Installer. If you find there is still an entry (as shown below) then the Chrome installer will likely fail with a 1603 error.
In this scenario, there will be a similar error message to the one below in the Msi log file.


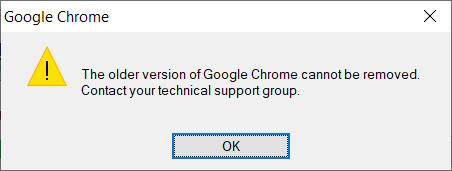
If you try to install Chrome using the Msi GUI (i.e. just launching the googlechromestandaloneenterprise64.msi file without using the msiexec command with the silent option) then you will likely see this message:

A full clean removal and reinstall of Google Chrome
You may have encountered similar, or the exact same scenarios illustrated above where you just cannot get Chrome to update or install properly. This is often when a full clean removal of Chrome is required, which we will break down in the steps below:
Step 1: Force close Google Chrome
To ensure a successful attempt at uninstalling Chrome, any processes associated with Chrome should be killed. Namely:
- Chrome.exe
- GoogleUpdate.exe
- Chrome_proxy.exe
- Lbs_native_host.exe *if Legacy Browser Support is installed
Step 2: Uninstall Google Chrome
Next, try to uninstall Chrome (and Legacy Browser Support - if installed) from Programs and Features. To run the uninstall command silently, you can look up the relevant product code and/or uninstall string from the Programs and Features registry keys (listed below in step 3). Specify the “/qn" parameter in the command line to execute uninstall silently as shown in the example below. We would also recommend specifying a verbose log file with the /l*v switch.
If you are not sure of the product code, and if there is no entry for Chrome in Programs and Features then have a look at step 5 below. Specifically, under the section titles “Retrieving the Product Code from the Registry" where we explain how to search the Windows Installer registry keys for the “compressed" product code and how to convert this to the GUID.
Note: If the uninstall step is missed or if it is unsuccessful, then the following Google Update registry keys will need to be removed:
- HKEY_LOCAL_MACHINE\SOFTWARE\WOW6432Node\Google\Update\Clients\{8A69D345-D564-463c-AFF1-A69D9E530F96}
- HKEY_LOCAL_MACHINE\SOFTWARE\WOW6432Node\Google\Update\ClientState\{8A69D345-D564-463C-AFF1-A69D9E530F96}
- HKEY_LOCAL_MACHINE\SOFTWARE\WOW6432Node\Google\Update\ClientStateMedium\{8A69D345-D564-463C-AFF1-A69D9E530F96}
Step 3: Remove Chrome artifacts from the Programs and Features registry keys
The uninstall may not have been successful or may not have been able to remove all Chrome remnants from the registry. So next we will search the following registry locations for Chrome artifacts and remove them.
- HKEY_LOCAL_MACHINE\SOFTWARE\Microsoft\Windows\CurrentVersion\Uninstall\<ProductCode>
- HKEY_LOCAL_MACHINE\SOFTWARE\WOW6432Node\Microsoft\Windows\CurrentVersion\Uninstall\<ProductCode> *if the 32-bit Google Chrome is installed
Important: If you find an entry for Google Chrome, make a note of the product code, we will need it in step 4 below.
Step 4: Remove Chrome artifacts from the Microsoft Installer registry keys
Like the above step, we will need to search the following registry locations for Chrome installer artifacts and remove them.
- HKEY_LOCAL_MACHINE\SOFTWARE\Classes\Installer\Products
- HKEY_LOCAL_MACHINE\SOFTWARE\Classes\Installer\Features
- HKEY_LOCAL_MACHINE\SOFTWARE\Classes\Installer\UpgradeCodes
- HKEY_LOCAL_MACHINE\SOFTWARE\Microsoft\Windows\CurrentVersion\Installer\UserData\S-1-5-18\Products
- HKEY_LOCAL_MACHINE\SOFTWARE\Microsoft\Windows\CurrentVersion\Installer\UserData\S-1-5-18\Components
This step is a little trickier than the last because there can be several artifacts and it's quite an involved process to search and remove every artifact that could be left behind. And Msi products can be referenced in several ways and the product code referenced in the above registry locations will be “compressed" to improve searchability in older versions of Windows. The compressed product code will need to be converted to the GUID as explained below.
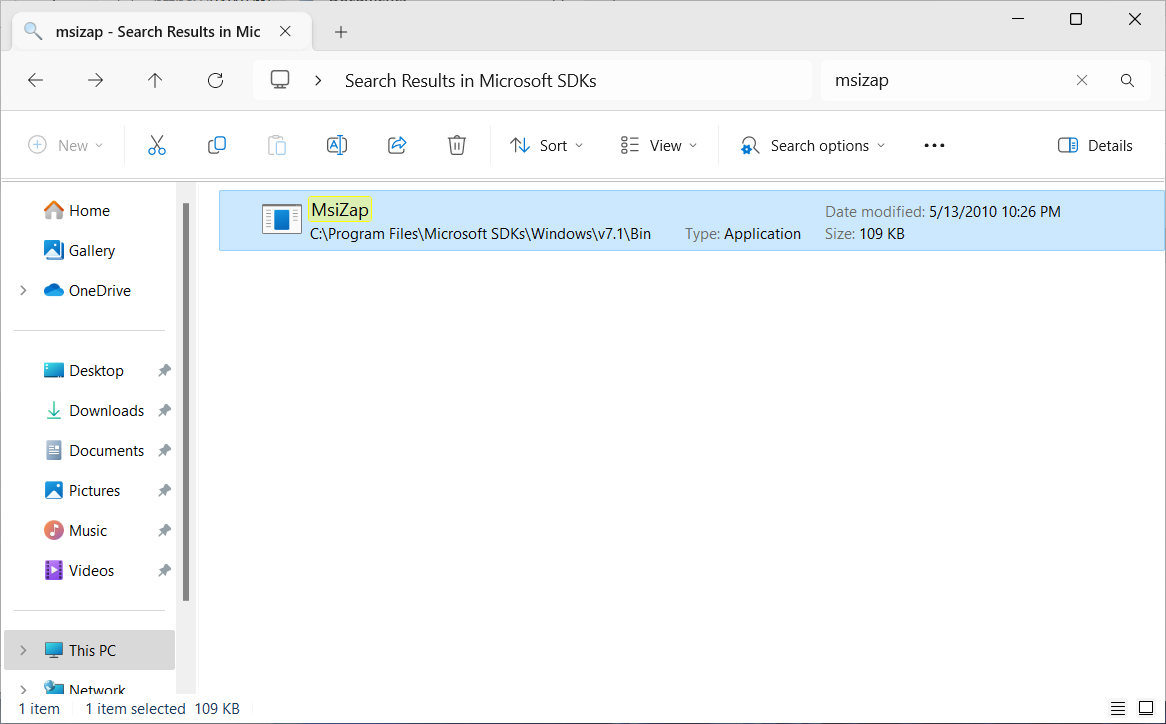
For this step, I would recommend using MsiZap which is a Windows Installer tool from the 7.1 version of the Windows SDK, which can be downloaded from here: Download Microsoft Windows SDK 7.1 from Official Microsoft Download Center. Once downloaded and installed, MsiZap can be found in the folder “C:\Program Files\Microsoft SDKs\Windows\v7.1\Bin".
Note: The MsiZap.exe can be copied and run on its own without reinstalling the Windows SDK on any other computers.
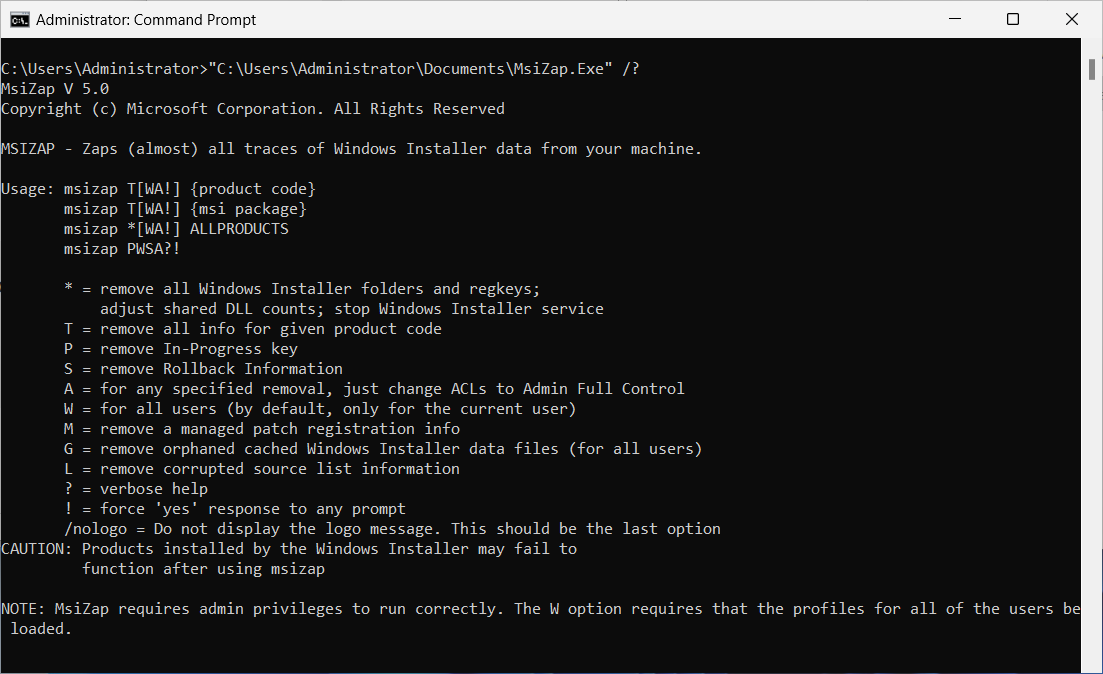
To remove Chrome installer artifacts with MsiZap we will need the product code GUID, as shown in the syntax below:
If you don't know the product code for the version of Chrome you are trying to uninstall, then you can search the below Windows Installer product registry keys for “Google Chrome".
- HKEY_LOCAL_MACHINE\SOFTWARE\Classes\Installer\Products
- HKEY_LOCAL_MACHINE\SOFTWARE\Microsoft\Windows\CurrentVersion\Installer\UserData\S-1-5-18\Products
Once you have found Google Chrome, you will find the “compressed" product code. In this example, the product code is “FAA05604EE323E7349749FE0D3F0B9D1".


To convert the compressed product code to the GUID, the below PowerShell function can be used (credit goes to MyITGuy on GitHub for this handy function). Using the example above, the GUID of the compressed product code “FAA05604EE323E7349749FE0D3F0B9D1" is {40650AAF-23EE-37E3-9447-F90E3D0F9B1D}.
Retrieving the Product Code from SCCMThe Google Chrome product codes on the devices in your environment can be queried in SCCM using the below WQL query. It is worth noting that the data “Installed Applications (64)" class is ingested from the Programs and Features registry sub keys during the SCCM client hardware inventory (i.e. HKEY_LOCAL_MACHINE\SOFTWARE\Microsoft\Windows\CurrentVersion\Uninstall\*).
The query results will appear like below

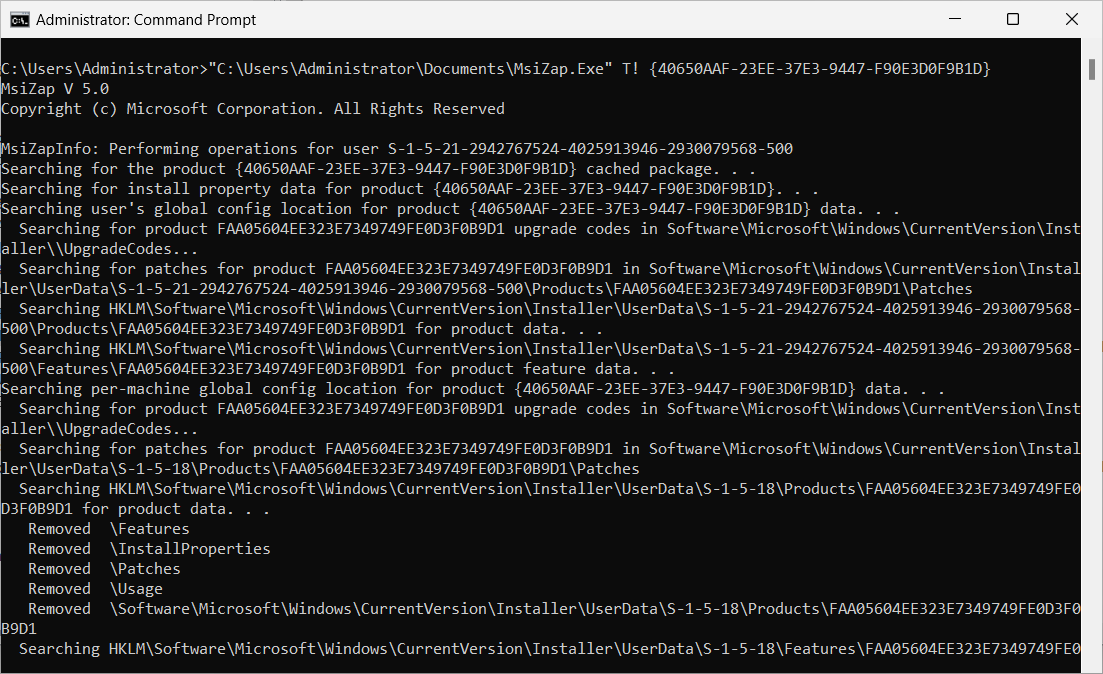
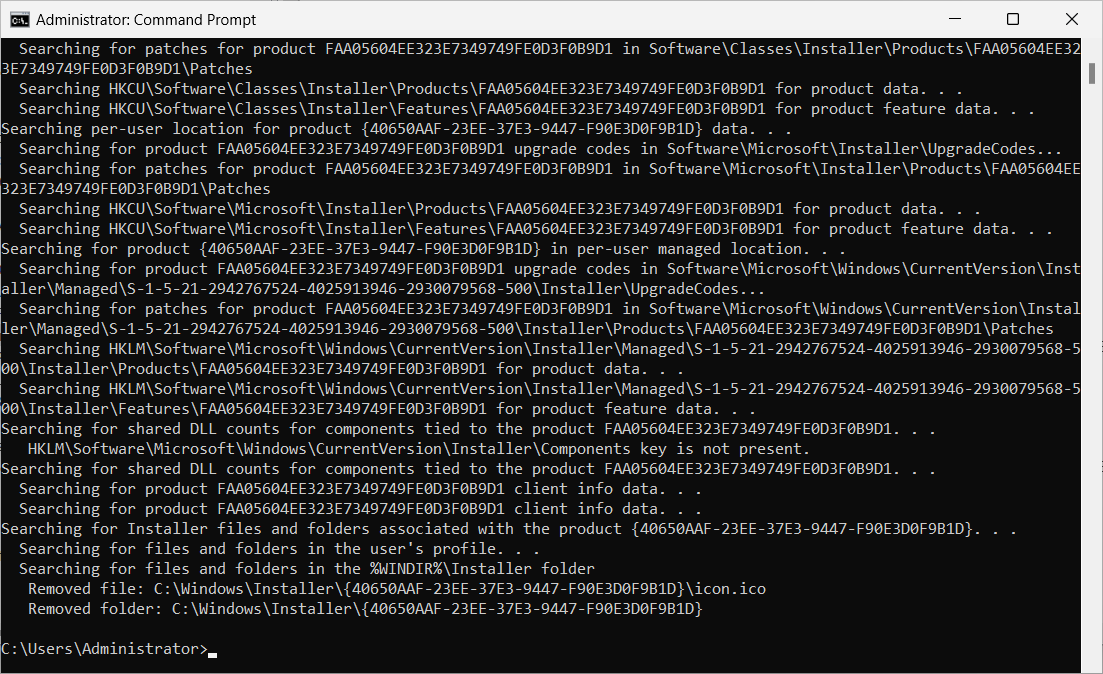
All the Msi product information for a given product code can be removed with MsiZap, using the syntax shown in the example below. MsiZap will search the registry for any associated Msi info and will remove it. It will also remove any cached Msi file or icon files, as well as the installer folder in C:\Windows\Installer\<Product Code>.
Step 5: Remove remaining Chrome files and folders
The last step before attempting reinstalling Chrome is to remove any remaining files or folders in the following locations. If you encounter any file or folder locks, you may need to kill the processes associated with Chrome (using the commands from step 1) and then try again.
- C:\Program Files\Google\Chrome
- C:\Program Files (x86)\Google\Chrome
- C:\Program Files (x86)\Google\Update
- C:\Program Files (x86)\Google\CrashReports
- C:\Program Files (x86)\Google\Temp
- C:\Program Files\Google\Legacy Browser Support *
- C:\Program Files (x86)\Google\Legacy Browser Support * If Legacy Browser Support is installed
Step 6: Reinstall Google Chrome
Finally, you should now be able to successfully reinstall Google Chrome using the googlechromestandaloneenterprise64.msi file. To install chrome silently, use the following command:
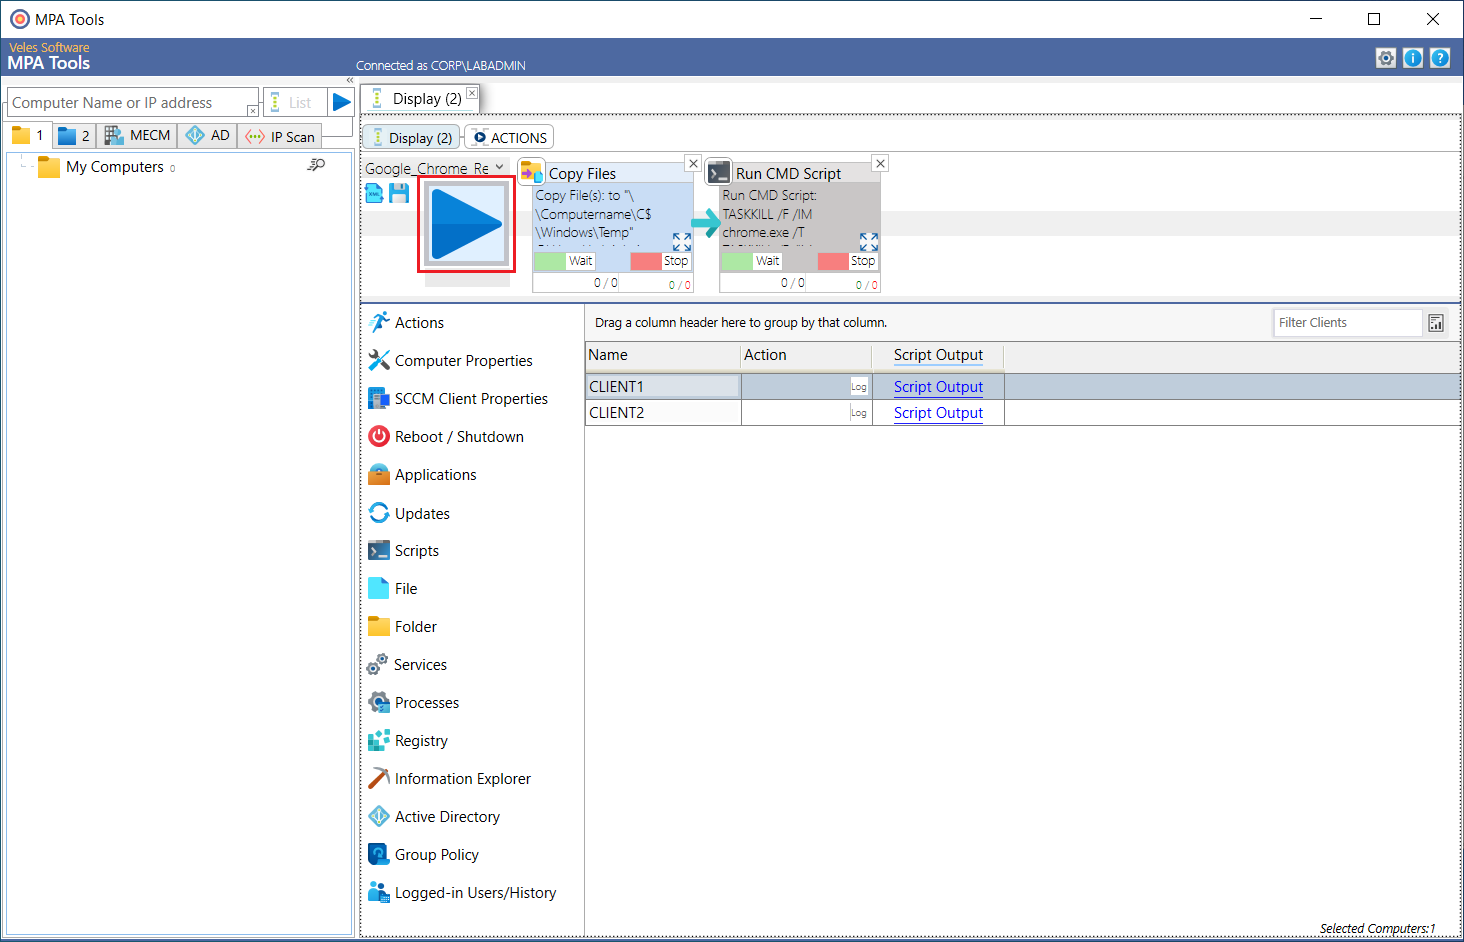
Perform the full Chrome remediation with a MPA Tools workflow
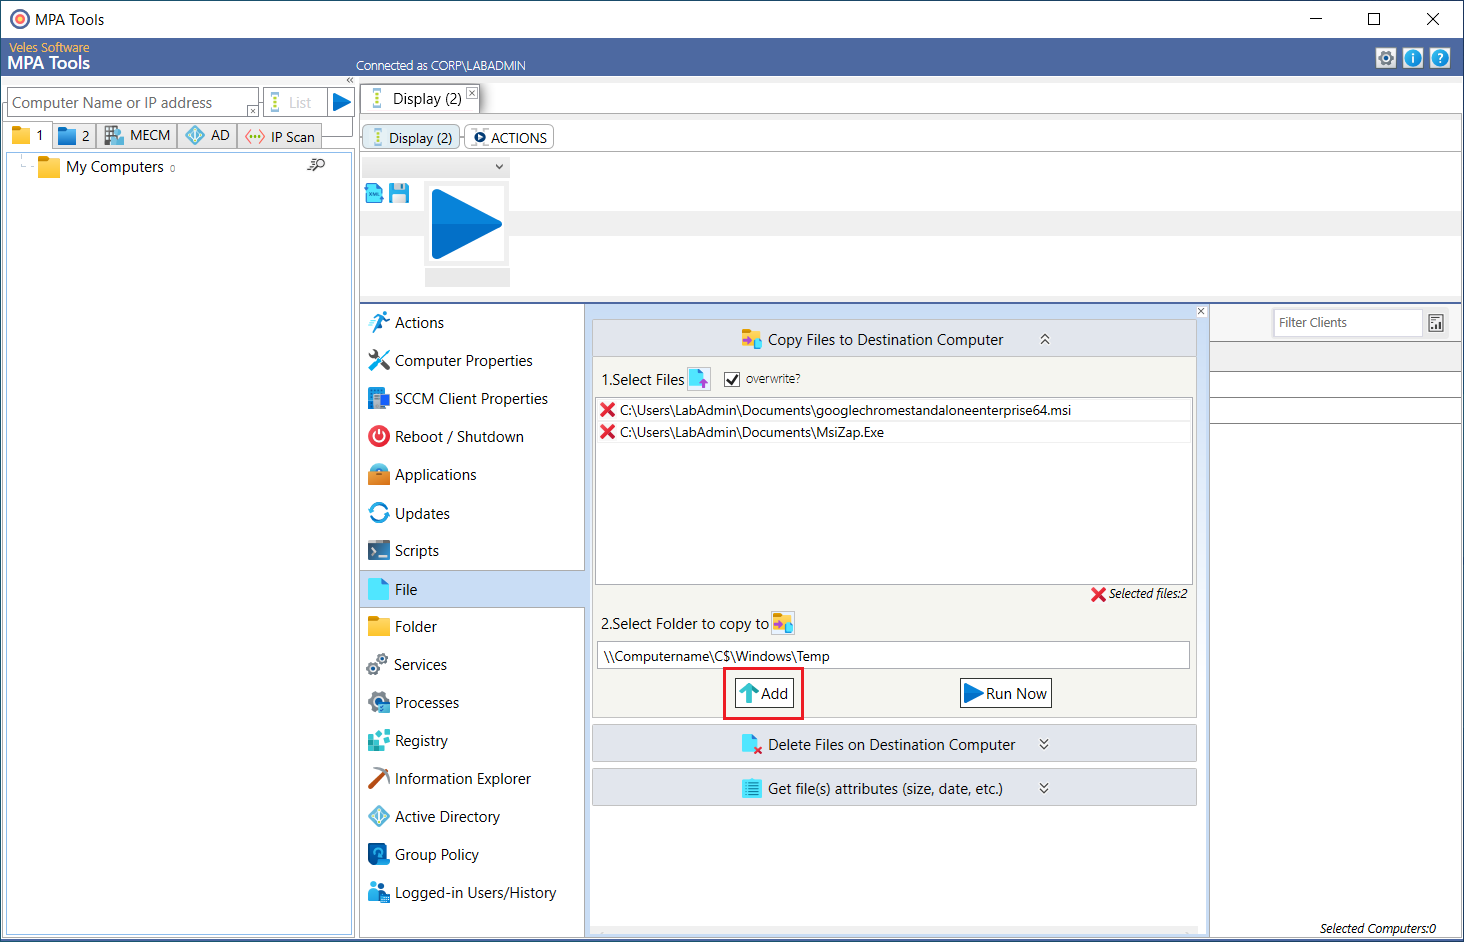
First, the MsiZap and the googlechromestandaloneenterprise64.msi files will need be copied to a temporary location on the client computer.
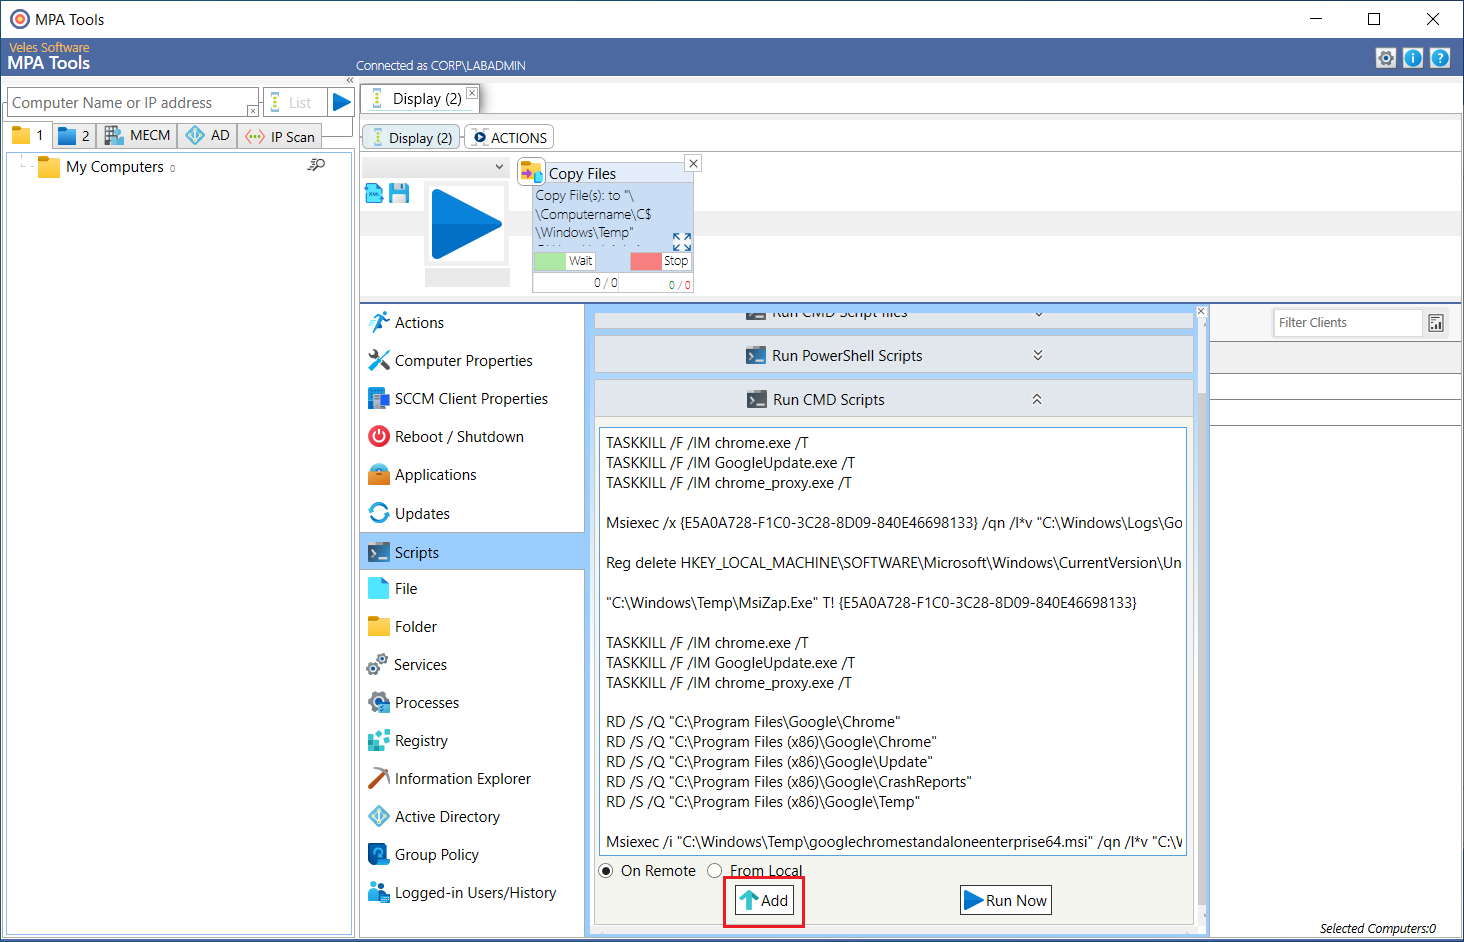
Next, we will add the action to run the CMD script.
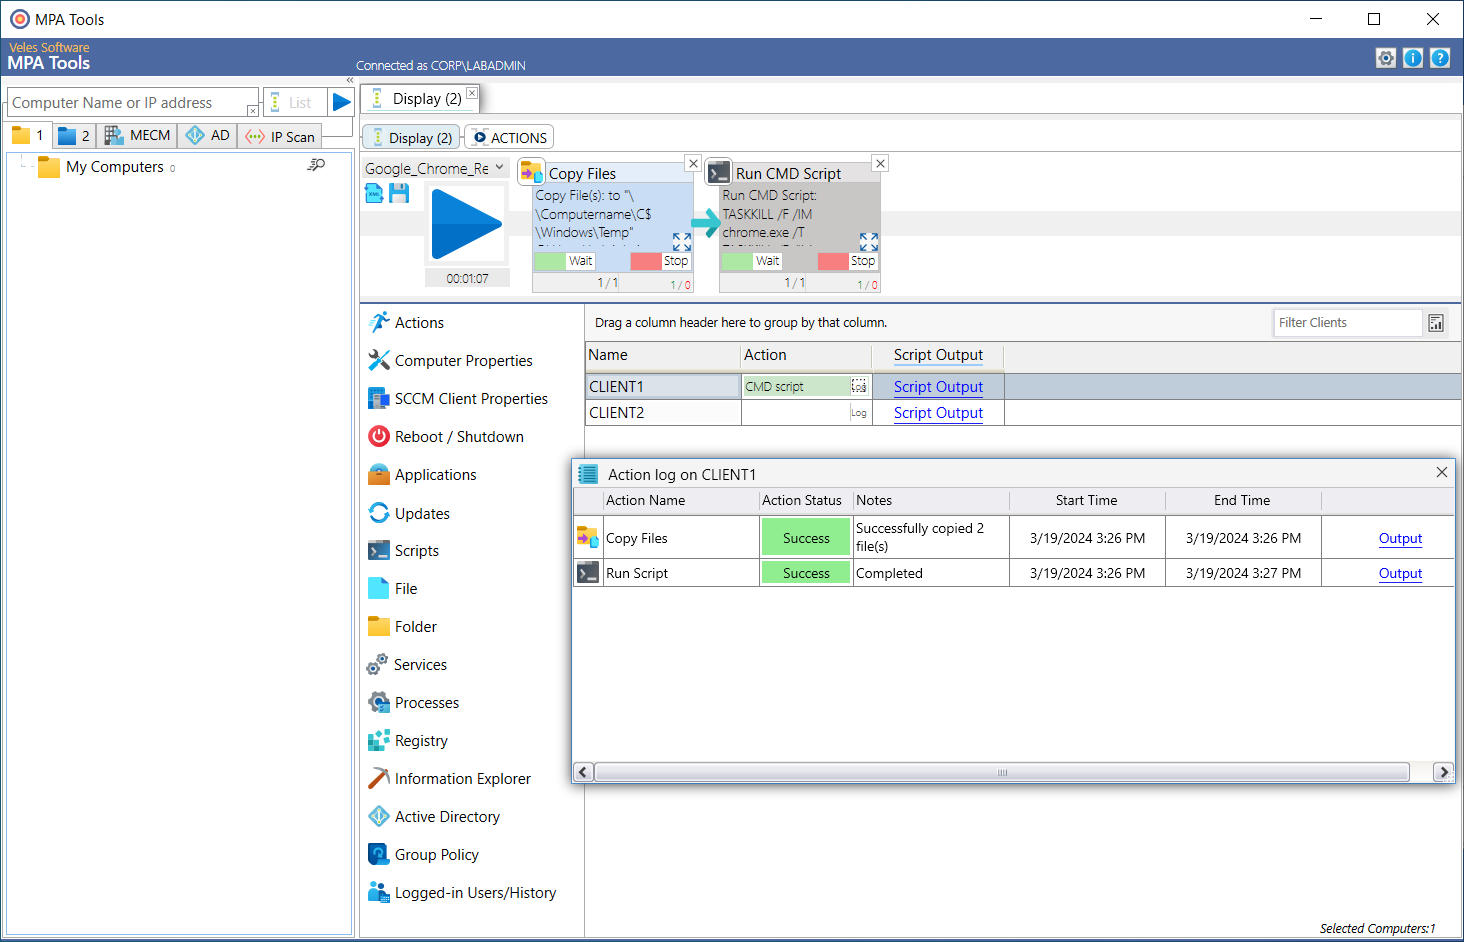
Once we have saved the workflow, we can select the relevant client computers and then click the blue play button to execute the workflow.
Important: Don't forget that the WMI firewall rules need to be enabled for this workflow to work. For more information, see MPA Tools Guide for Enabling Windows WMI Firewall Rules | Veles Software
I know that all of this was a lot but when it comes to remediation activities, it's usually quite involved. Hopefully this will help you with your Google Chrome remediation efforts!