An Azure application must be registered forMPA Tools with your Azure AD tenant to delegate identity and access management functions to Azure AD. When you register an application with Azure AD, you create an identity configuration that allows it to integrate with Azure AD.
When MPA Tools is first installed, it is set up to use a default pre-configured Azure application for the integration with your Azure tenant. If you prefer, you can register your own custom Azure application for use with MPA Tools - see the section below titled “Registering MPA Tools with a custom enterprise application". Registering an app in the Azure portal will require the redirect URI, and you can choose to configure it for single-tenant or multi-tenant use.
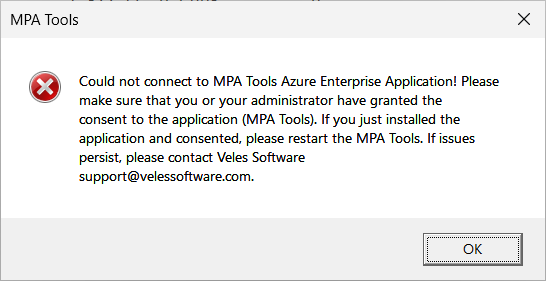
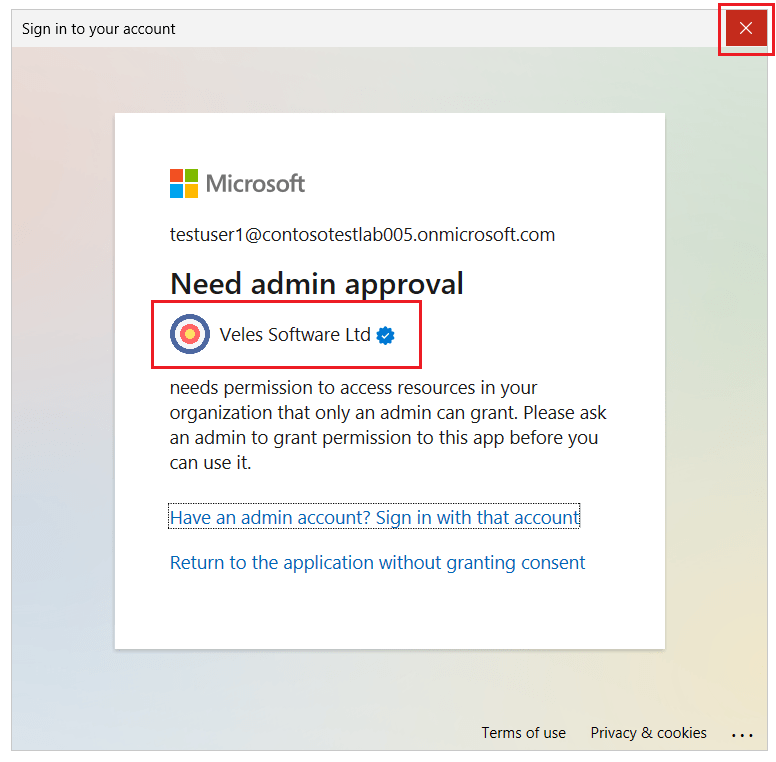
When you launch MPA Tools for the first time, it will attempt to connect to your Azure tenant using the logged-in account. If this account does not have sufficient access to the Azure tenant, then the following message will appear.
Note: If MPA Tools is installed on a device that isnot Azure AD joined or if the operating system is Windows Server, then this message will not appear.
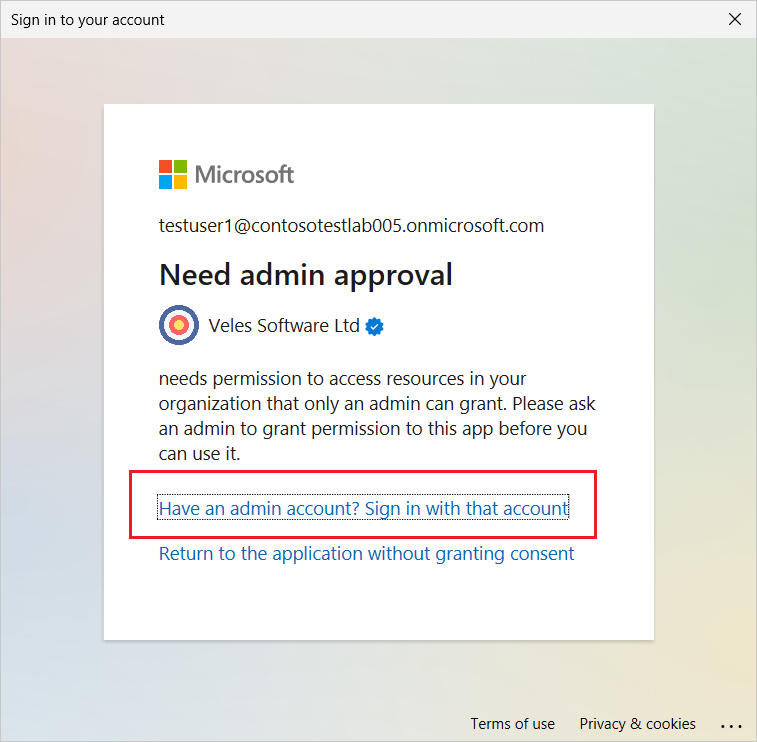
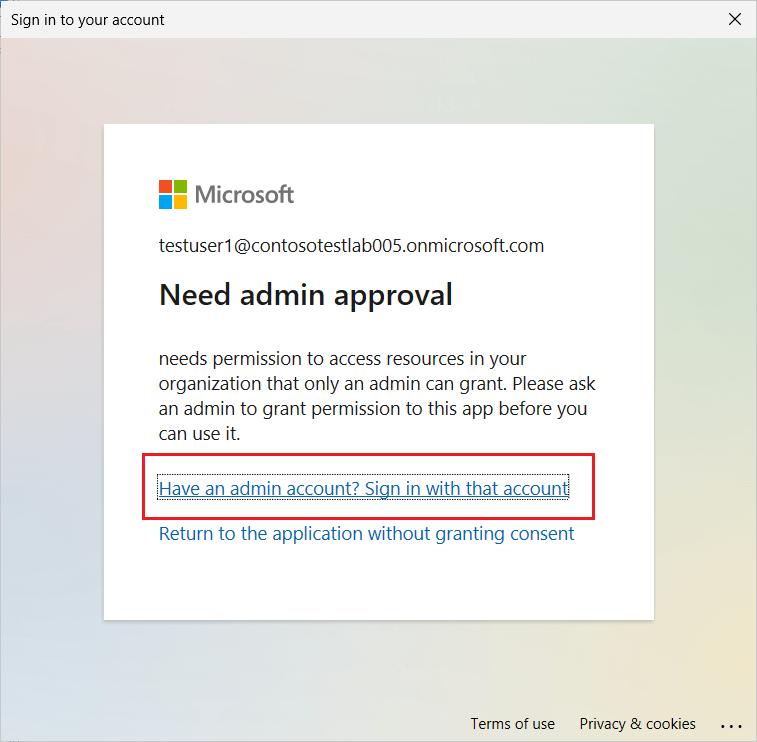
If you click OK to this prompt, the below Sign in/Approval message appears. Select the option “Have an admin account? Sign in with that account".
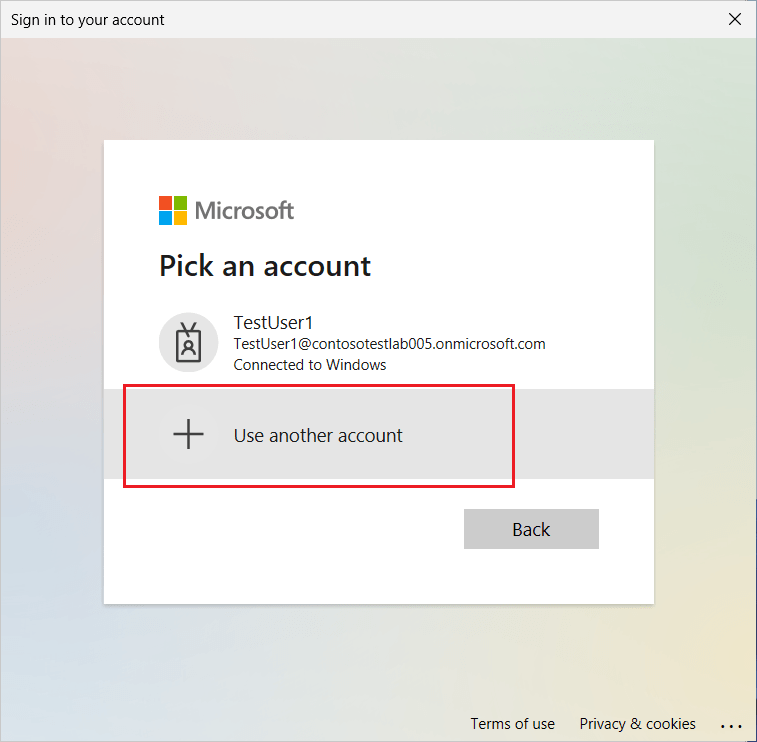
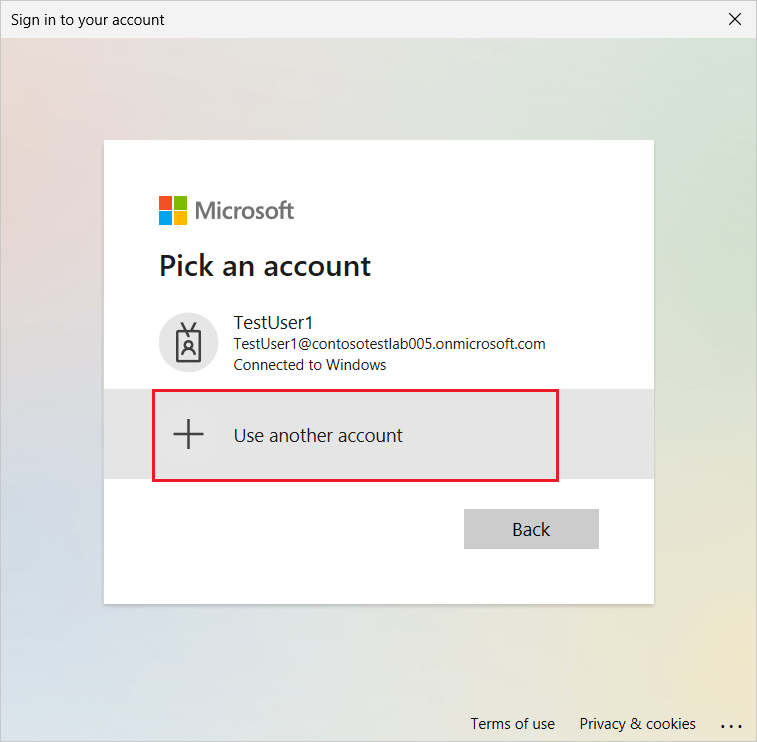
Then select the option “Use another account".
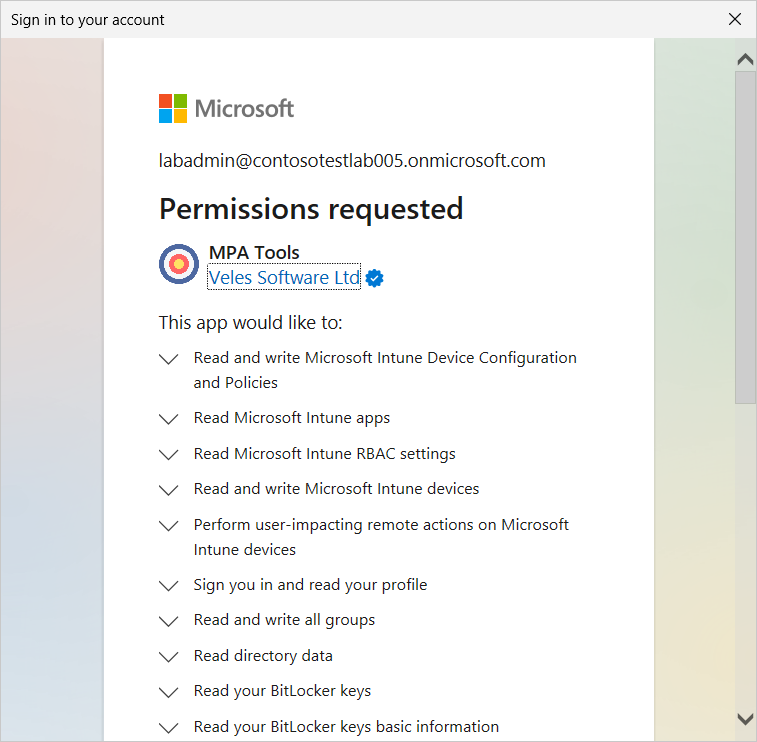
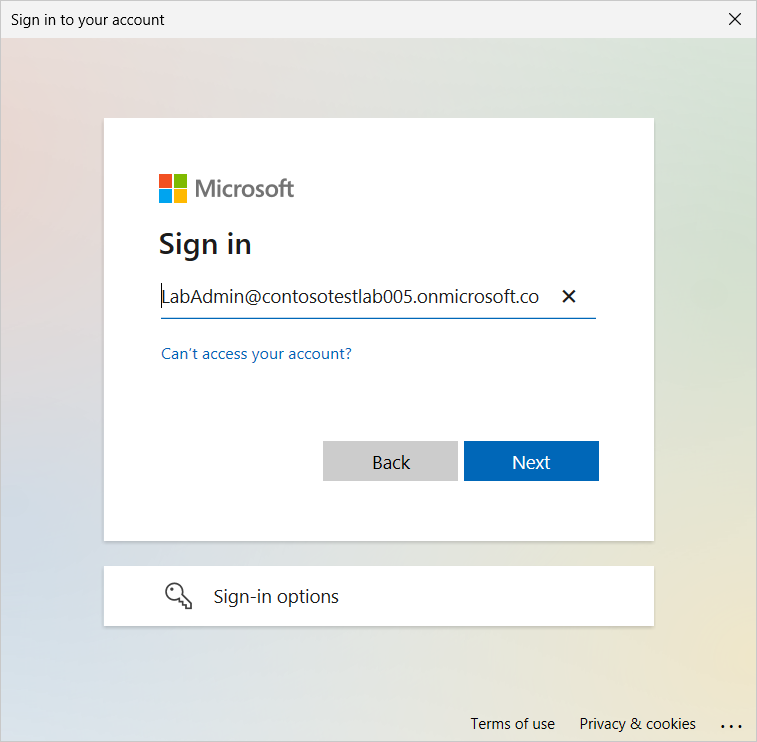
Enter a username for an administrative account that can authorize the required access listed below (this would typically be a Global Administrator for the Azure tenant):

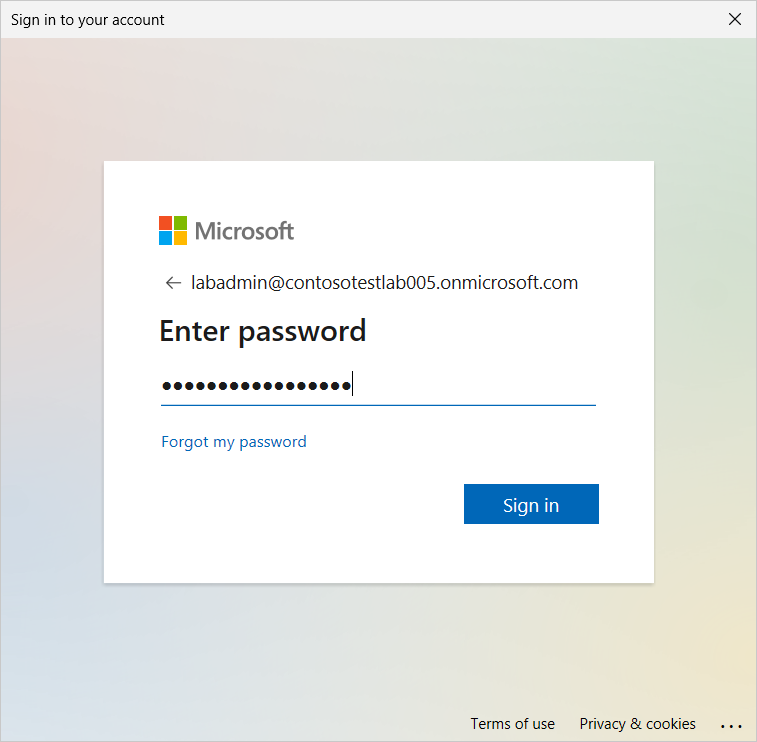
Enter the password for the administrative account and then click Sign in.

Approve the sign in request using the Authenticator app.

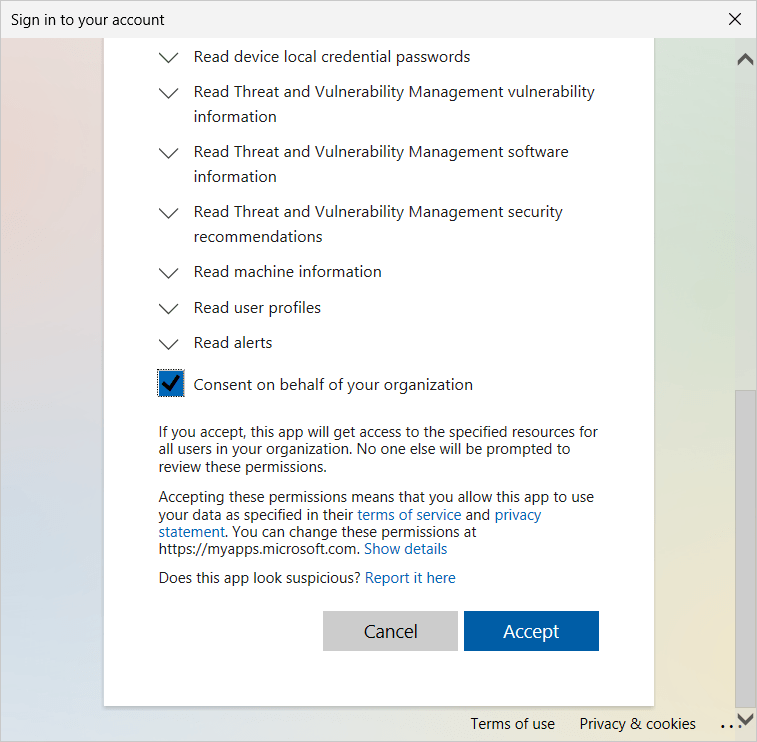
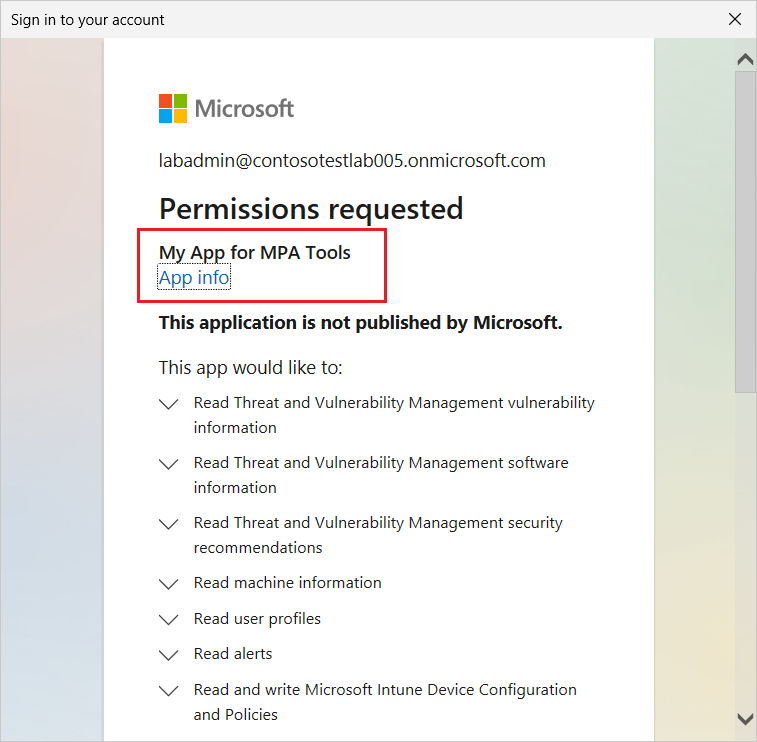
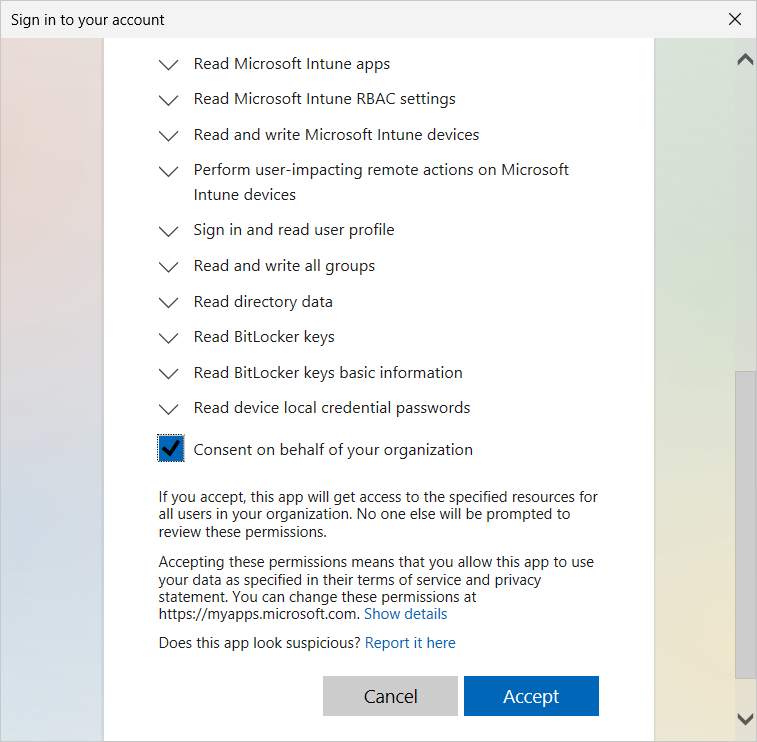
Review the requested permissions and then select the checkbox “Consent on behalf of you organization" and then click Accept.
MPA Tools will then launch using the credentials of the logged in user.
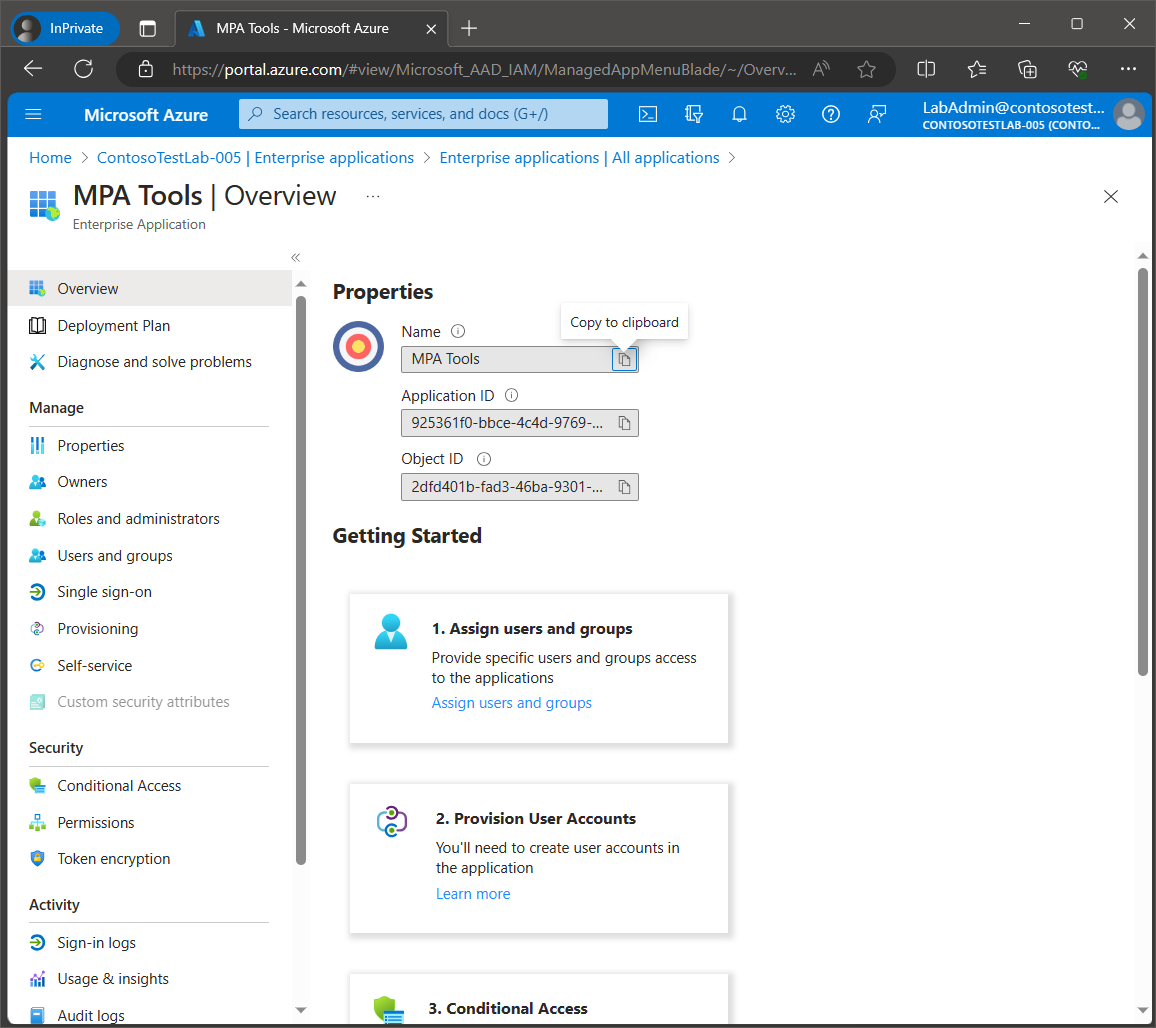
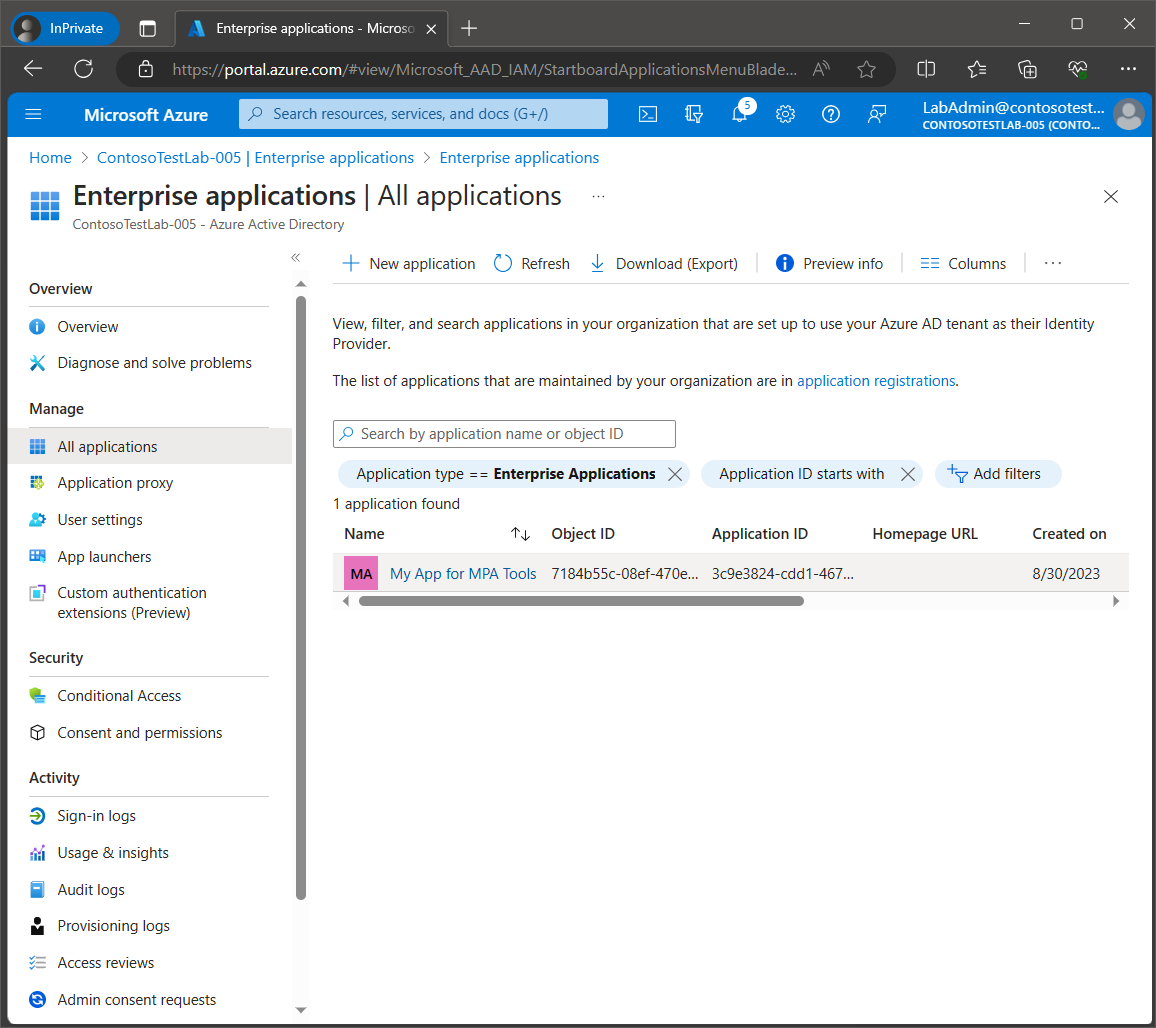
The enterprise application for MPA Tools can be viewed in the Azure portal by navigating tohttps://portal.azure.com selecting Azure Active Directory and then select Enterprise applications from the navigation menu on the left.
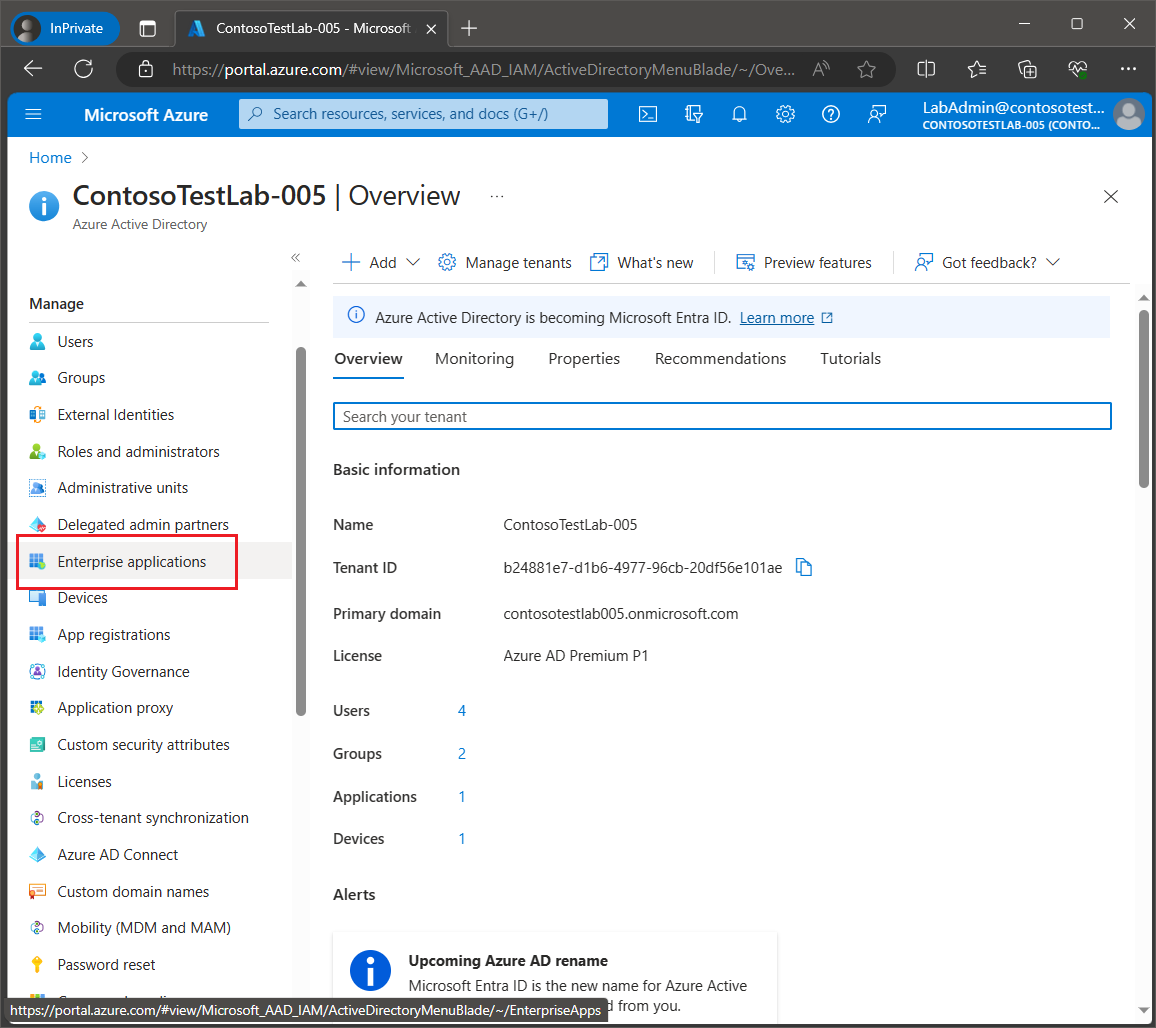
Select All Applications and then select MPA Tools.
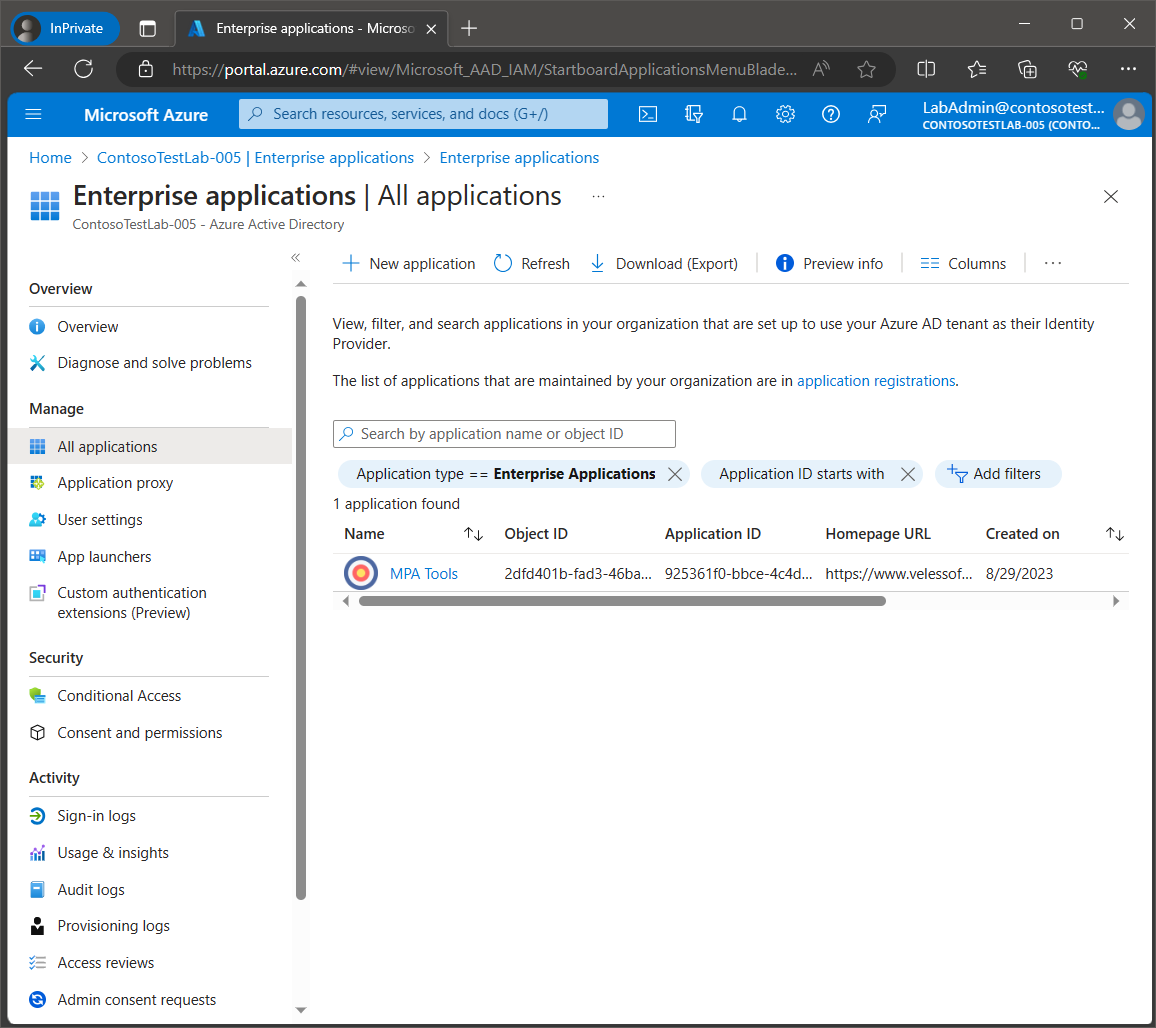
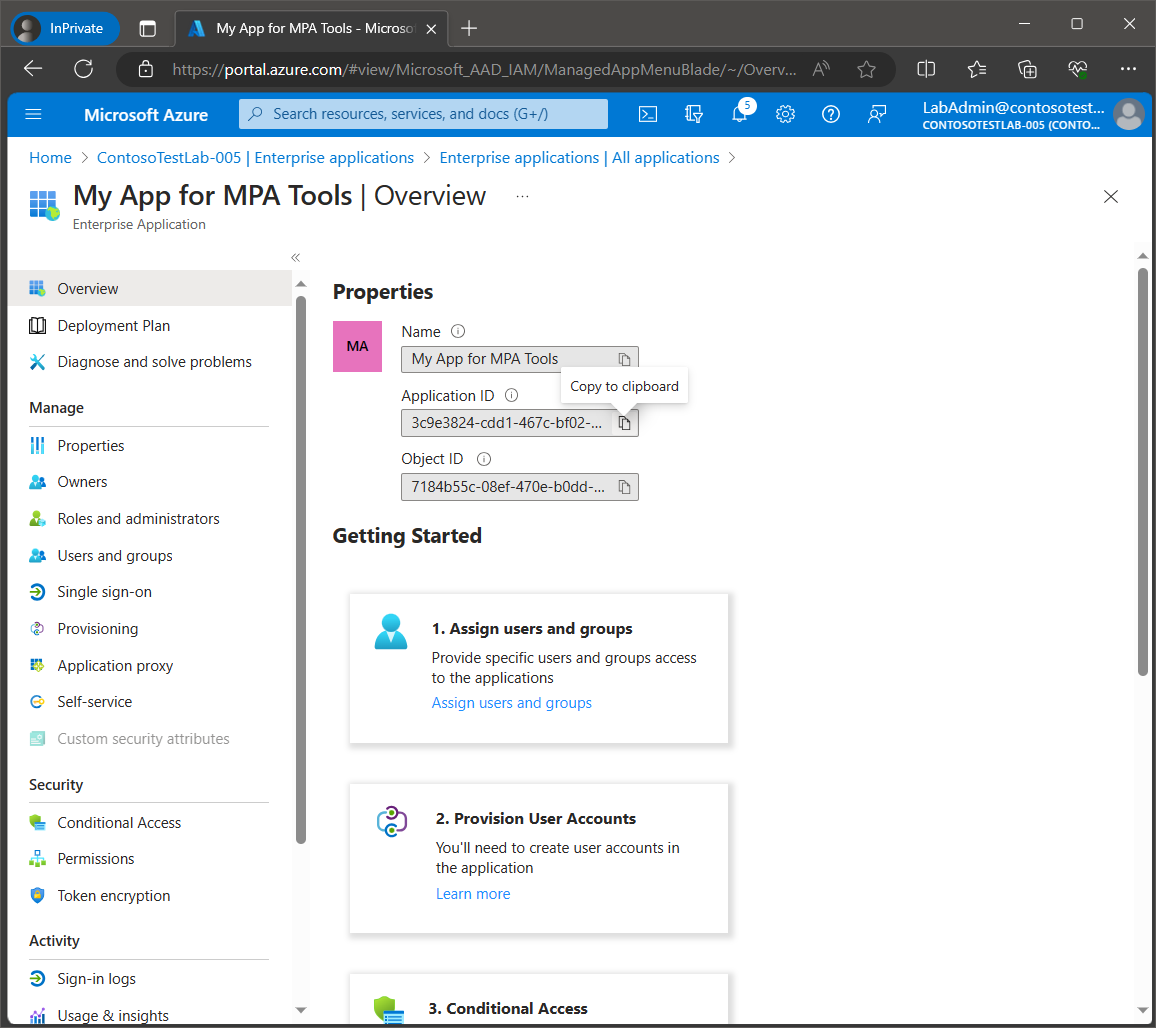
Here we can see the application ID and object ID.
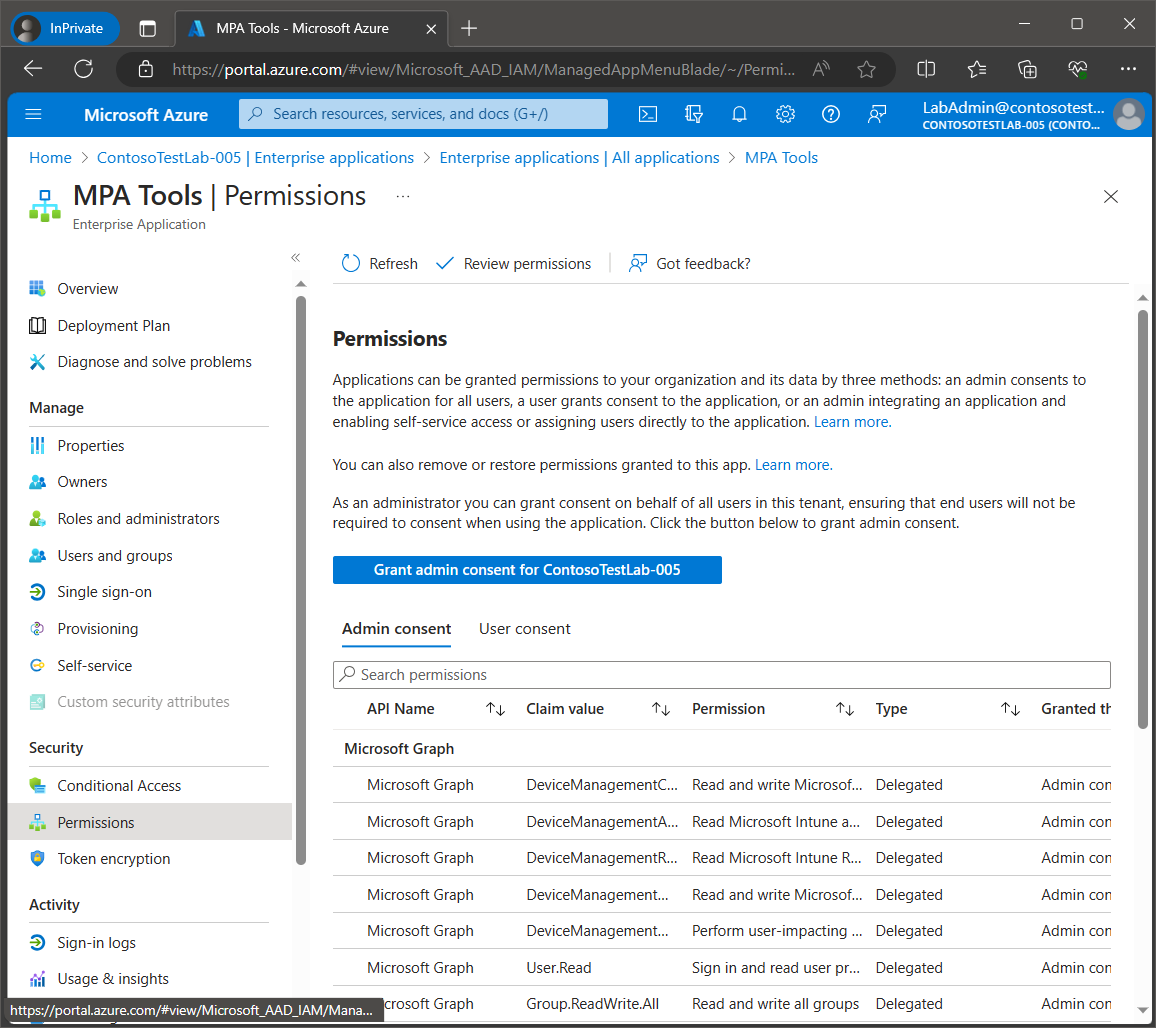
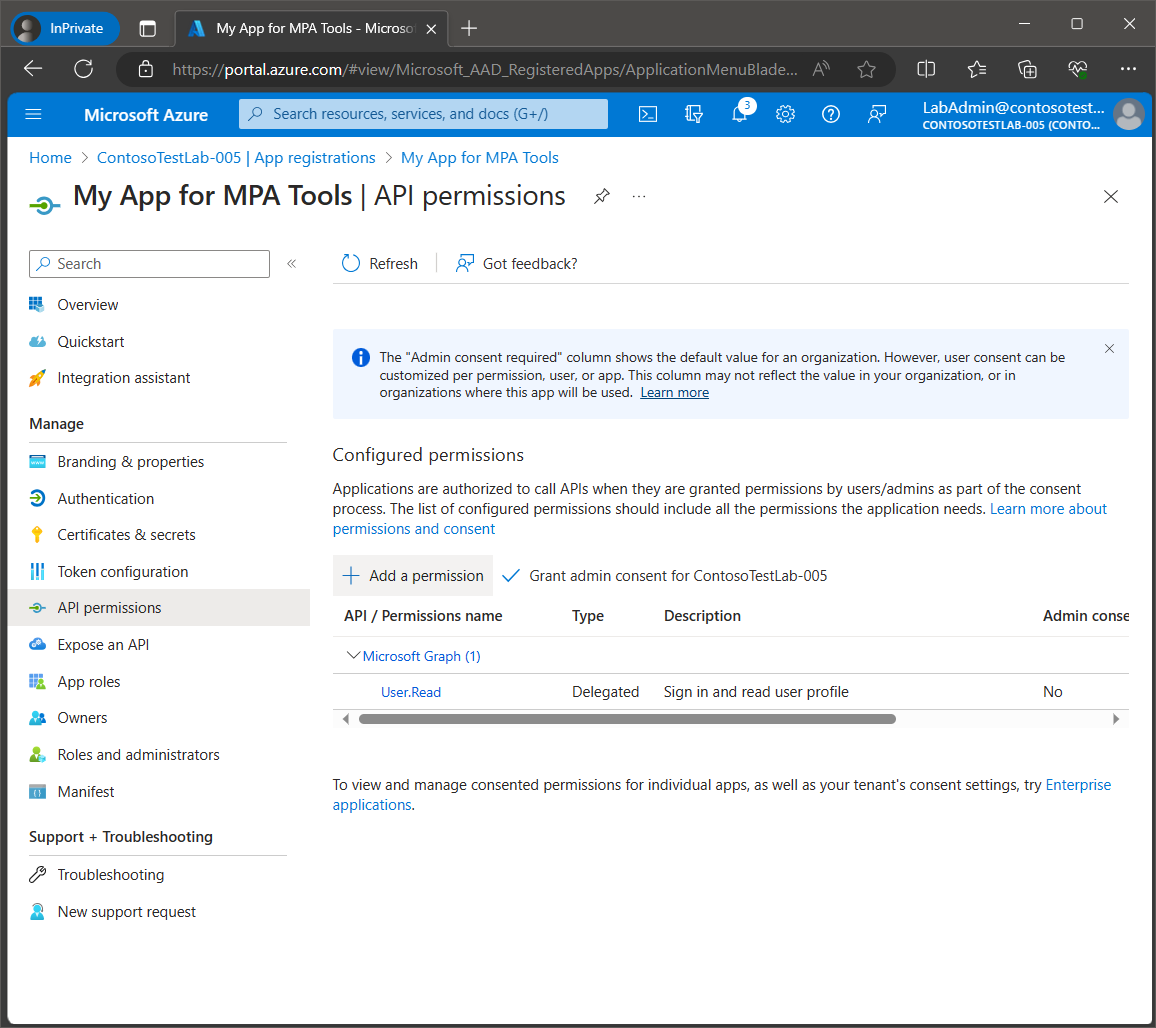
Click on Permissions to view the full list of requested permissions.
Disconnecting MPA Tools from your Azure tenant
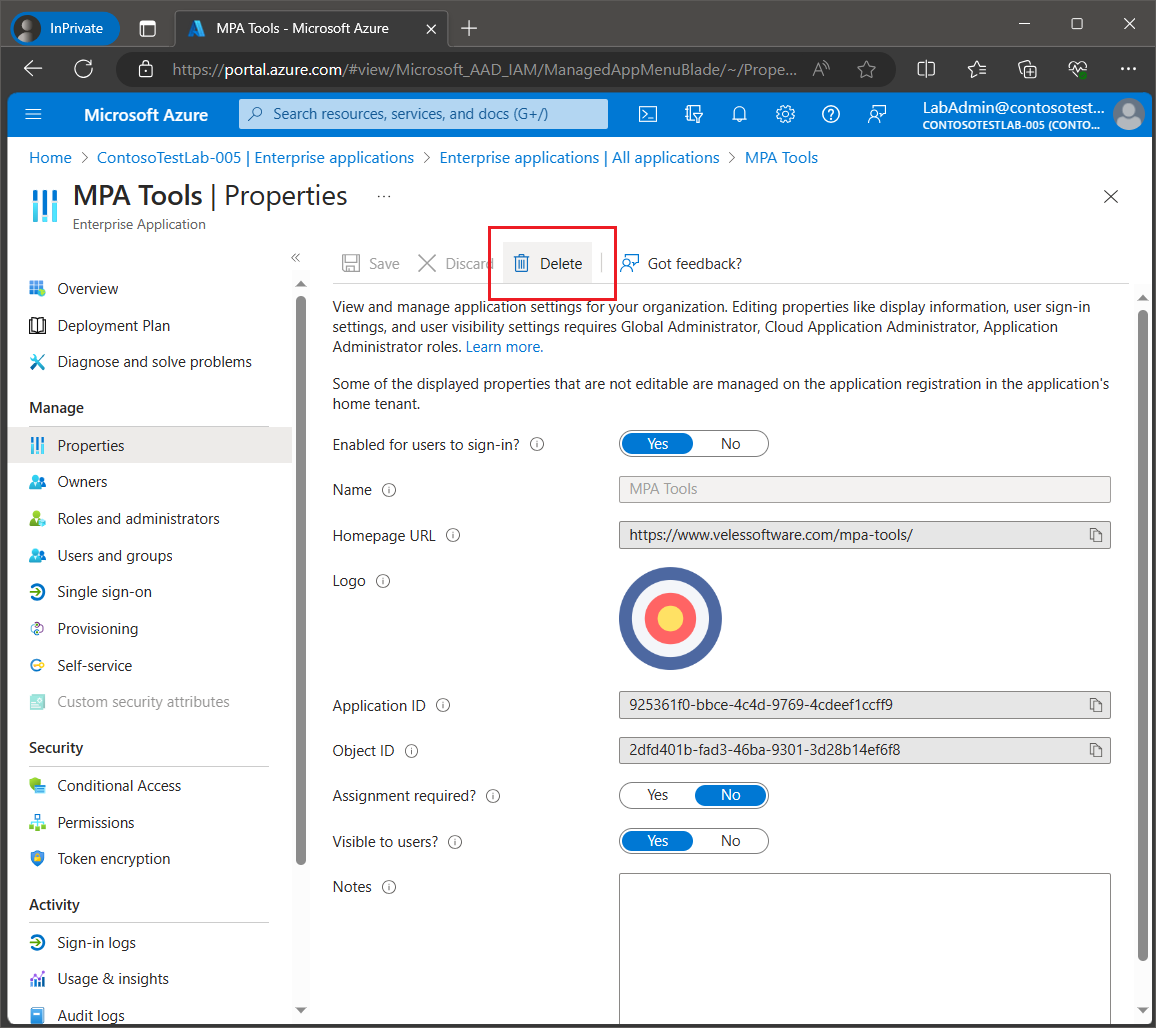
If, at the end of the trial, you would like to remove the MPA Tools enterprise application in your Azure tenant, then select Properties and then click the Delete button and the click Yes to the confirmation prompt.
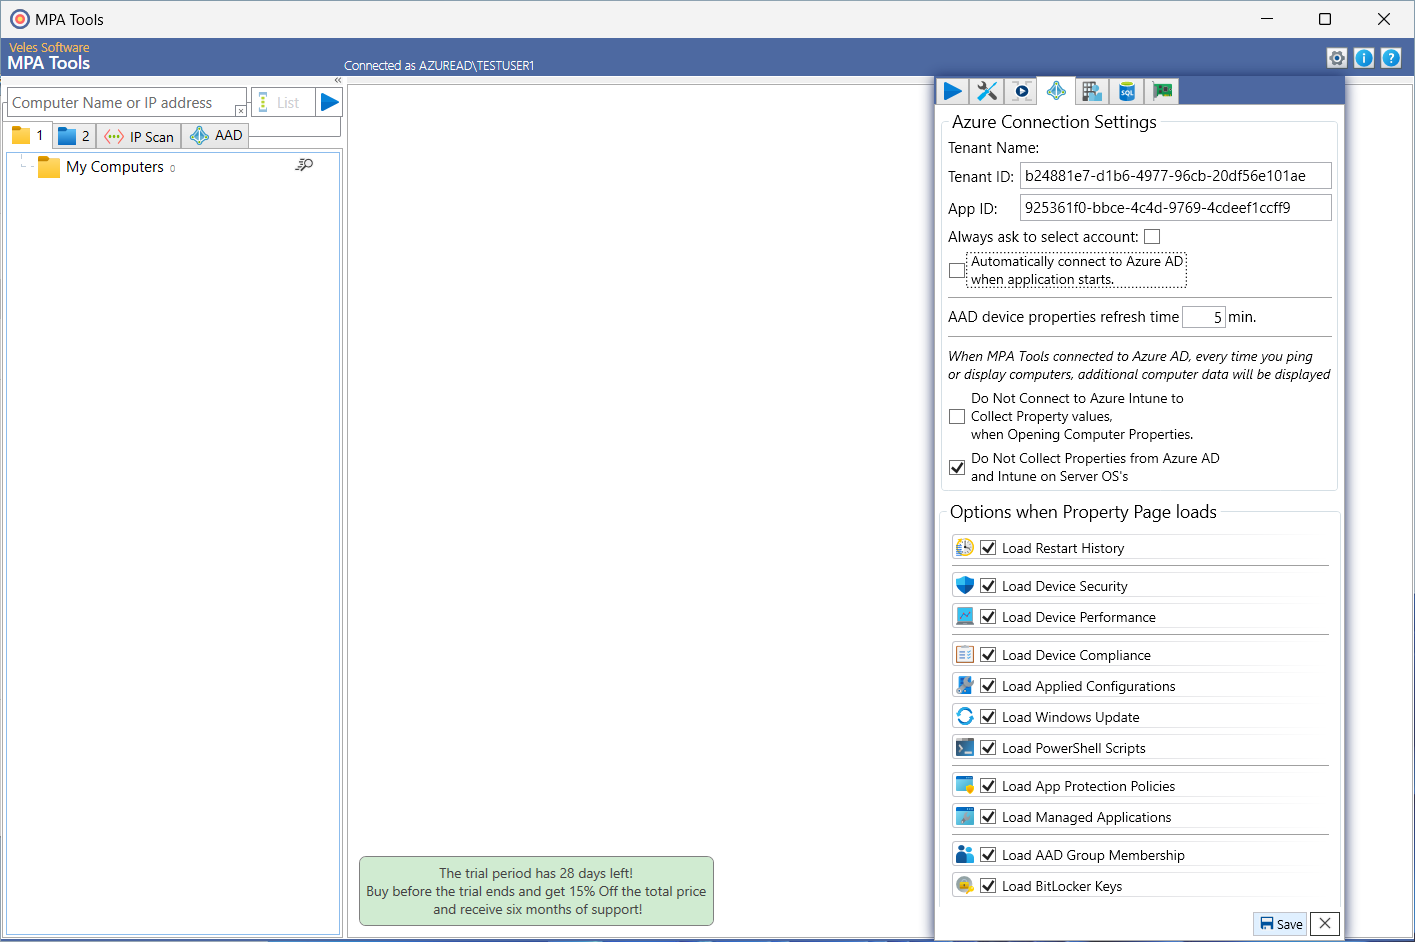
Disabling Azure tenant auto-connection in MPA Tools
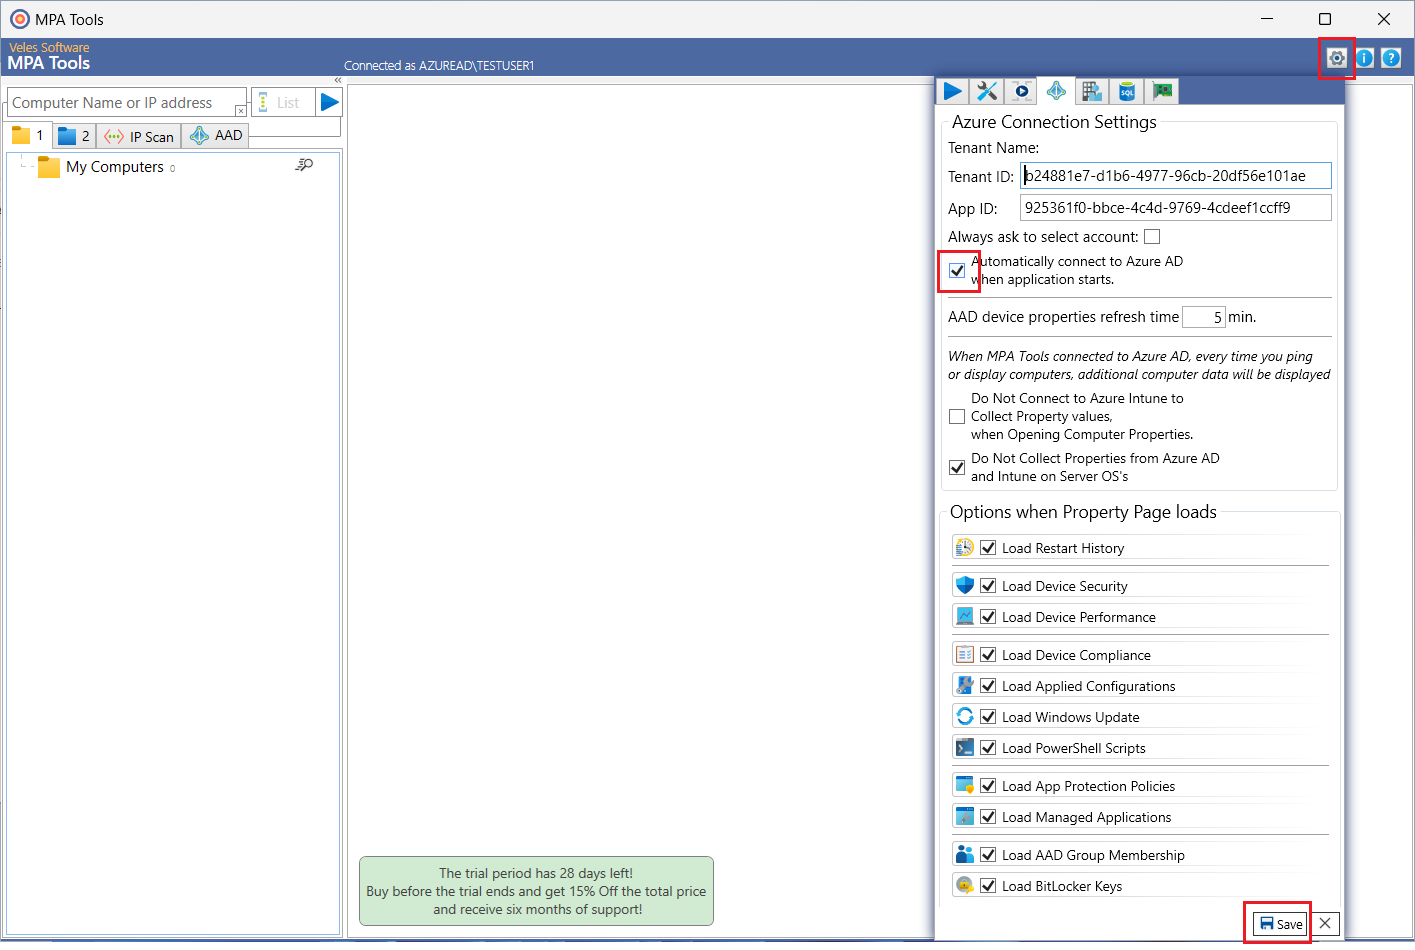
If MPA Tools will not be used for Azure tenant management, then we recommend disabling the Azure tenant auto-connect feature at start up. This can be done by clicking the settings gear icon on the top right-hand side of the MPA Tools window, then unchecking the setting “Automatically connect to Azure AD when application starts". Then click the Save button. After this change, MPA Tools will no longer attempt to connect to your Azure tenant when you open the application and the first two messages at the top of the article will no longer appear.
Registering MPA Tools with a custom Azure application
If you prefer to create a custom Azure application to register MPA Tools in your Azure tenant, then please follow the below steps:
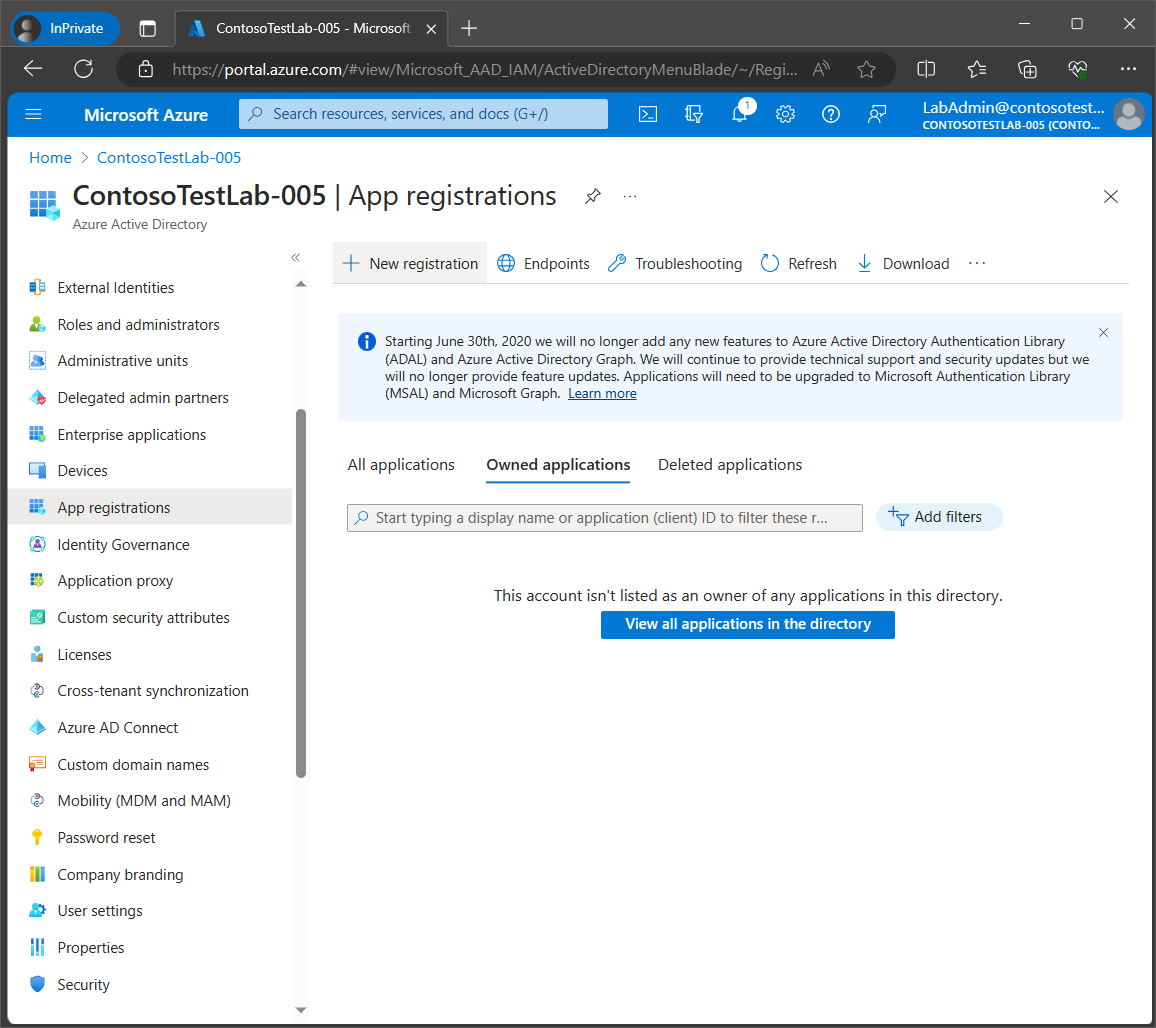
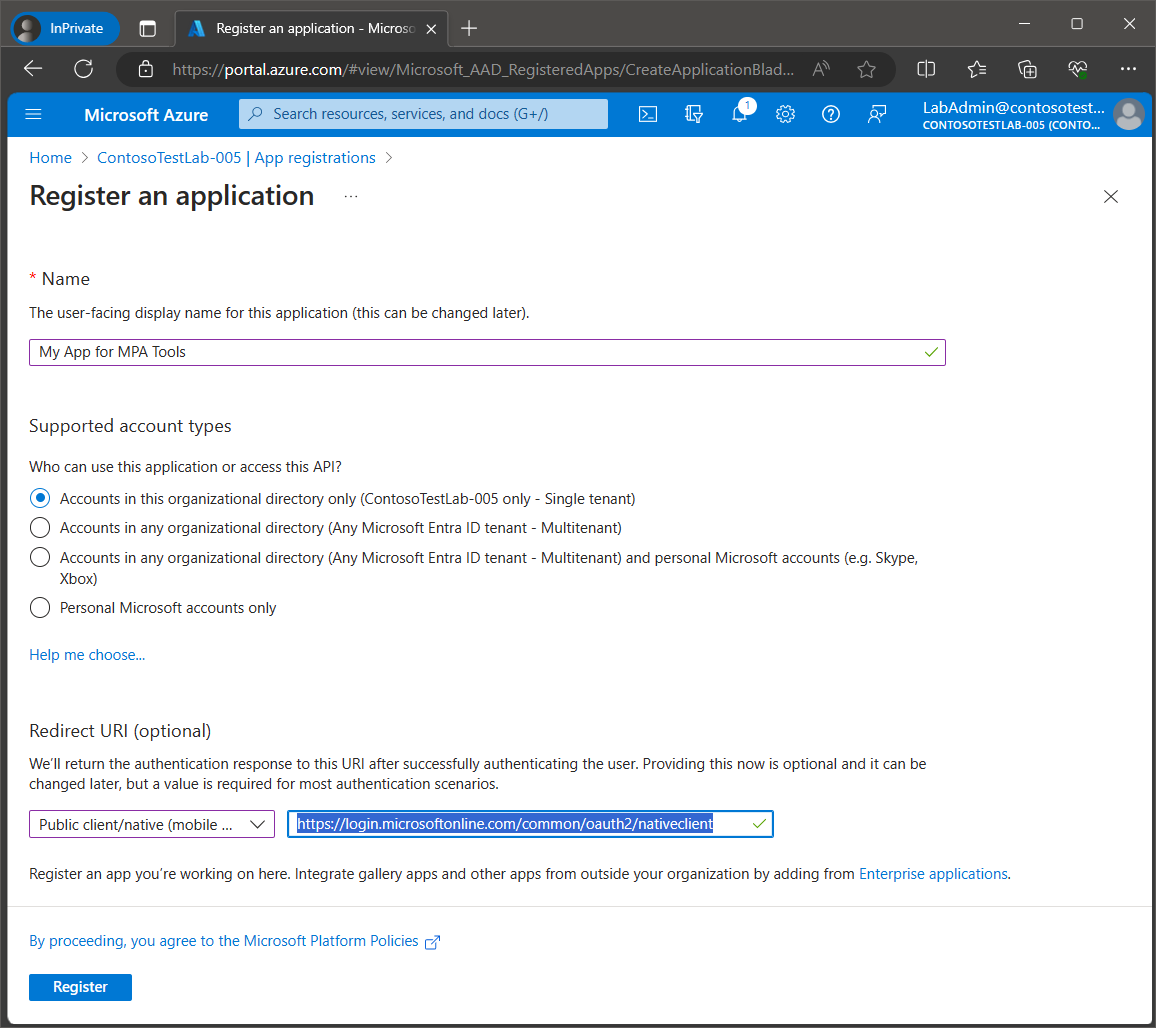
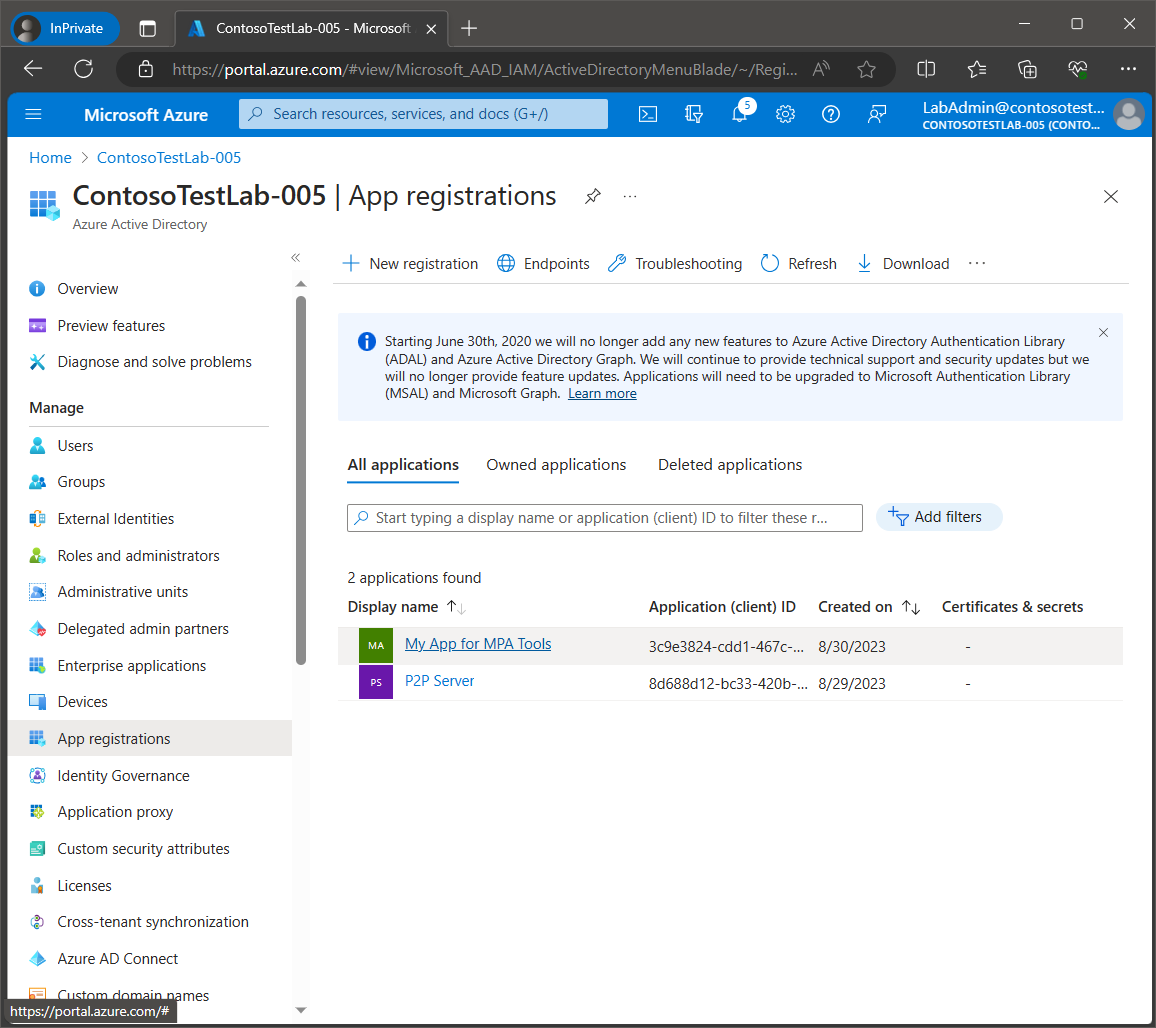
Navigate to the Azure portalhttps://portal.azure.com, then select Azure Active Directory and then select App registrations from the navigation menu on the left. Click New registration.
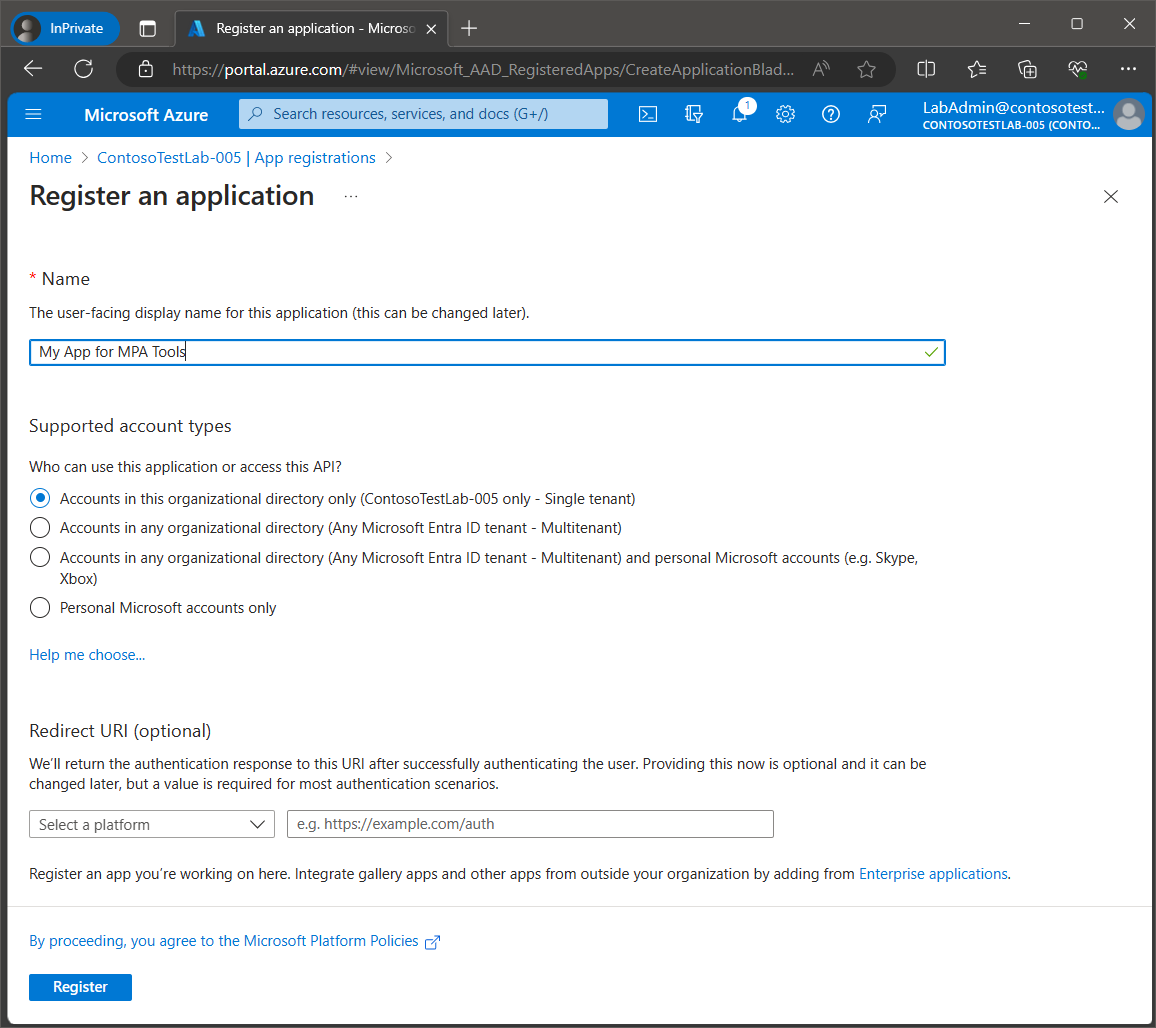
Enter a custom name for the application, for example, My App for MPA Tools. Select the account type.
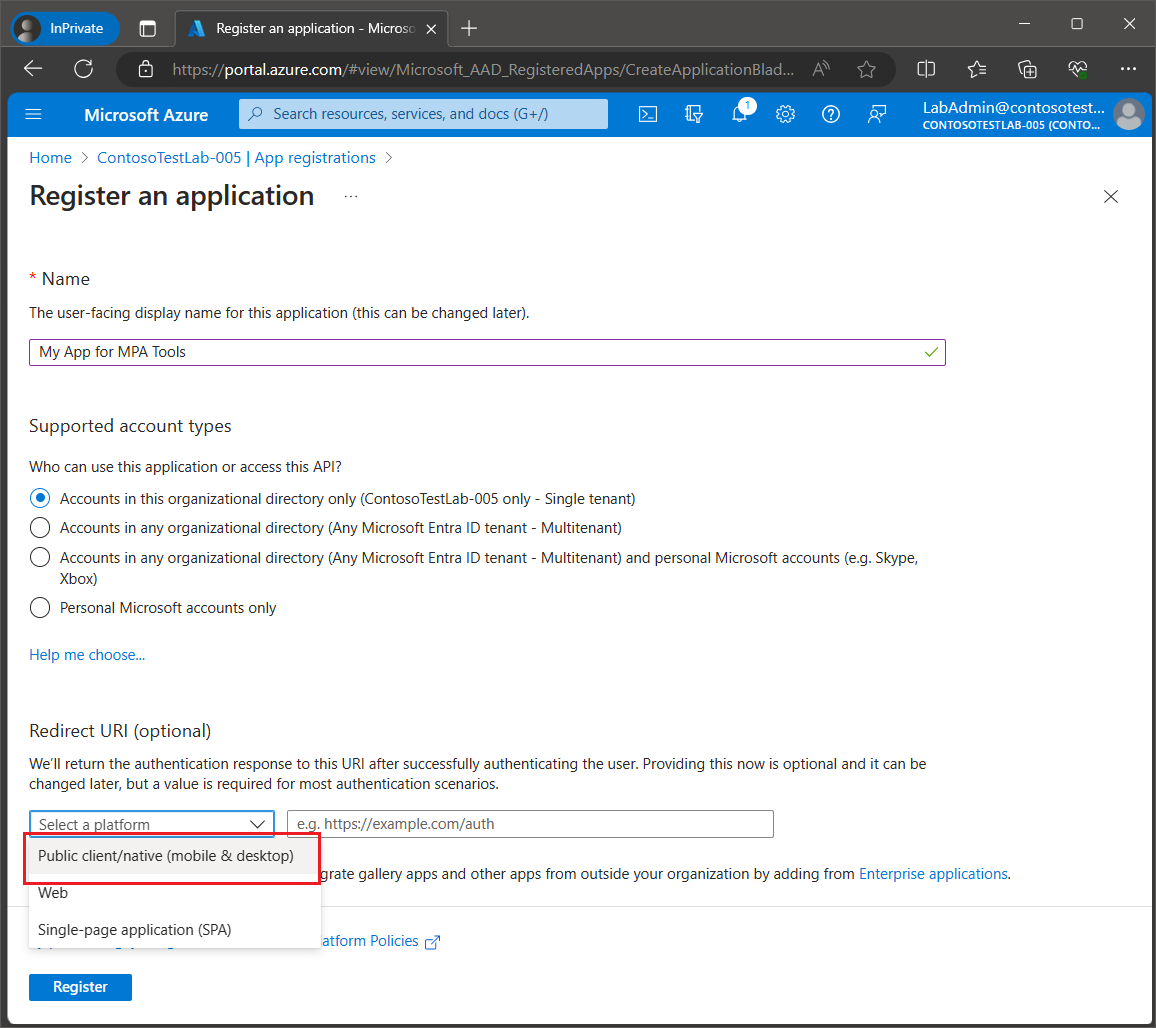
Important: Under Redirect URI, select Public client/native (mobile& desktop) from the drop down box and enterhttps://login.microsoftonline.com/common/oauth2/nativeclient in the text box.
Click Register.
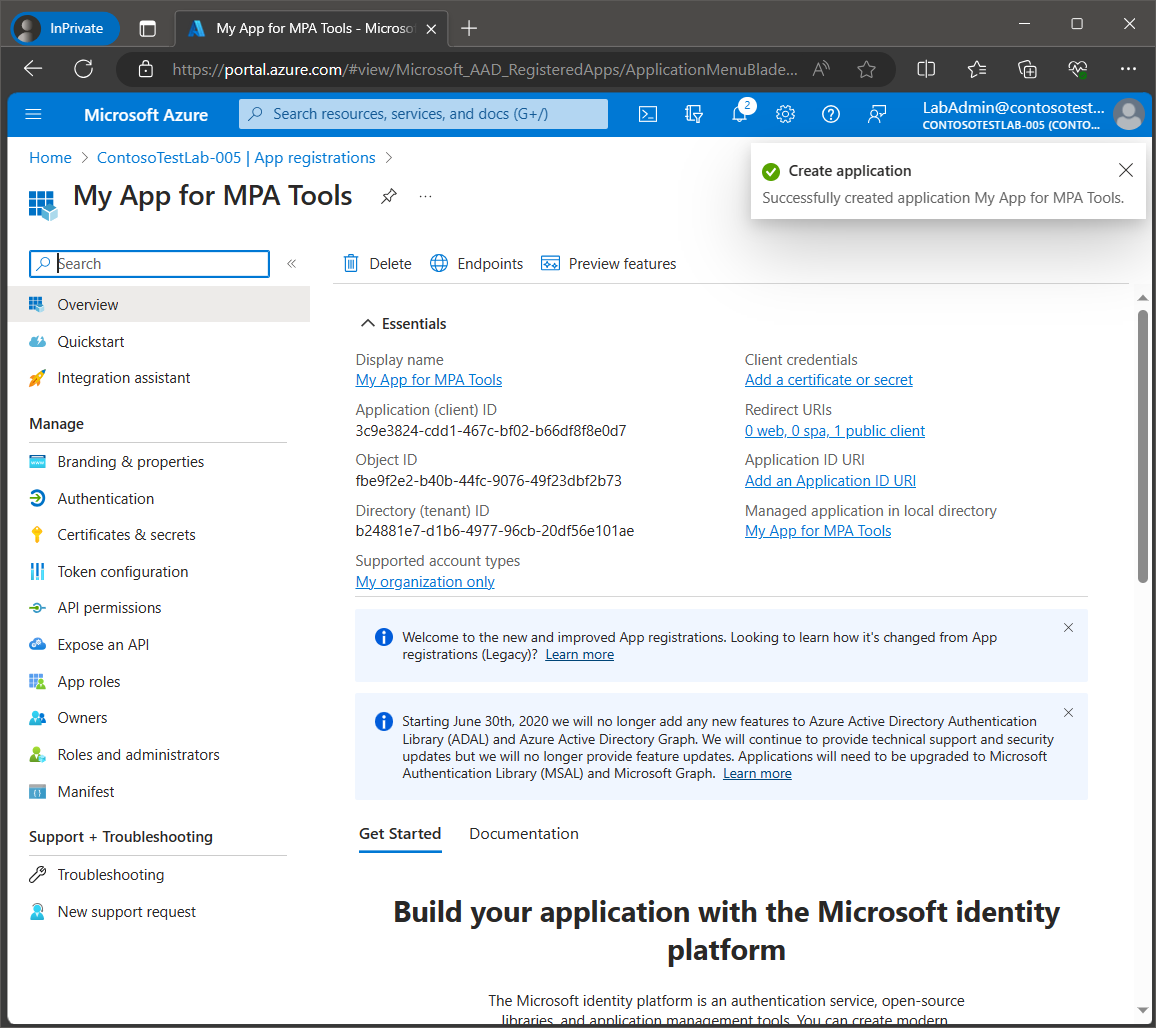
The application will then be created, and it will be assigned an unique Application ID which will be required for MPA Tools (as illustrated later in the instructions below).
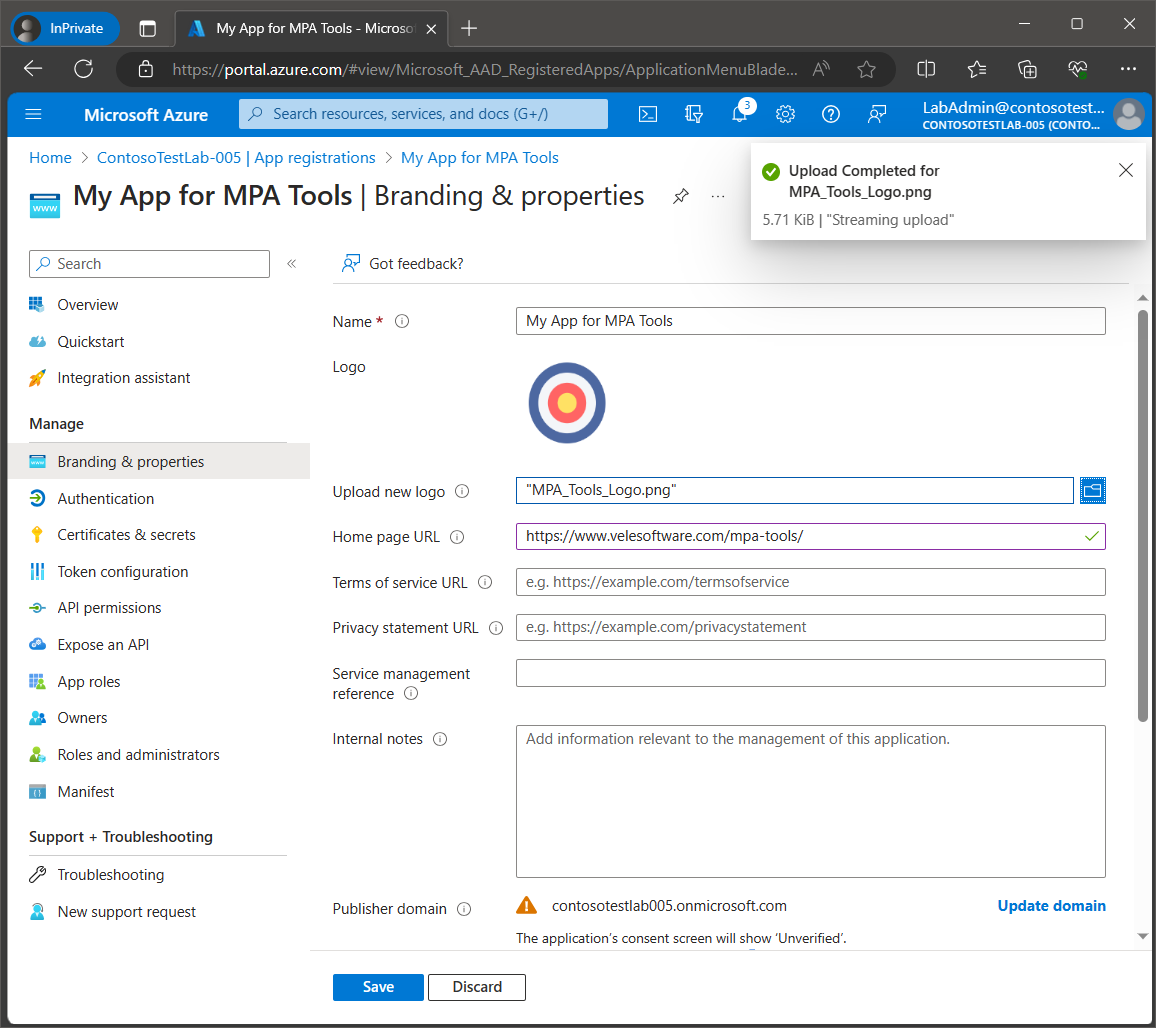
Select Branding & properties from the navigation menu on the left. If you would like to add the brand logo for the application, you can use the icon file below. You can also enterhttps://www.velesoftware.com/mpa-tools/ for the Home page URL.

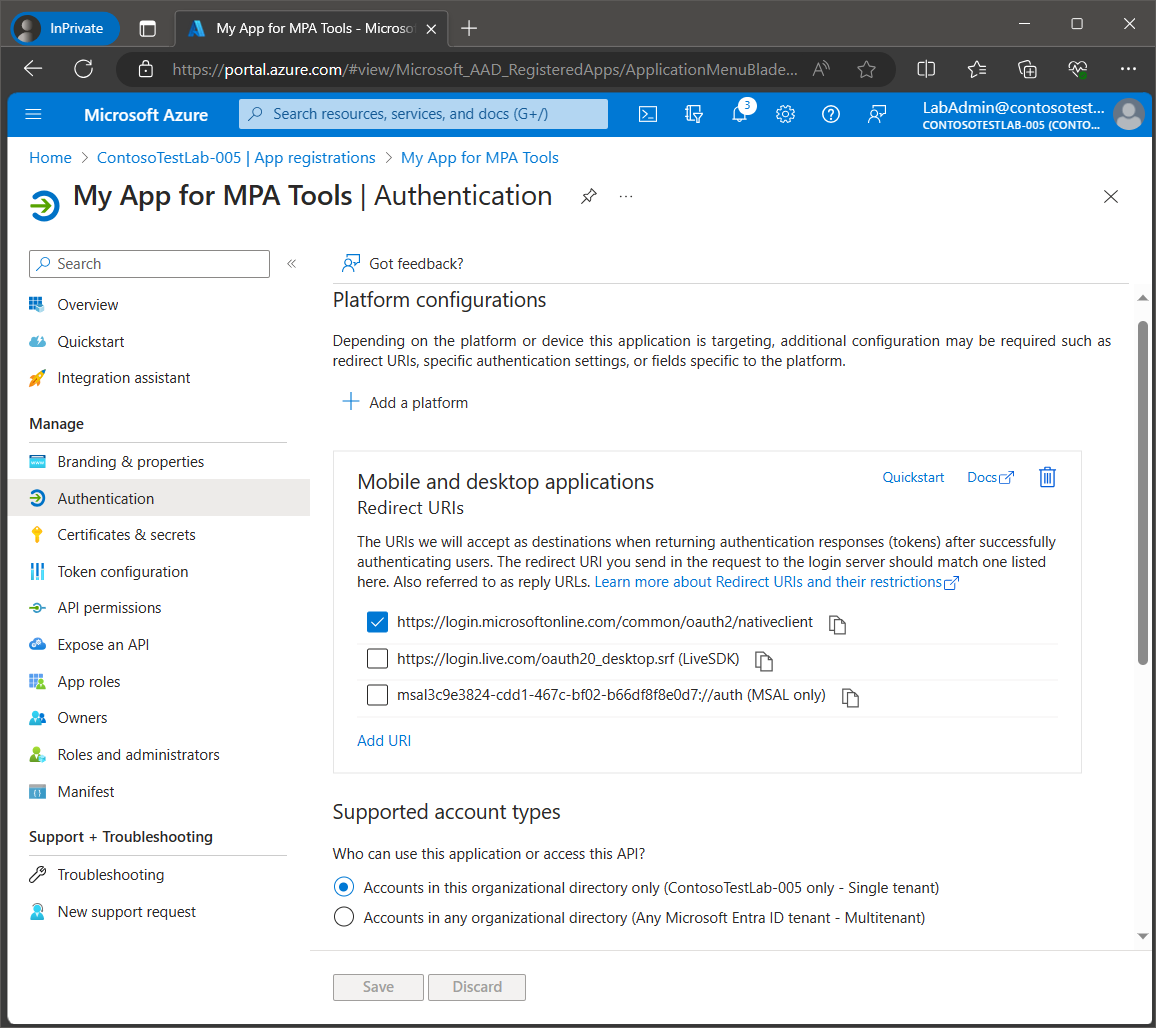
Select Authentication from the navigation menu on the left. Confirm that the URLhttps://login.microsoftonline.com/common/oauth2/nativeclient is selected under Mobile and desktop applications / Redirect URIs.
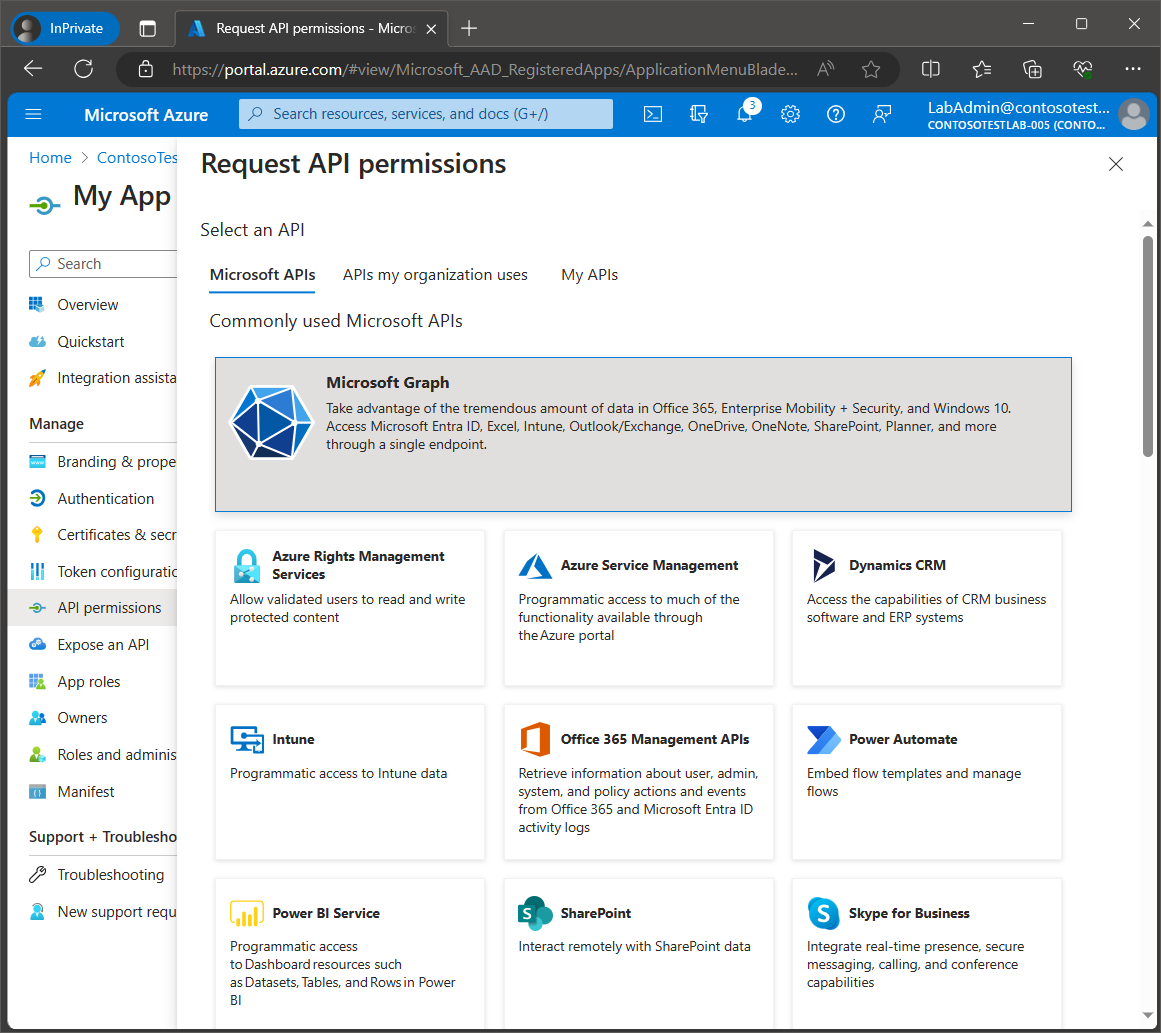
Next, we will need to add the following Microsoft Graph permissions. Select API permissions from the navigation menu on the left. Click Add a permission.
Click Microsoft Graph.
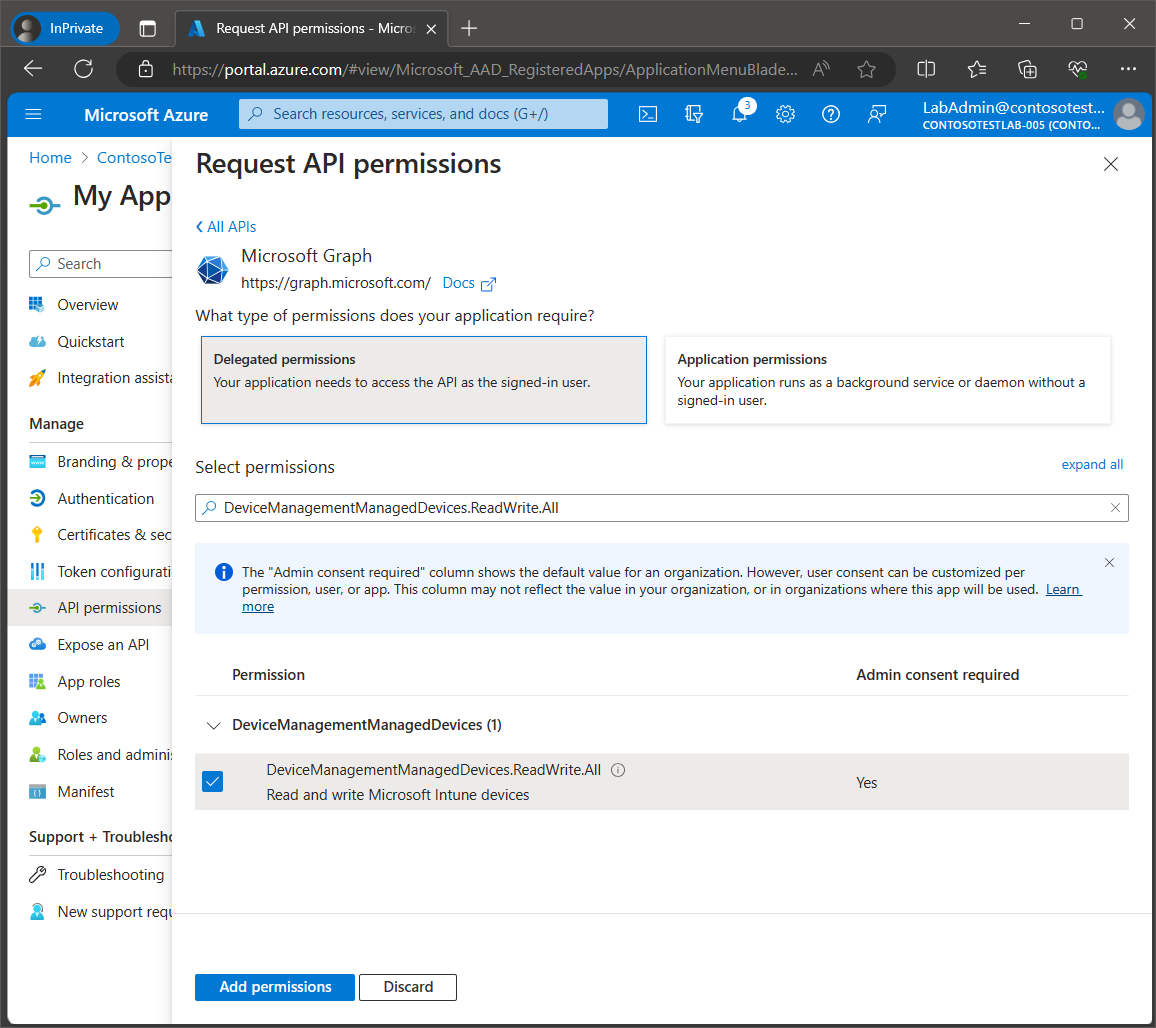
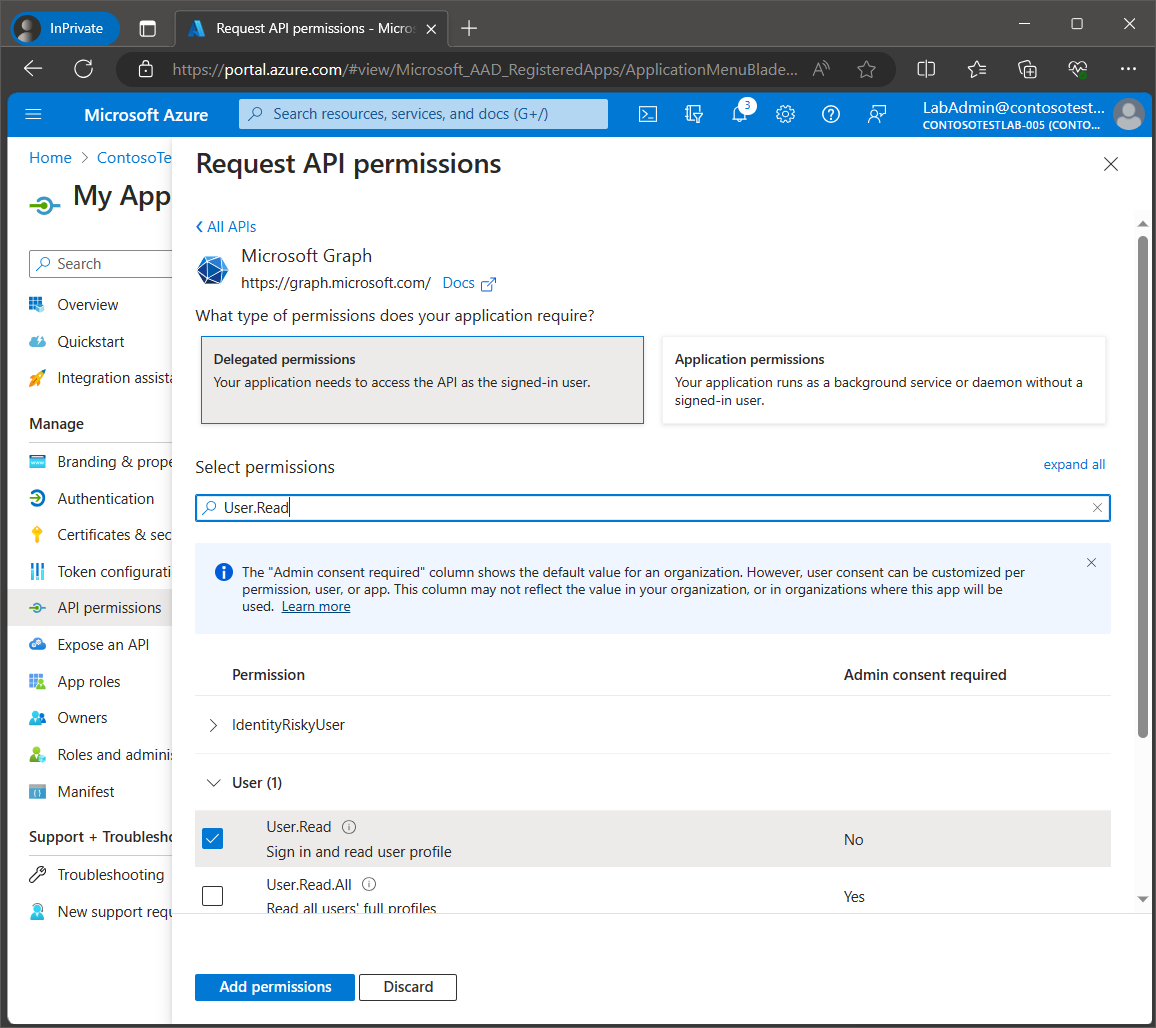
Select Delegated permissions.
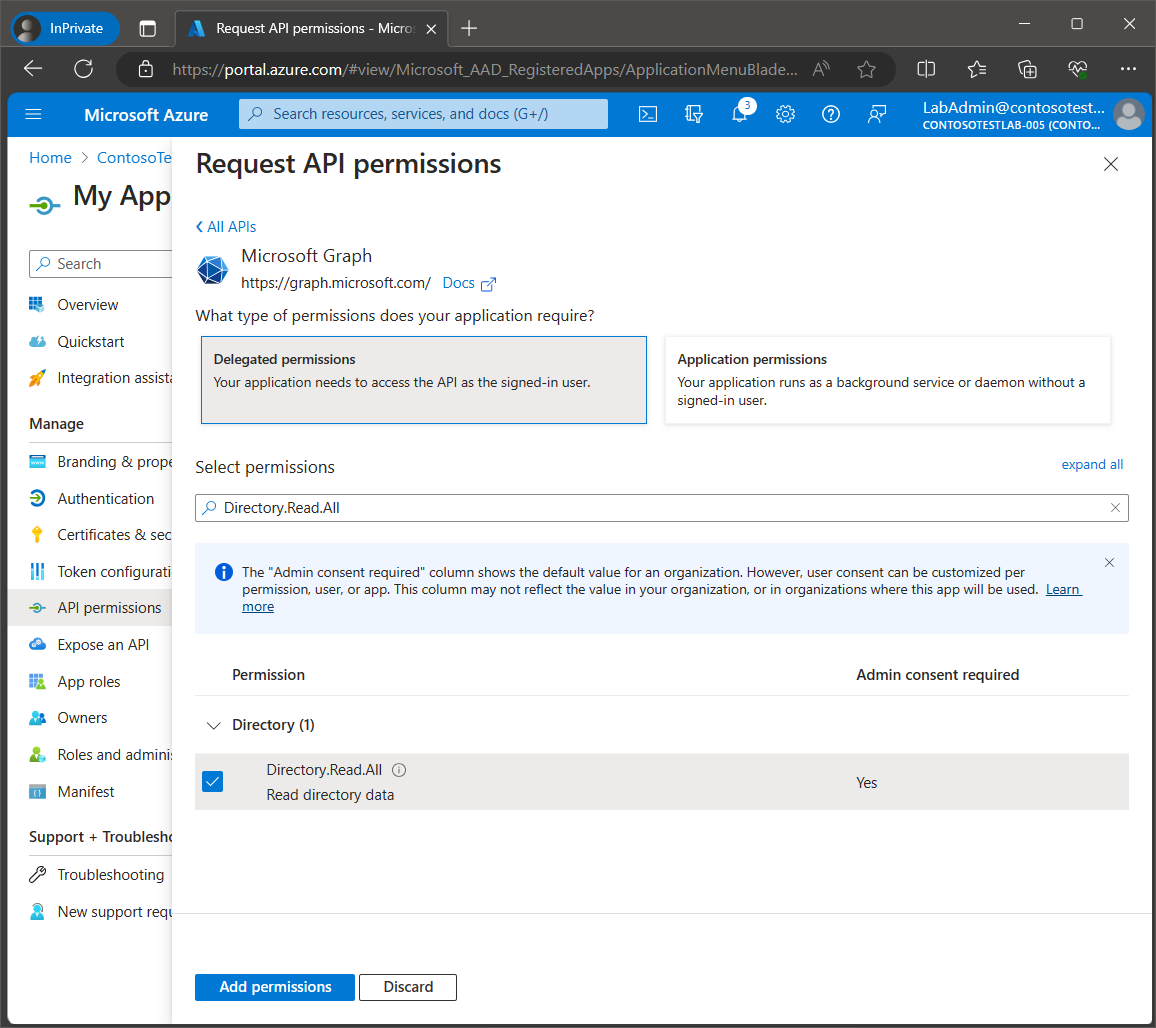
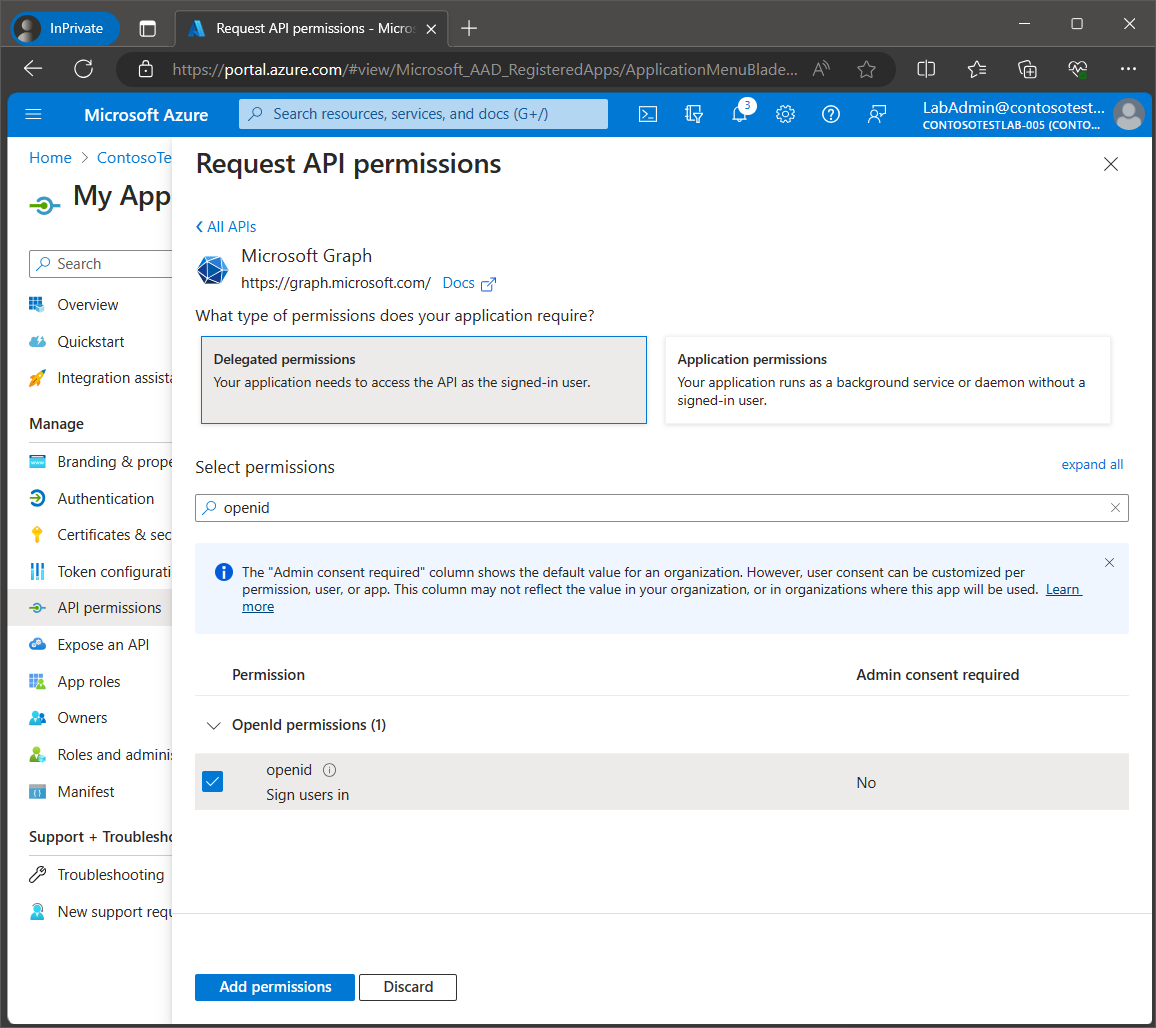
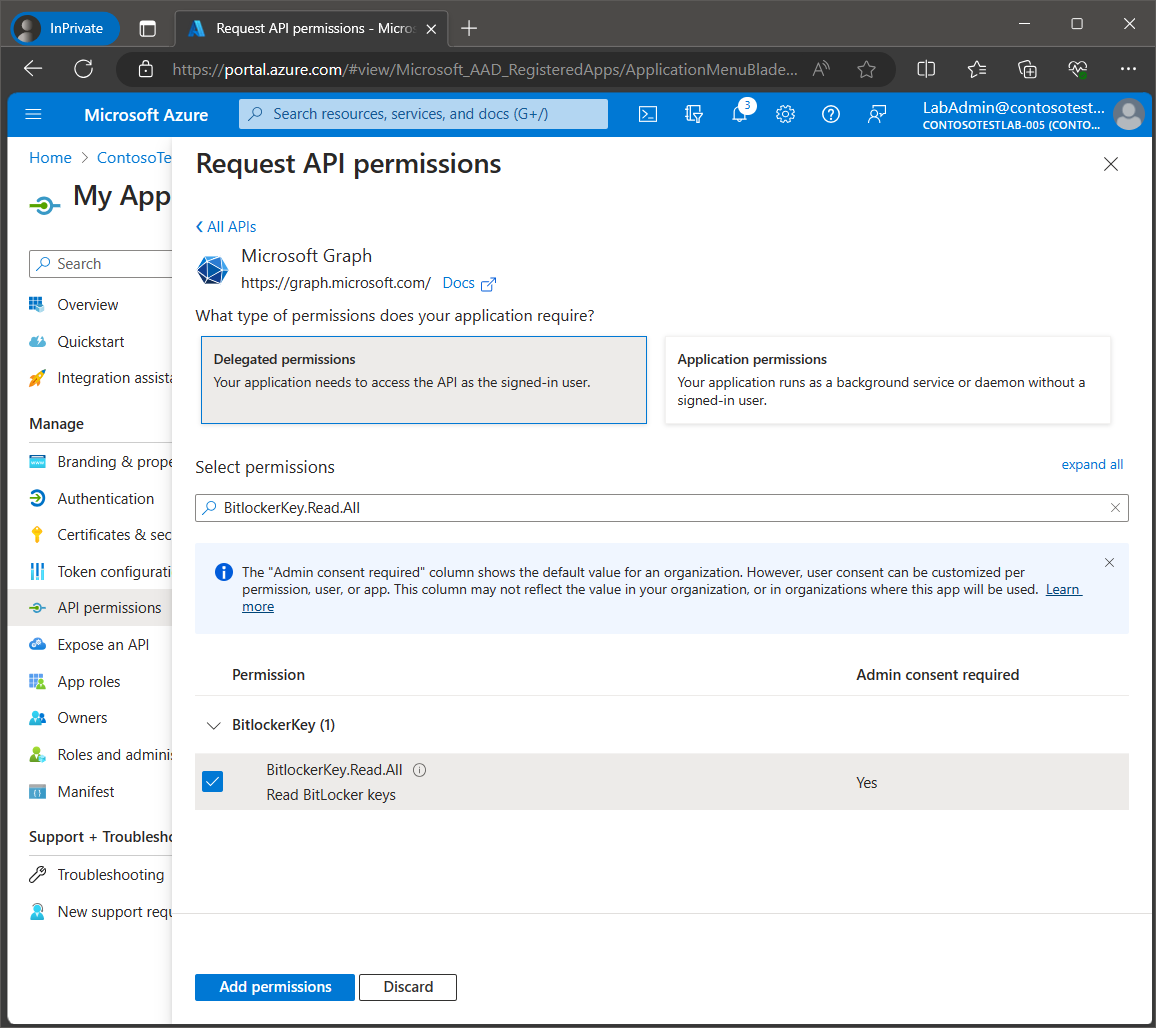
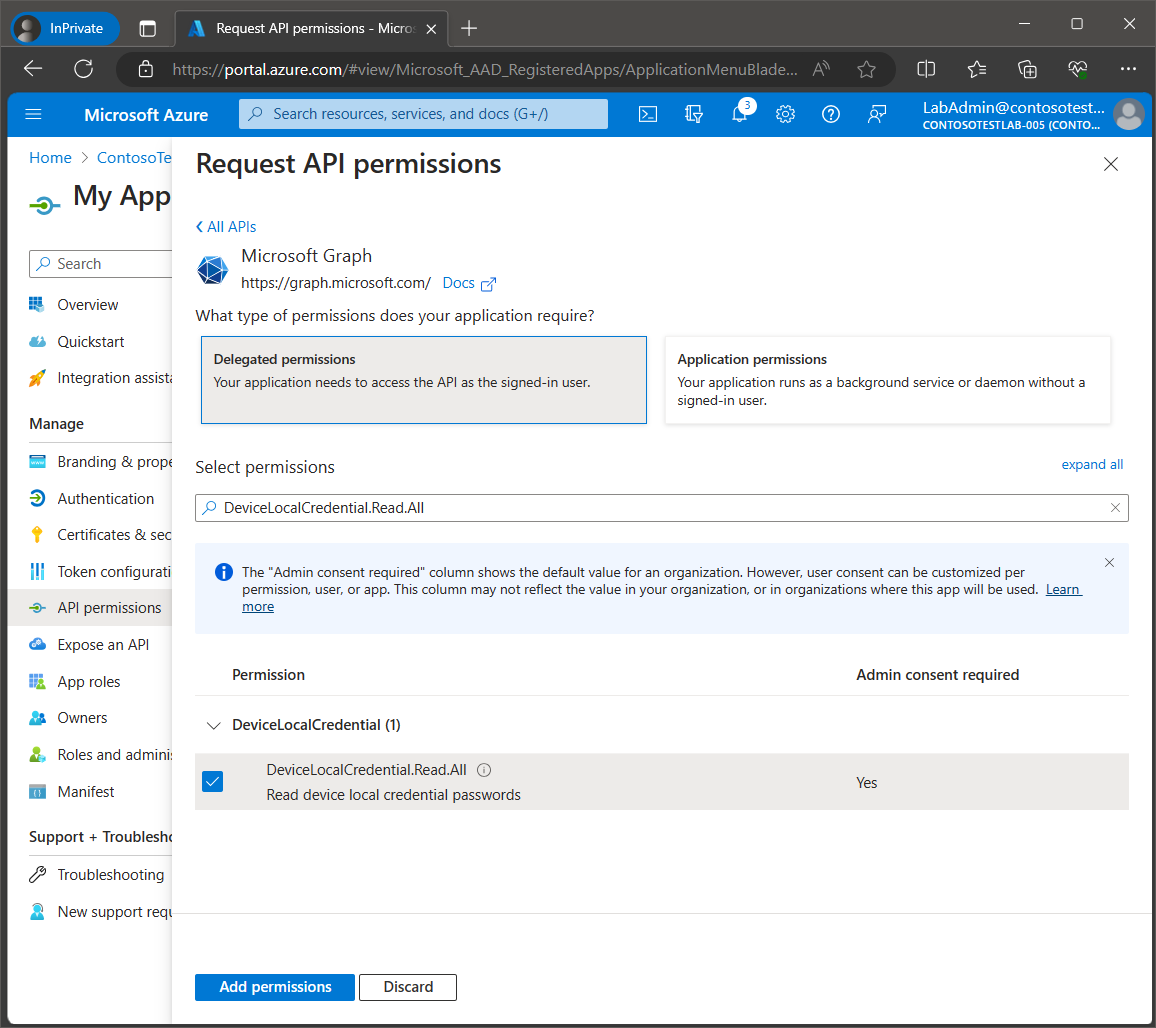
Enter each permission from the Claim Value column in the table of Microsoft Graph permissions above and then click the checkbox for each one. You can search for each permission one by one, selecting the checkbox for each one and then click the Add permission button once they are all selected. Below are screen prints of each required Microsoft Graph permission.
Note: If any of the required permissions are not selected, then this will affect the functionality of the relevant component of MPA Tools.


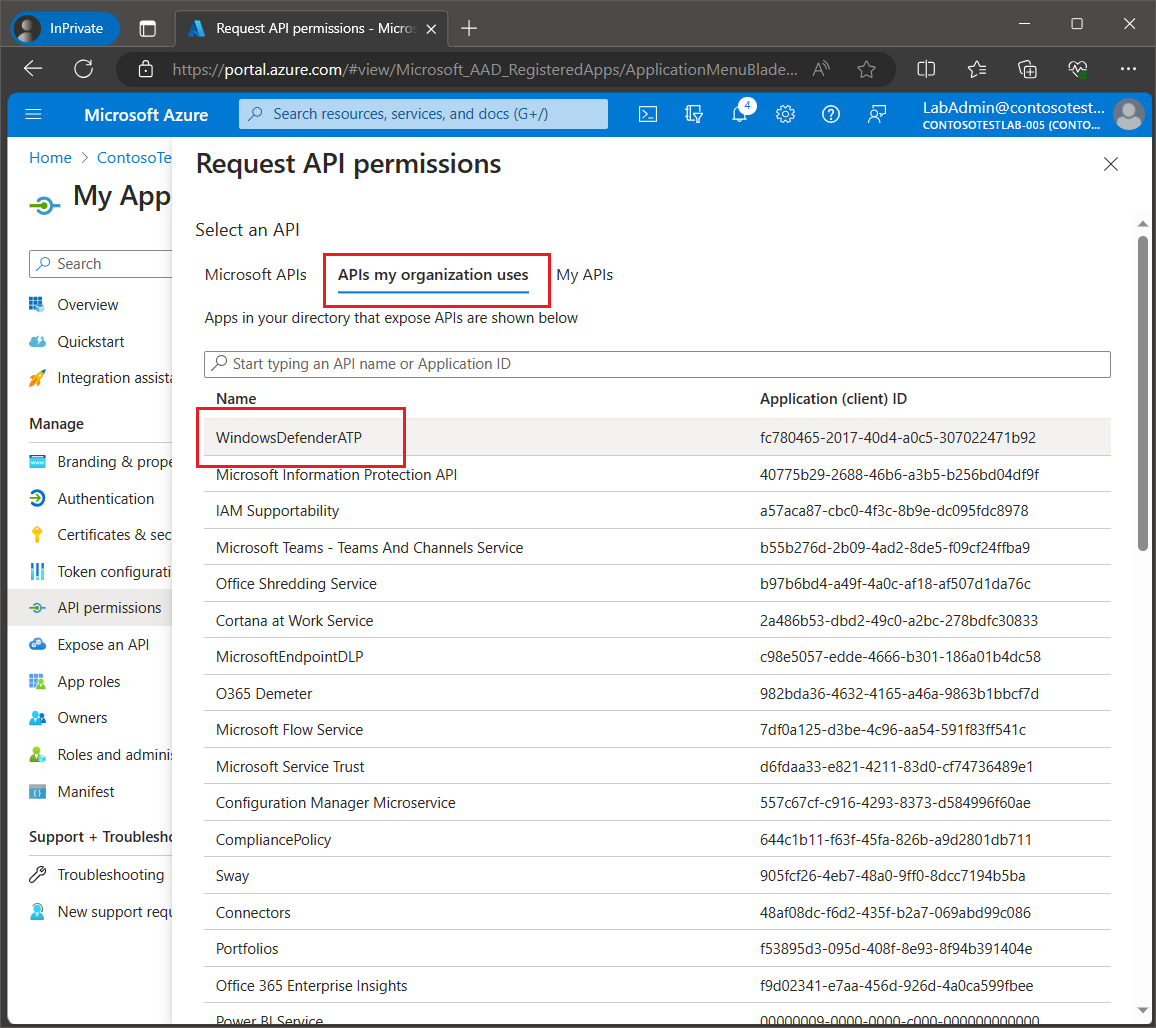
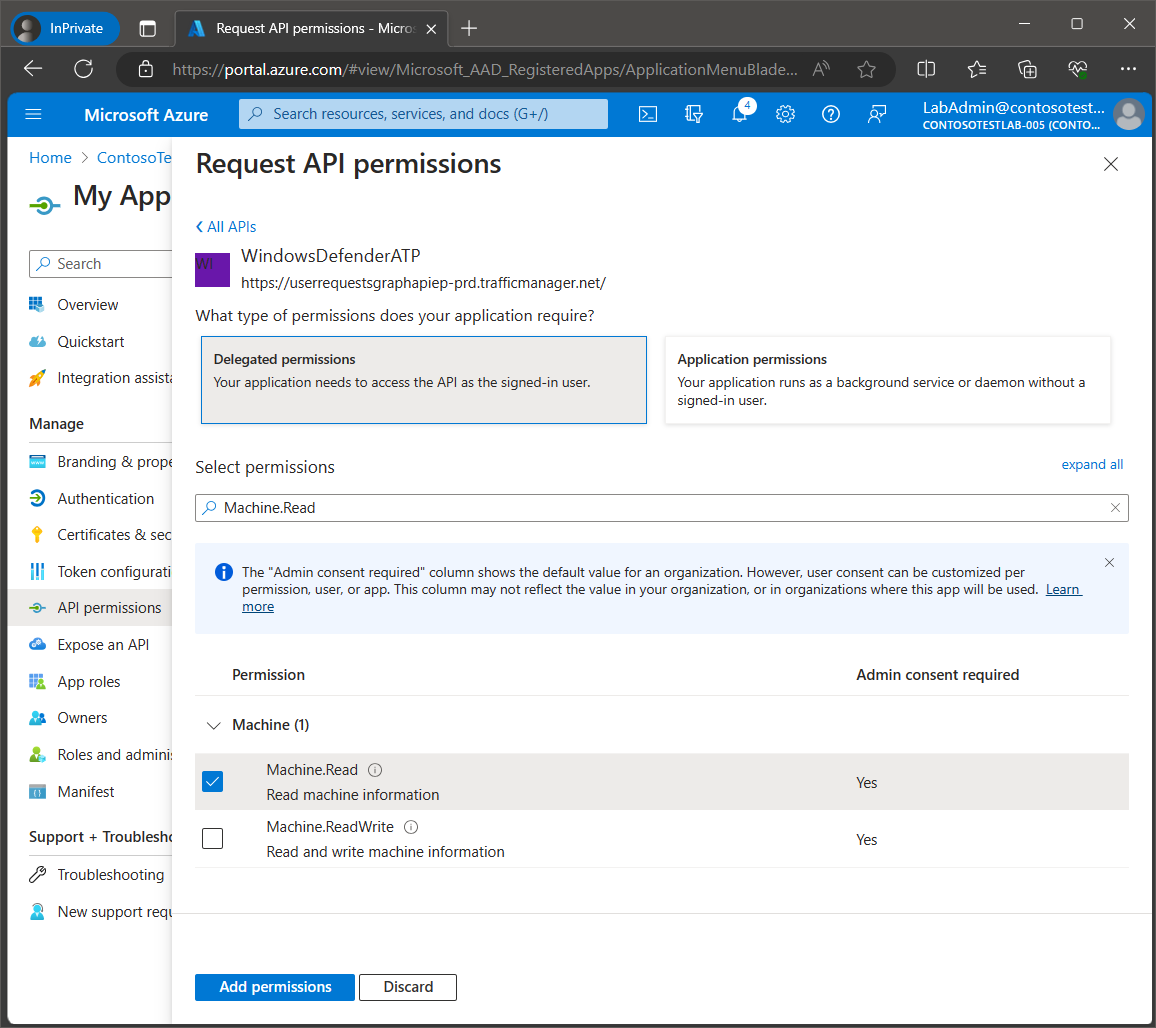
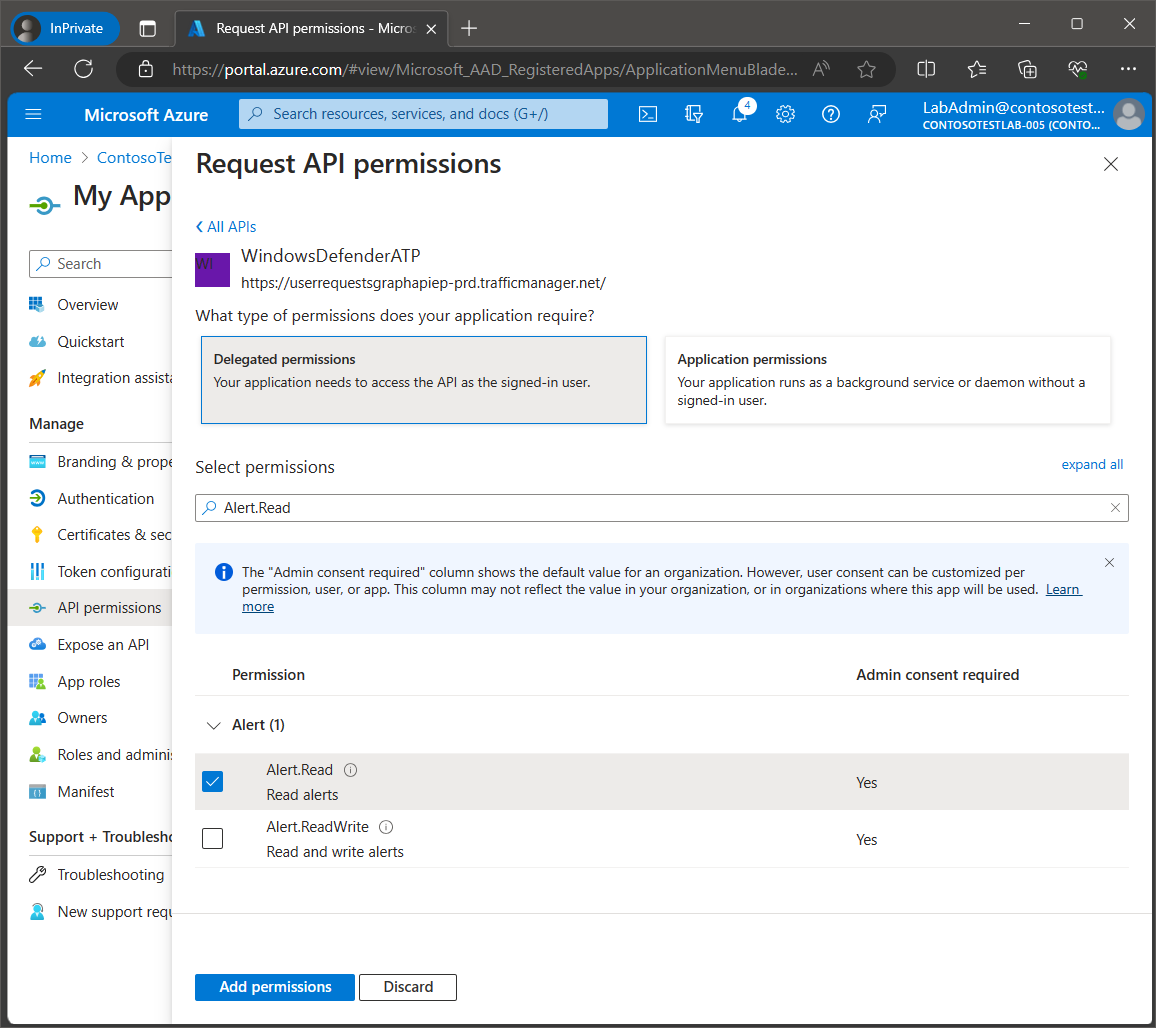
Next, we will need to add the following Windows Defender ATP permissions. Select API permissions from the navigation menu on the left. Click Add a permission. When selecting the API, click on APIs my organization uses and then select WindowsDefenderATP.
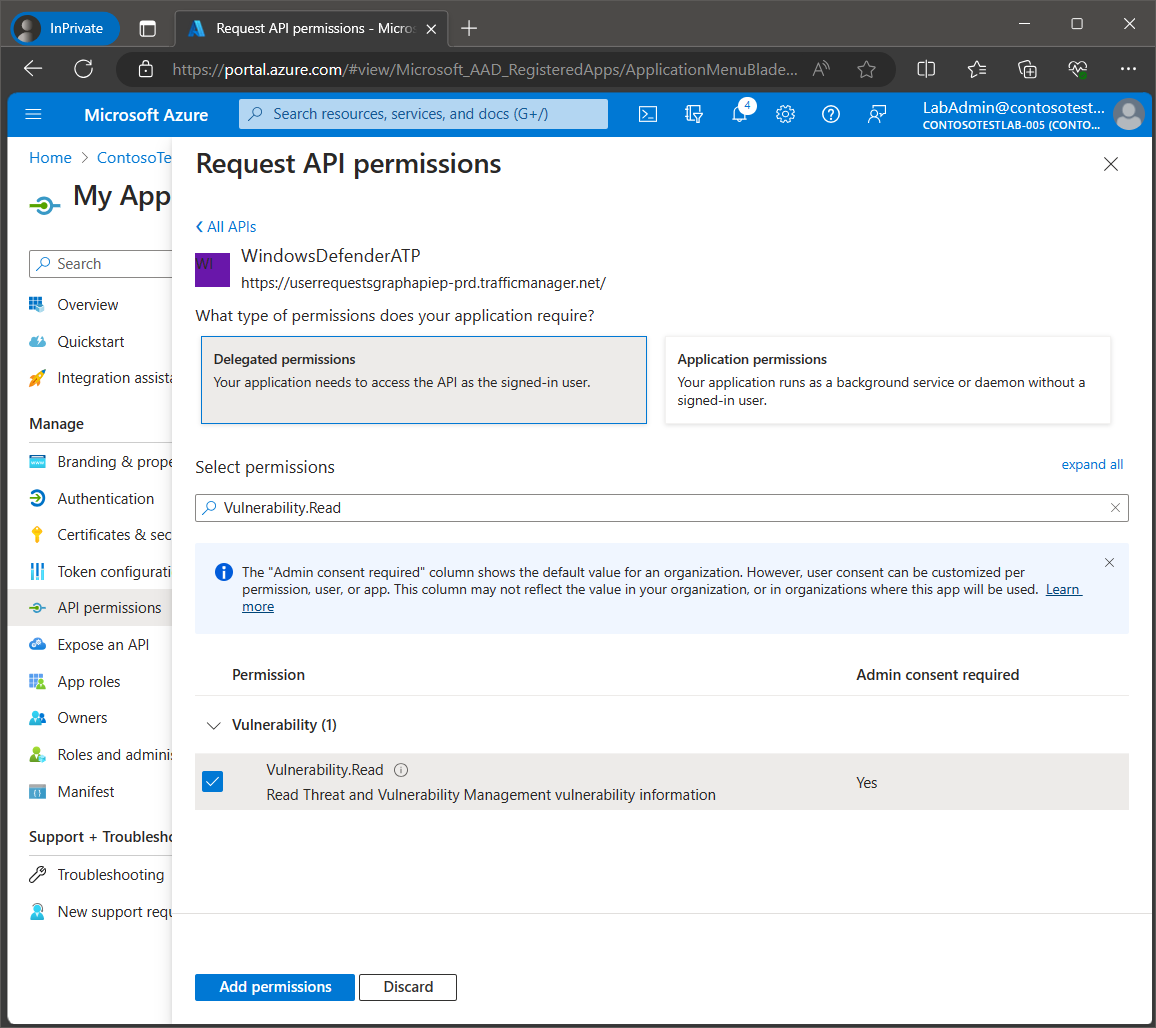
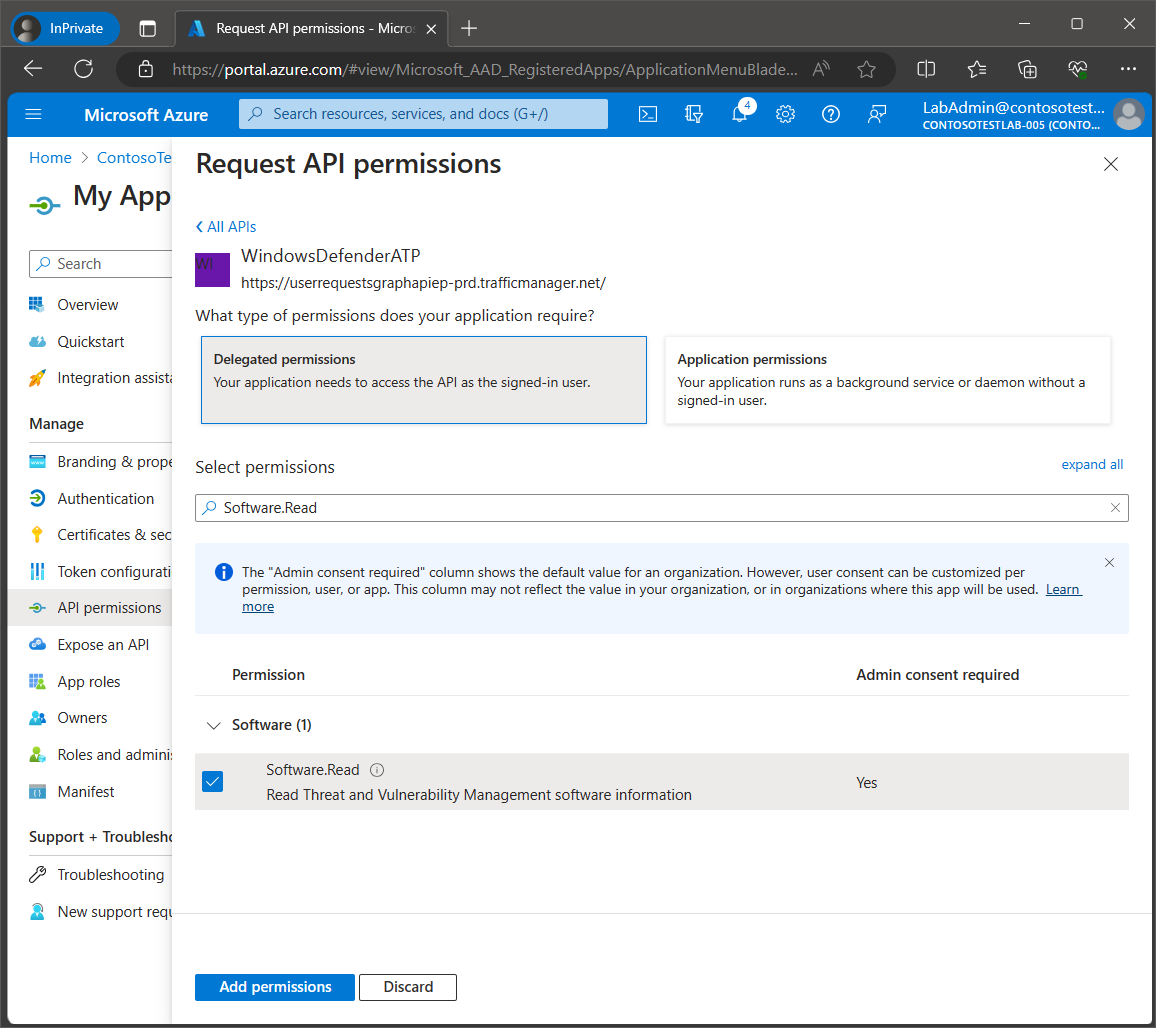
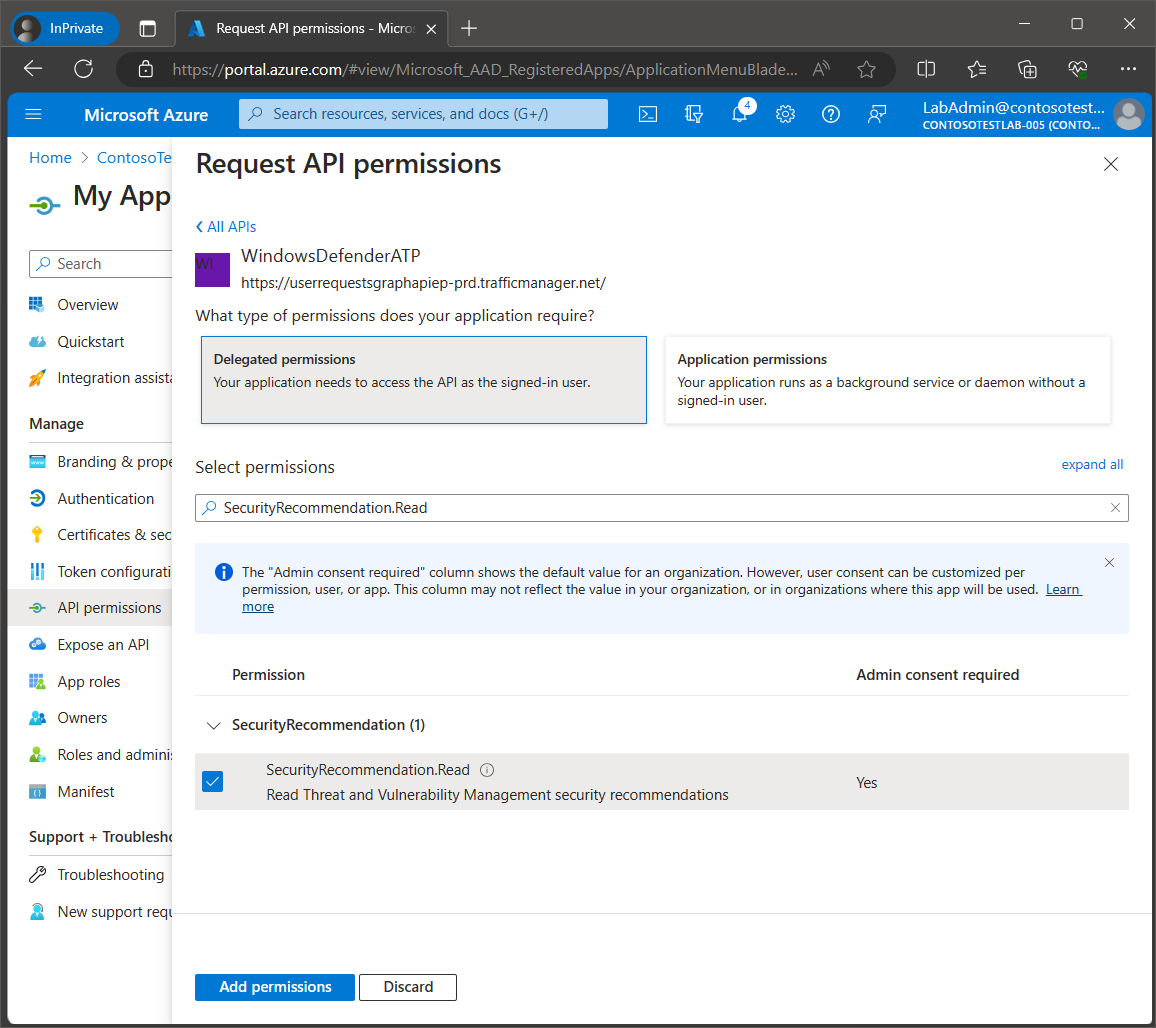
Select Delegated permissions.
Enter each permission from the Claim Value column in the table of WindowsDefenderATP permissions above and then click the checkbox for each one. You can search for each permission one by one, selecting the checkbox for each one and then click the Add permission button once they are all selected. Below are screen prints of each required WindowsDefenderATP permission.
Note: If any of the required permissions are not selected, then this will affect the functionality of the relevant component of MPA Tools.

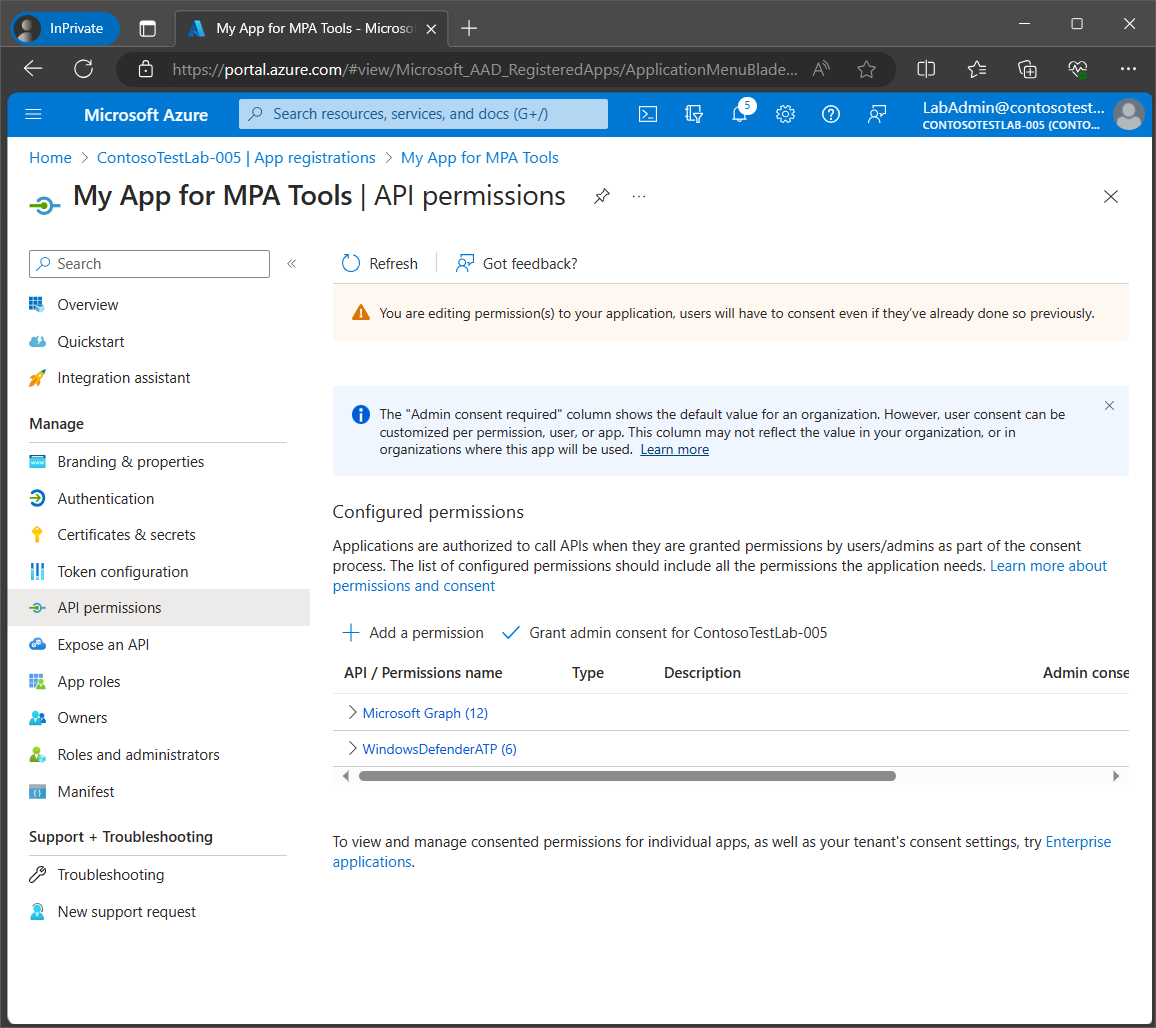
Once all the required permissions have been added, you should see 12 permissions for Microsoft Graph and 6 permissions for WindowsDefenderATP (as shown below).
The required configurations for the app registration are complete, and now you should see you custom Azure application listed.
Note: You can add your own configurations to the application, for example, an app owner can be assigned, or app roles can be added to delegate the API permissions to specific users or groups.
In Azure Active Directory, select Enterprise Applications from the navigation menu on the left to confirm that the custom application has been created. Select the application.
Copy the application ID.
Launch MPA Tools on the computer where the software is installed. When you launch MPA Tools for the first time, it will attempt to connect to your Azure tenant using the logged in account.
The below Sign in/Approval message will appear which is requesting approval/consent for the default Azure application for MPA Tools (note that the application indicates that it is from Veles Software Ltd).
Since we will be using a custom Azure application, we will ignore this message by clicking theX on the top right-hand corner.
The following warning will appear, click OK.

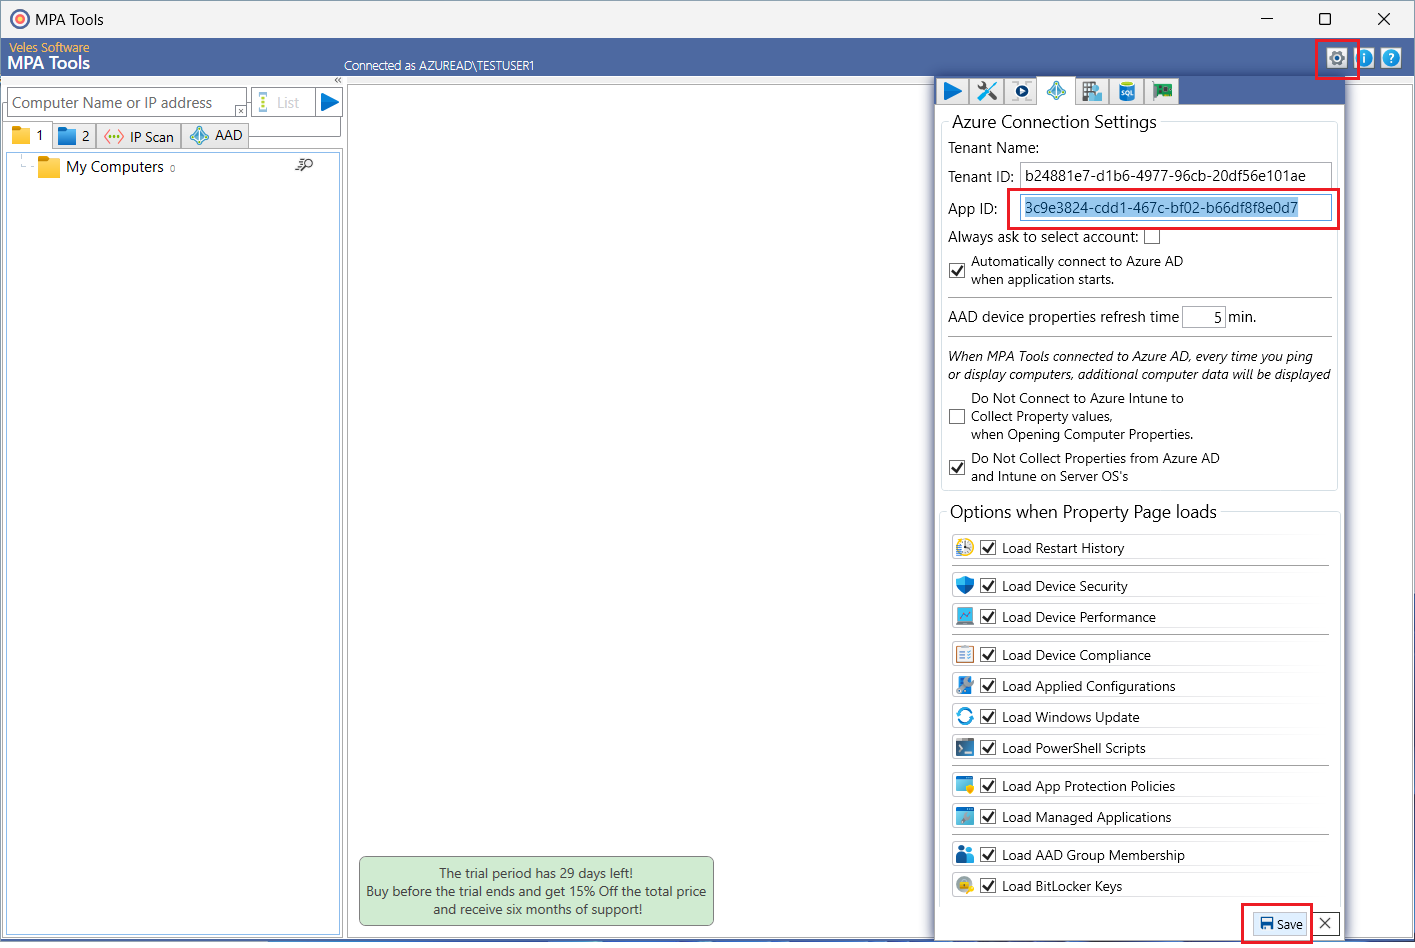
Click the settings gear icon on the top right-hand side of the MPA Tools window. Enter the application ID for the custom Azure application in the App ID field and then click the Save button.
Important: Close and reopen the MPA Tools window to give consent to the custom Azure application and for MPA Tools to connect to your Azure tenant.
Once you have relaunched MPA Tools, it will attempt to connect to your Azure tenant using the custom Azure application (note that the applicationdoes not indicate that it is from Veles Software Ltd).
Select the option “Have an admin account? Sign in with that account".
Then select the option “Use another account".
Enter a username for an administrative account that can authorize the required access provided by the permissions that were added earlier to the custom Azure application (this would typically be a Global Administrator for the Azure tenant).
Enter the password for the administrative account and then click Sign in.
Approve the sign in request using the Authenticator app.

Review the requested permissions.
Note: The name for the custom Azure application should appear here (as shown below).
Then select the checkbox “Consent on behalf of you organization" and then click Accept.
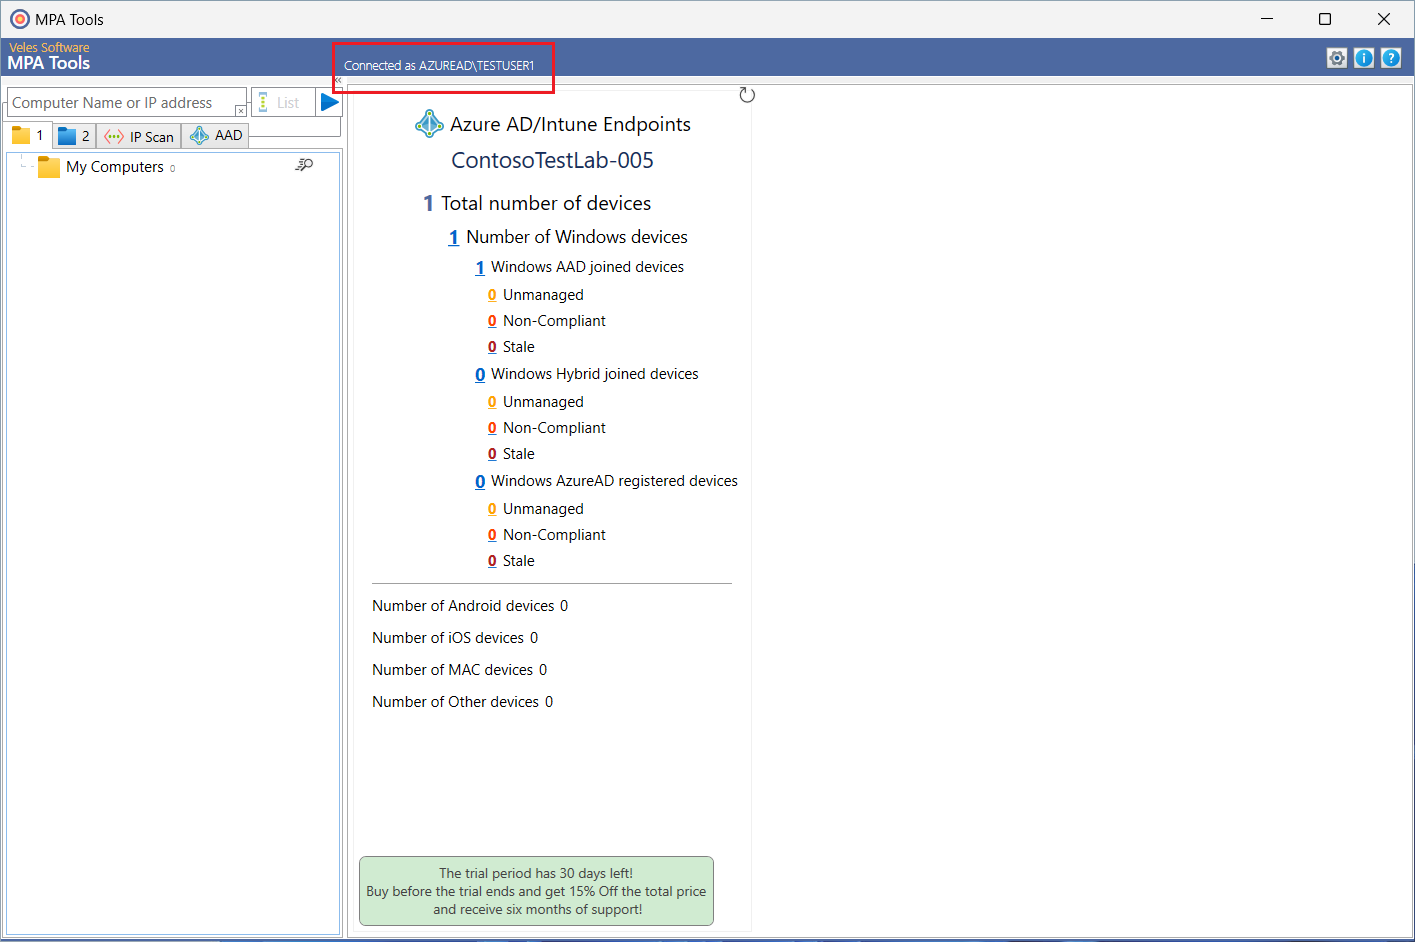
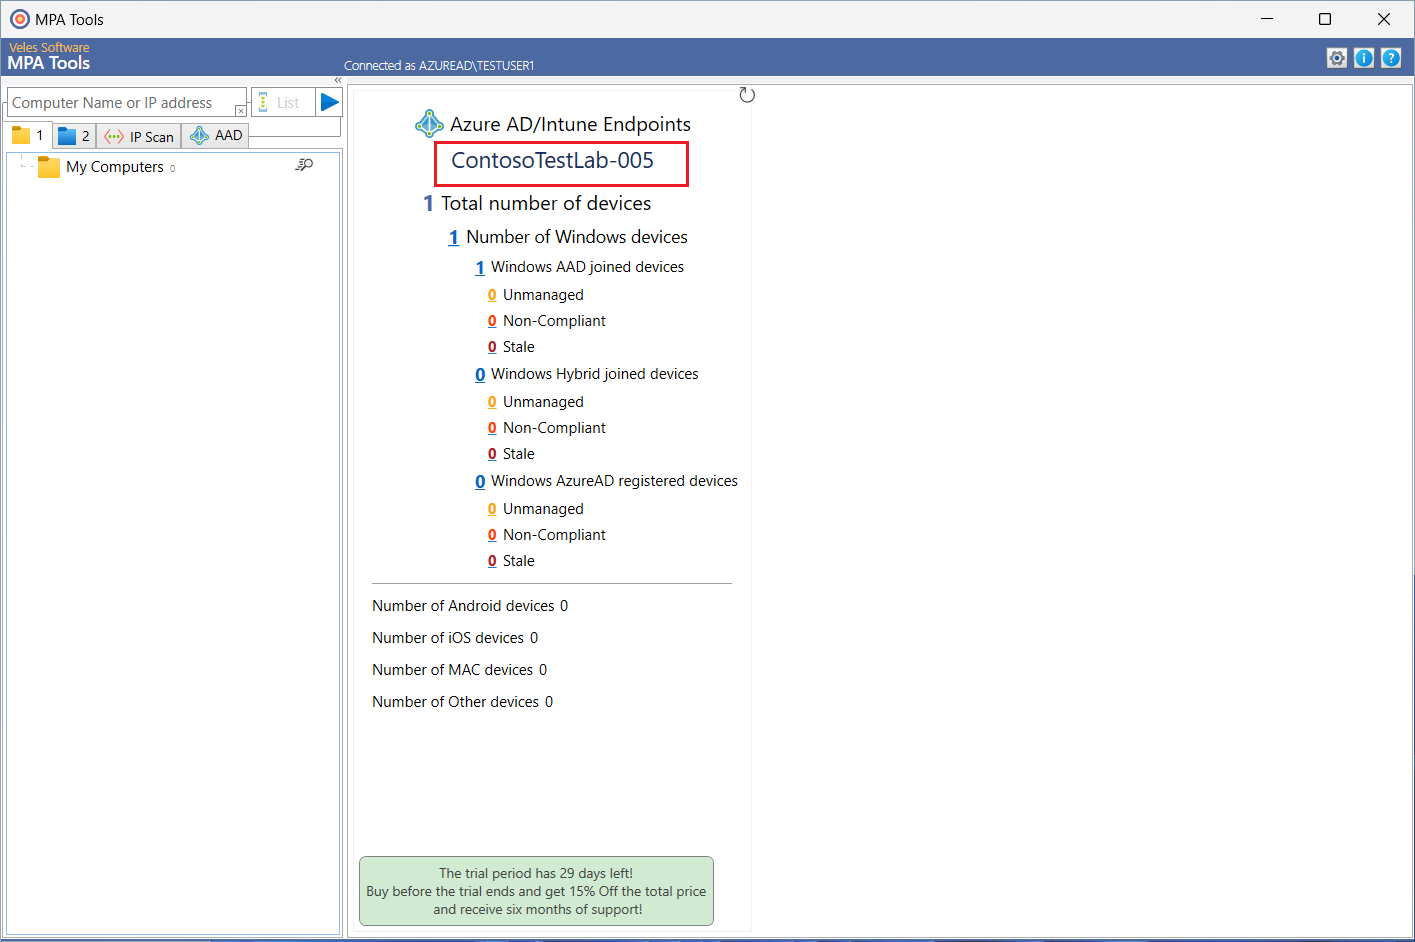
MPA Tools should now be connected to your Azure tenant, and it should start populating the device summary (as shown below).
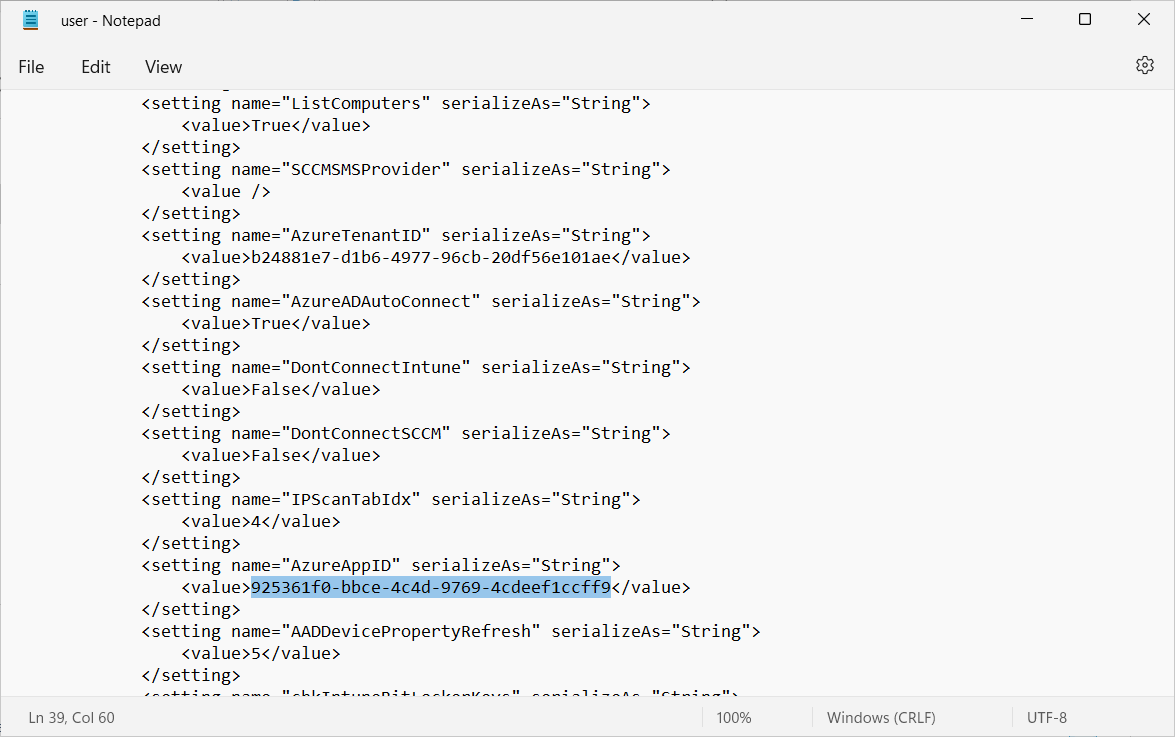
If for any reason you need to reset to the default application ID, the default app ID for the MPA Tools Azure application is: 925361f0-bbce-4c4d-9769-4cdeef1ccff9
The application ID is stored in the AzureAppID setting in this file: %LocalAppData%Veles_Software_ltdMPA_Tools.exe_Url_gmkbw2ylda2ykhqbwffantblgviqh0xp<AppVersion>user.config