In a previous post we had talked aboutHow to clear the SCCM client cache with MPA Tools, however, there may be times where there is not enough cache space even after clearing it. In these instances, we may need to increase the cache size.
In this post, we will look at what the SCCM client cache is, why we would ever need to increase it, and how to increase its size usingMPA Tools.
What is the SCCM client cache folder?
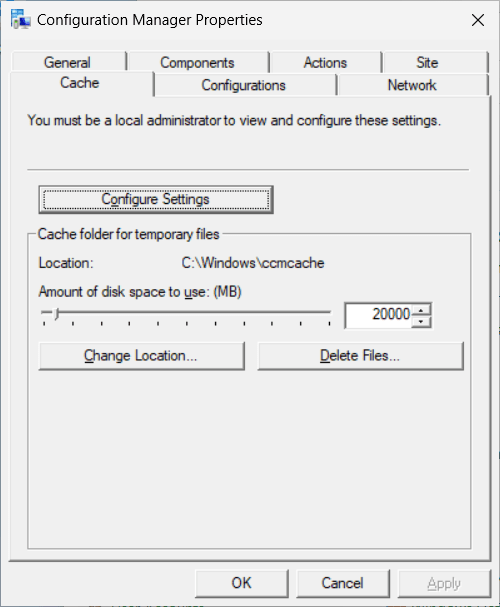
Just as a quick recap… the client cache stores temporary files for when the SCCM client install applications, programs and software updates. The default location for the Configuration Manager client cache is %windir%\ccmcache and the default disk space is 5120 MB, unless otherwise configured in the SCCM client settings.
When will the SCCM client cache size need to be increased?
The SCCM client cache size may be insufficient in the following scenarios:
- A deployed package/program or application content is larger than the client's cache size.
- There is package/program or application content that is persistent in the client cache consuming most of the client's cache, leaving little or no space for additional content.
- The content associated with an OSD task sequence deployed to an SCCM client is larger than the client's cache size.
- The content associated with all packages/programs and/or applications, that are deployed to a newly imaged or provisioned system, is larger than the client's cache size.
- The content associated with all packages/programs and/or applications that are deployed to a collection, that a system is a new member of, is larger than the client's cache size.
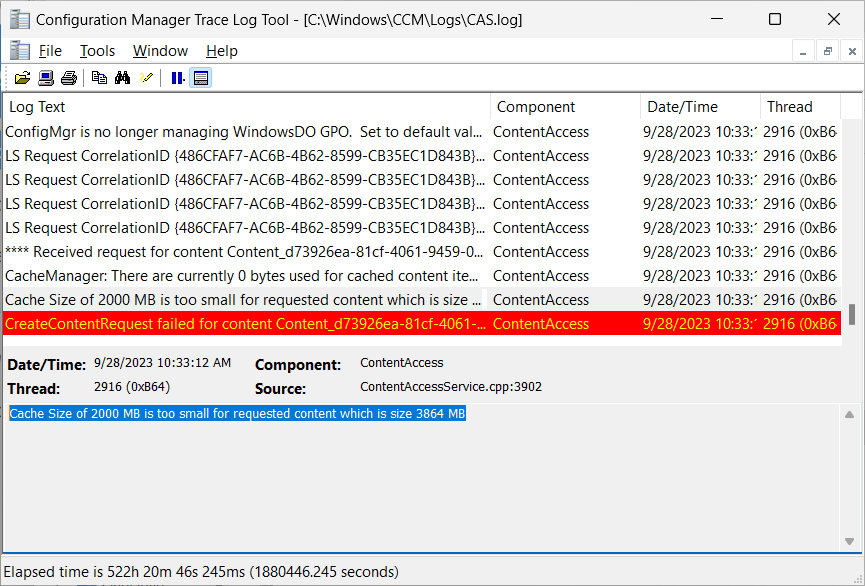
In these scenarios, a similar error to the following will appear in the CAS.log file in the C:\Windows\CCM\Logs folder.
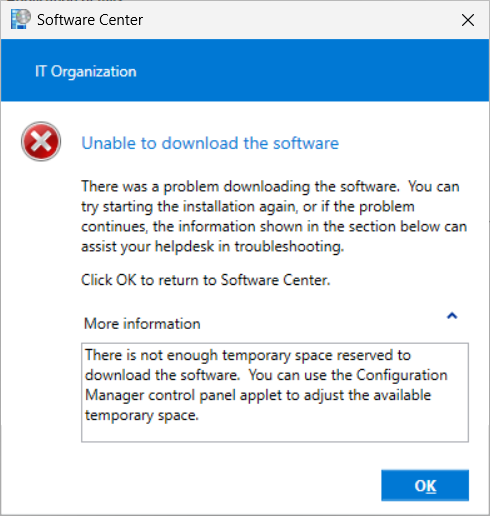
If the deployment is configured as “available", then the following error will appear in Software Center when trying to install the software.
For a more detailed explanation on how the SCCM client cache works, you may want to read the following Microsoft Learn articlehttps://learn.microsoft.com/en-us/mem/configmgr/core/clients/manage/configure-client-cache#about
Increase the client cache size with MPA Tools for a single computer
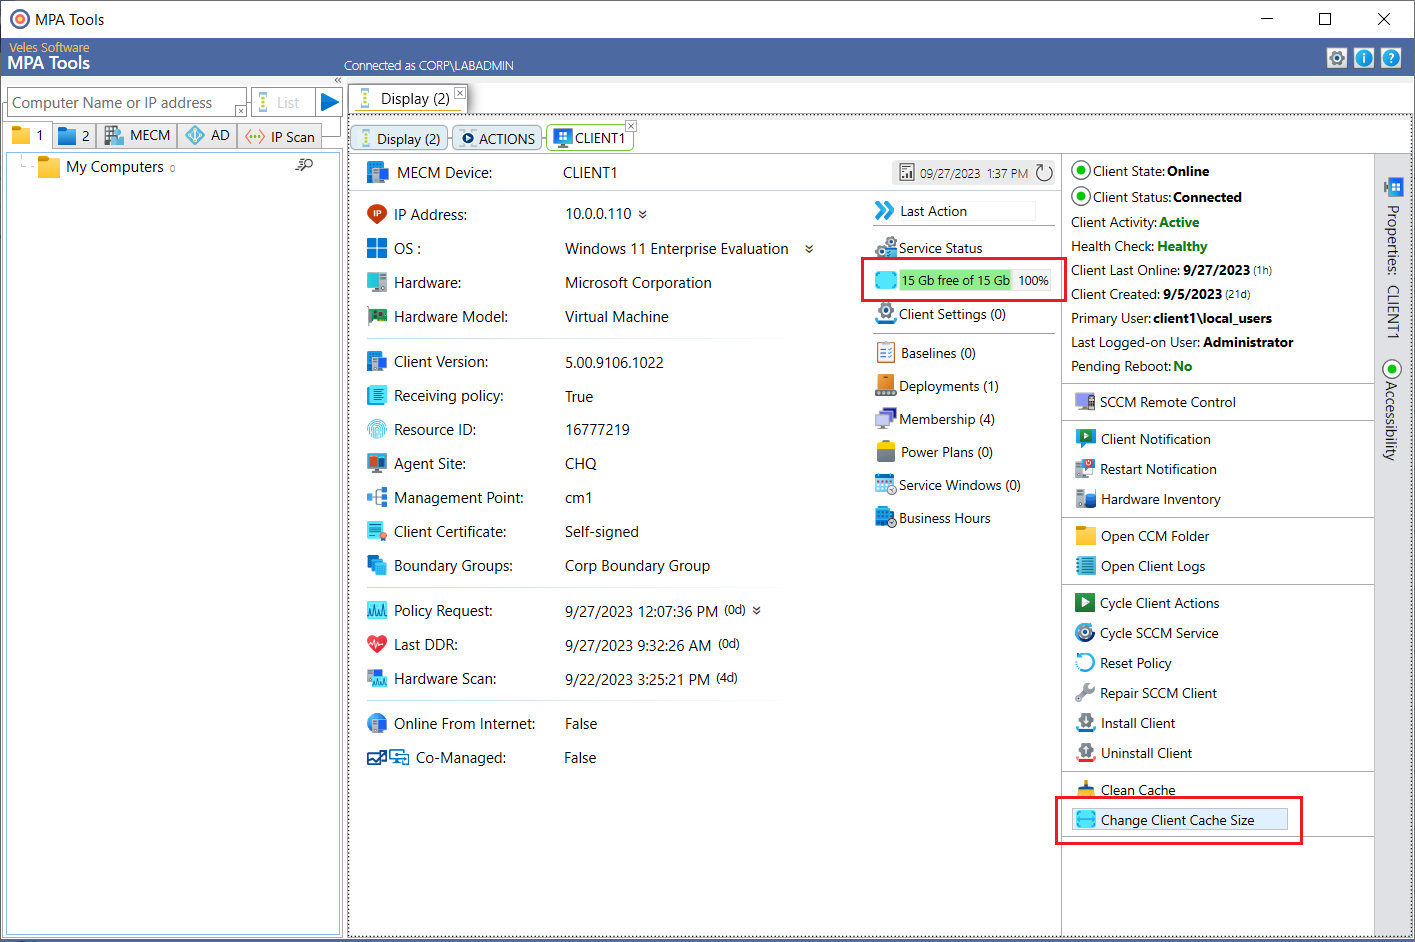
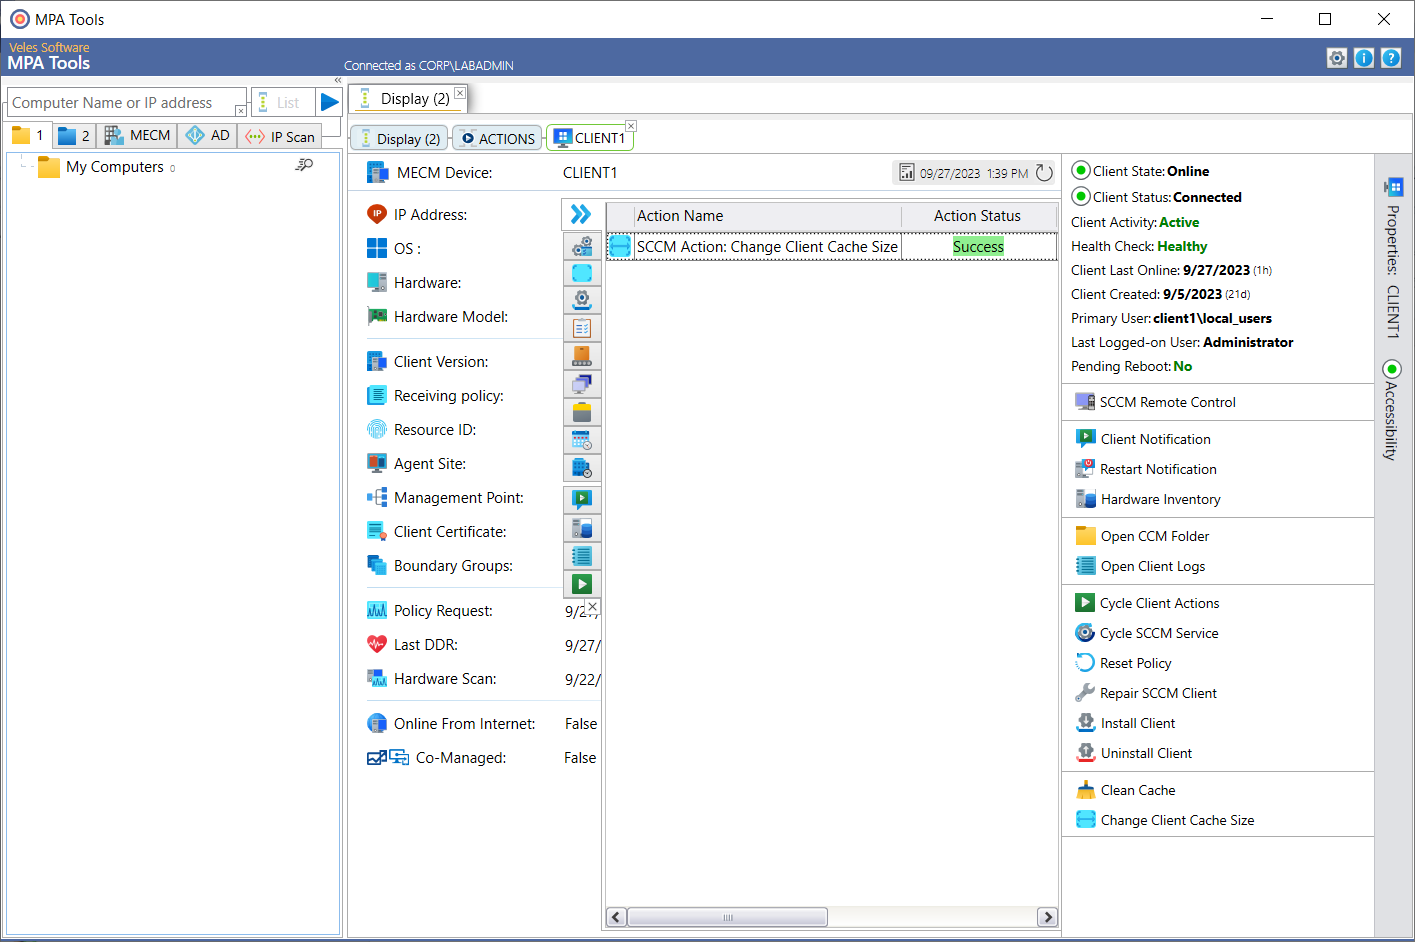
In MPA Tools, select a single client and then click the SCCM client button from the vertical toolbar on the right.
On the right-hand menu, we can see that that there is 15 GB of 15 GB free, indicating the current client cache size. Click the Change client Cache Size button at the bottom.
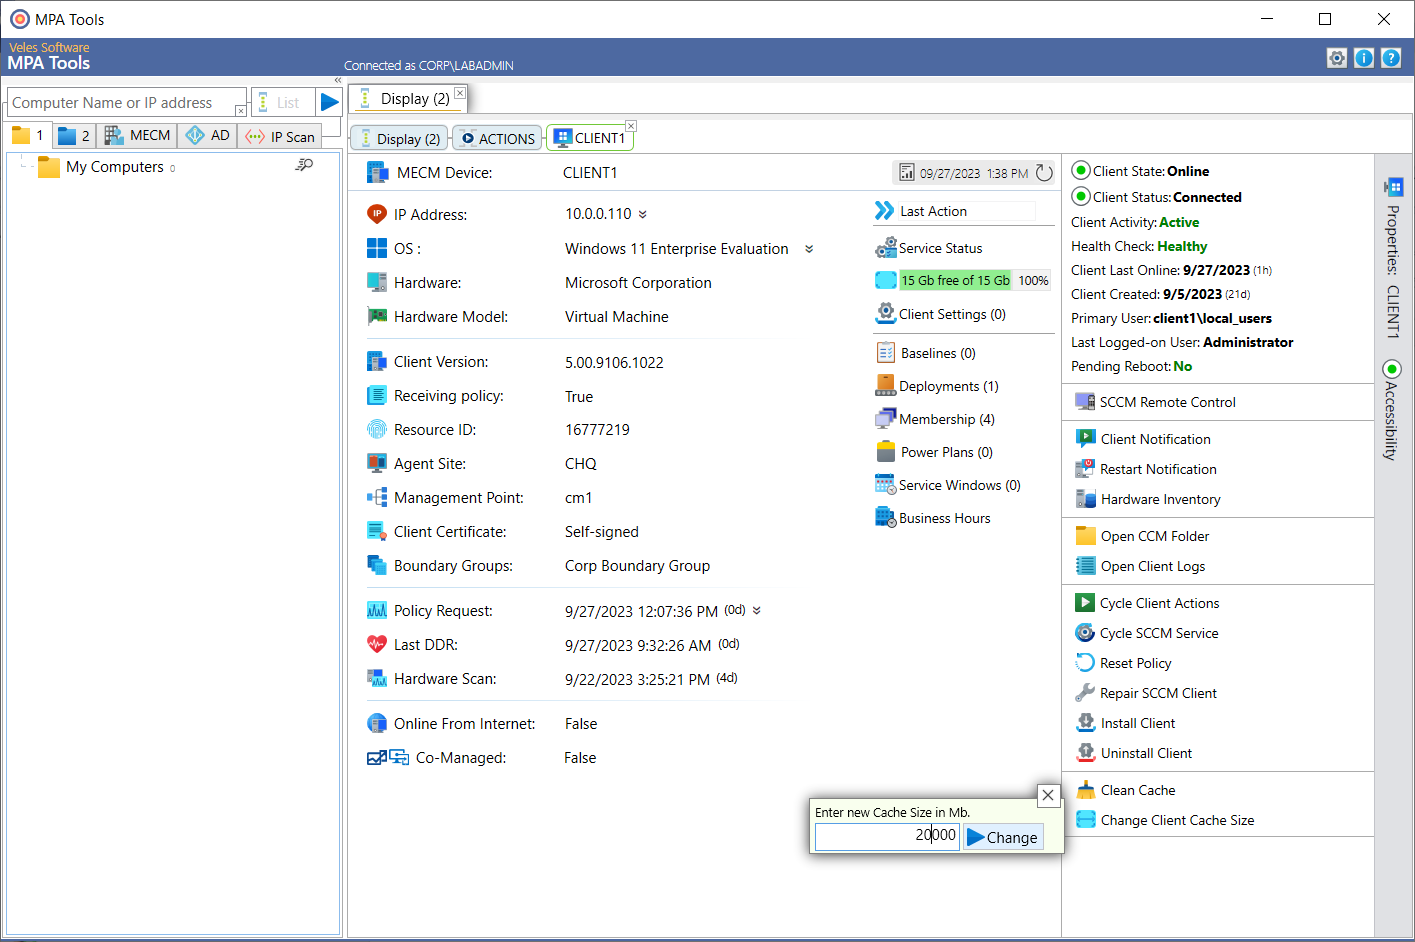
Enter the cache size in MB and then click the Change button.
After which, the action status for client cache size change appears.
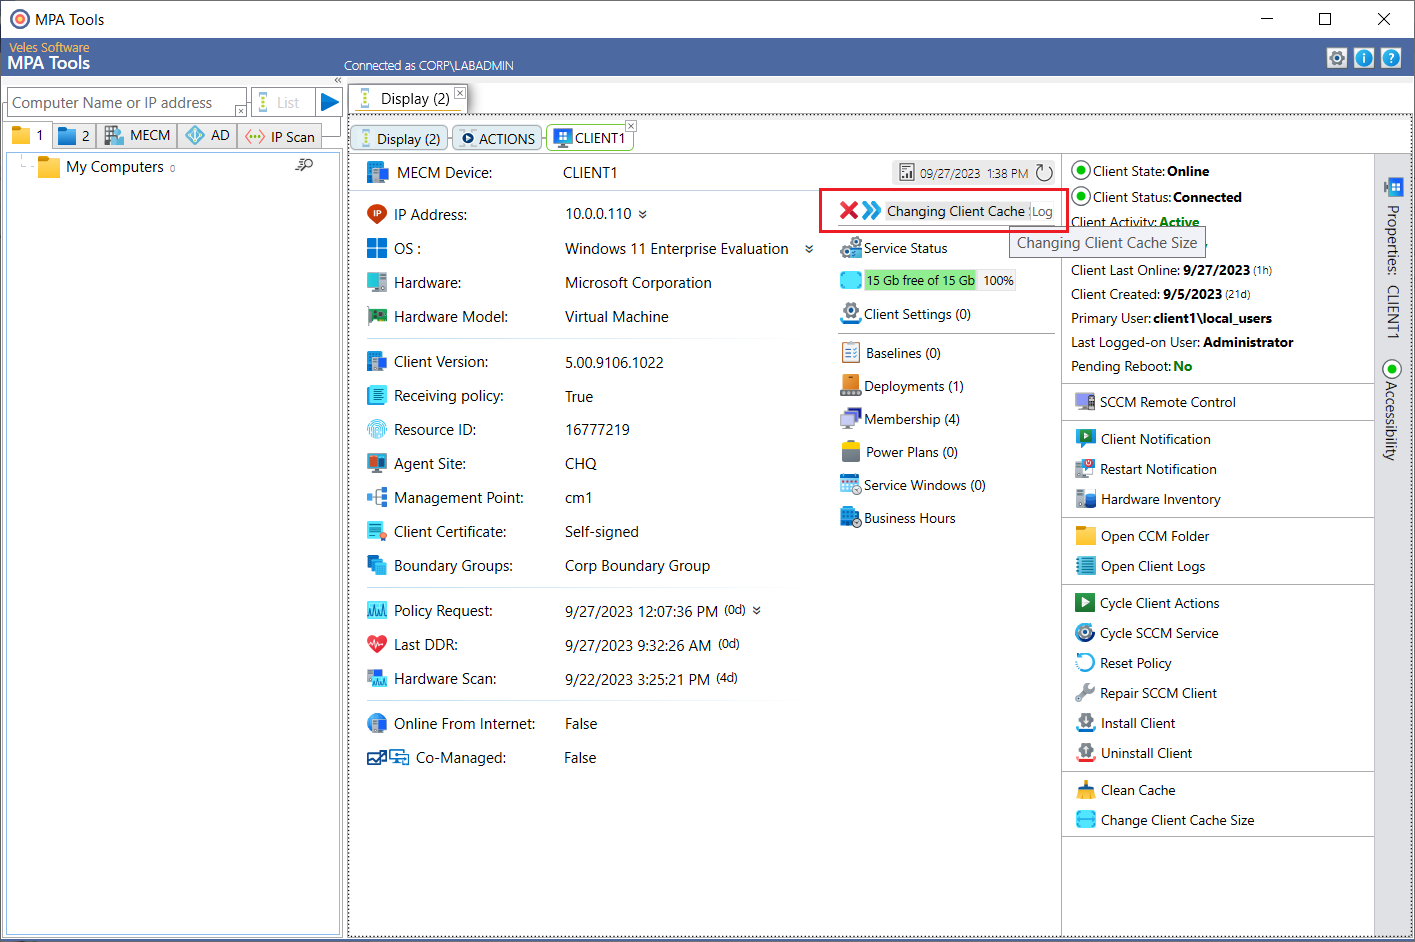
During this change the SMS Agent Host service (ccmexec) has to be restarted for the change to take affect (as shown below).
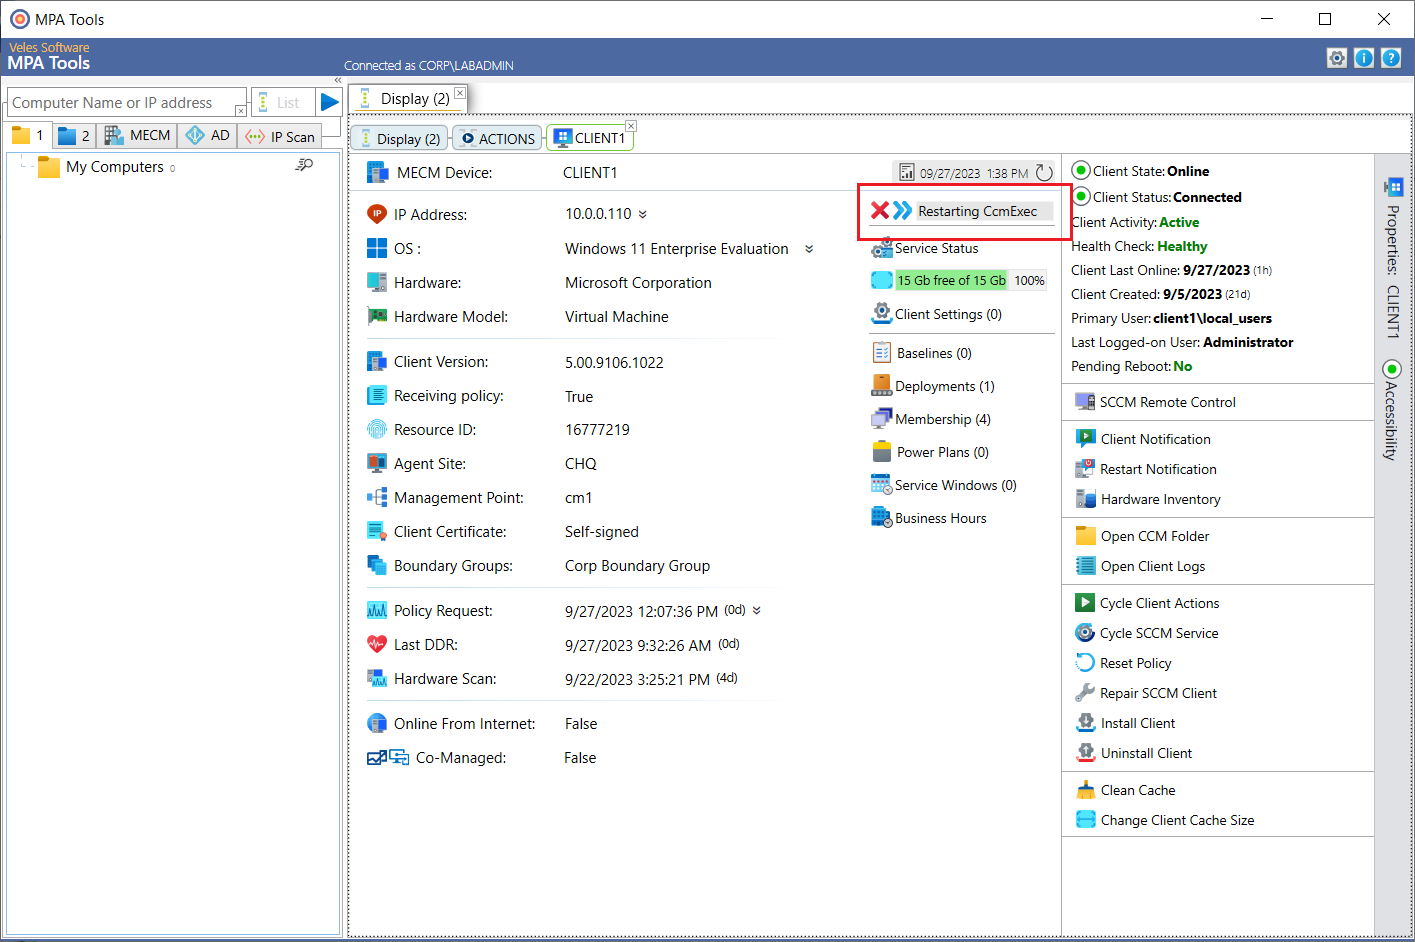
If we click on the >> button we can see that the action was a success under the action status.
Now we can see that that there is 20 GB of 20 GB free, indicating that the new client cache size has taken affect.
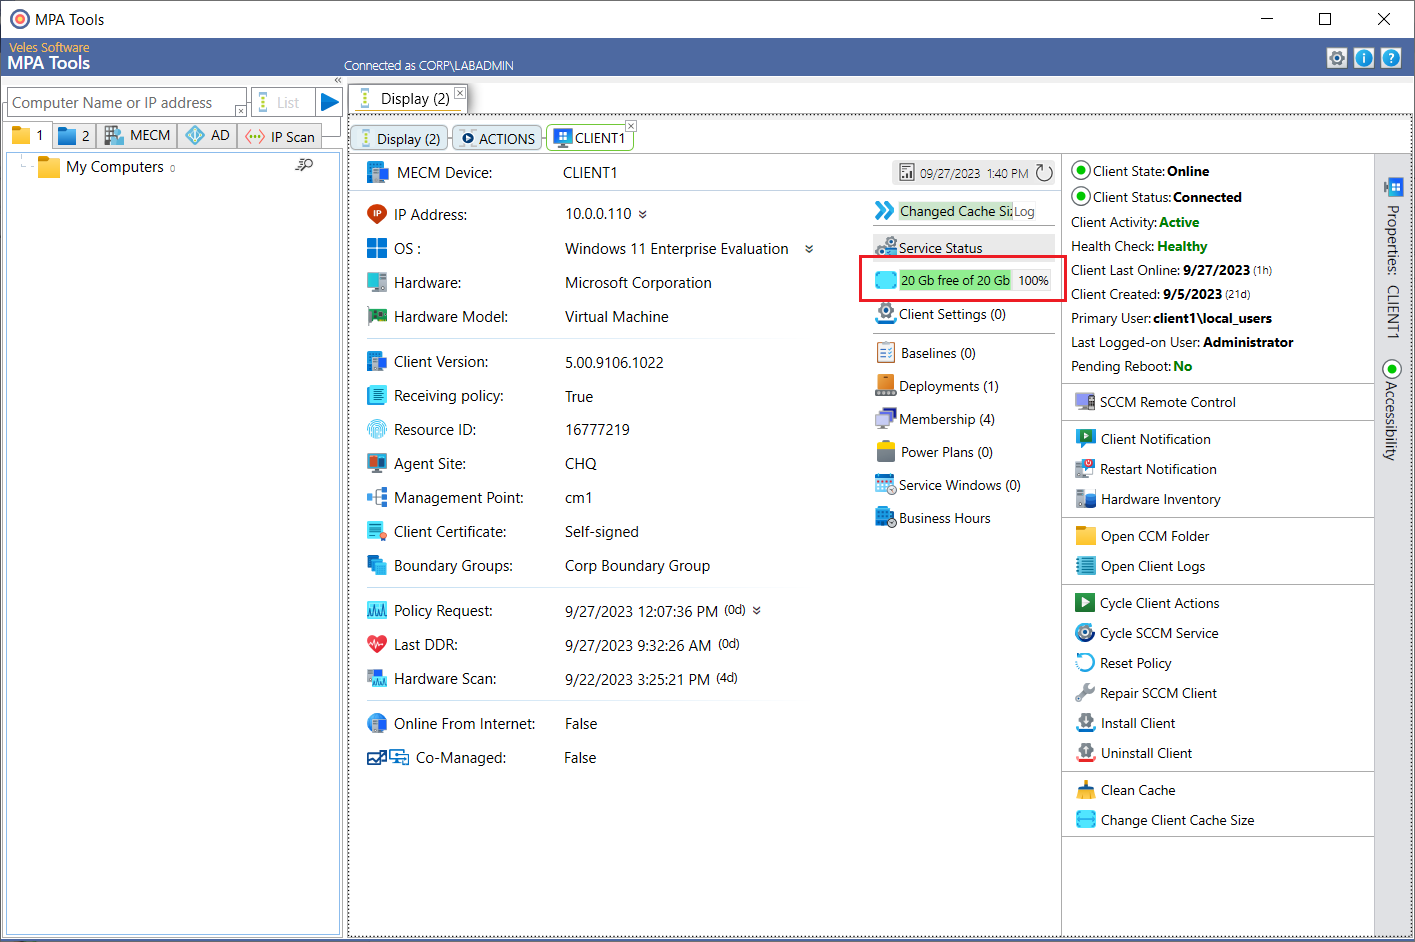
If we have a look at the cache settings on the client, we can confirm that the cache size is now 20GB.
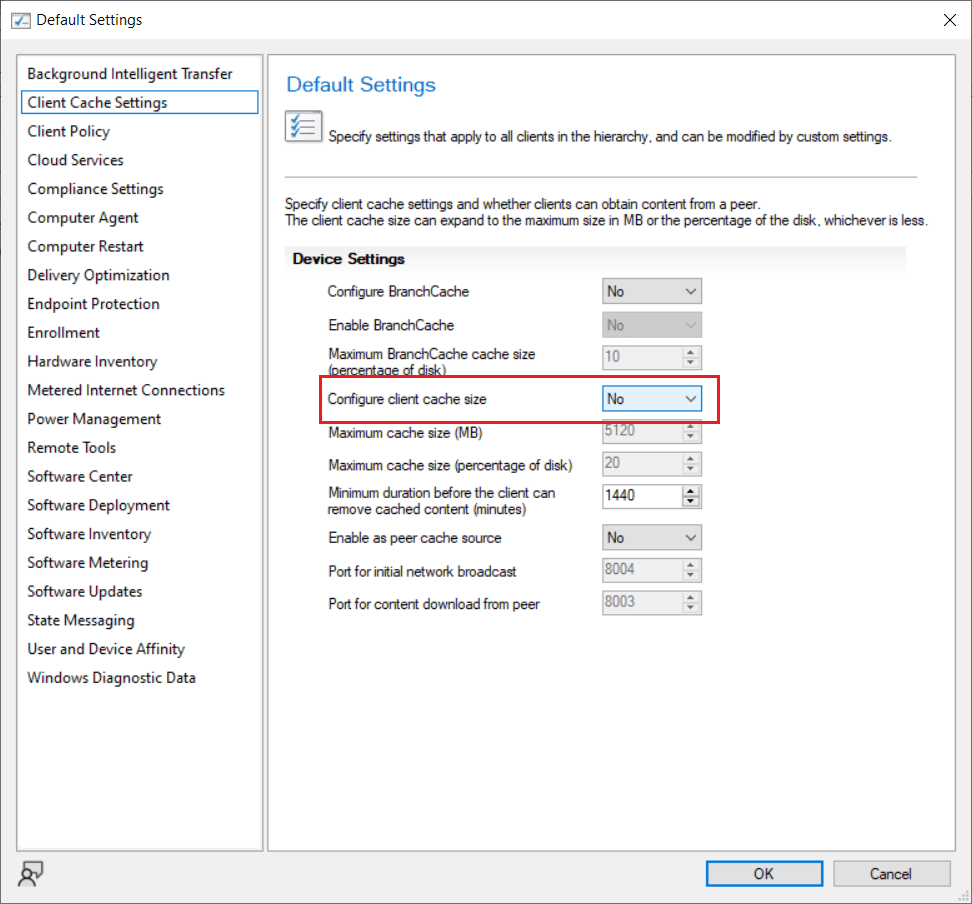
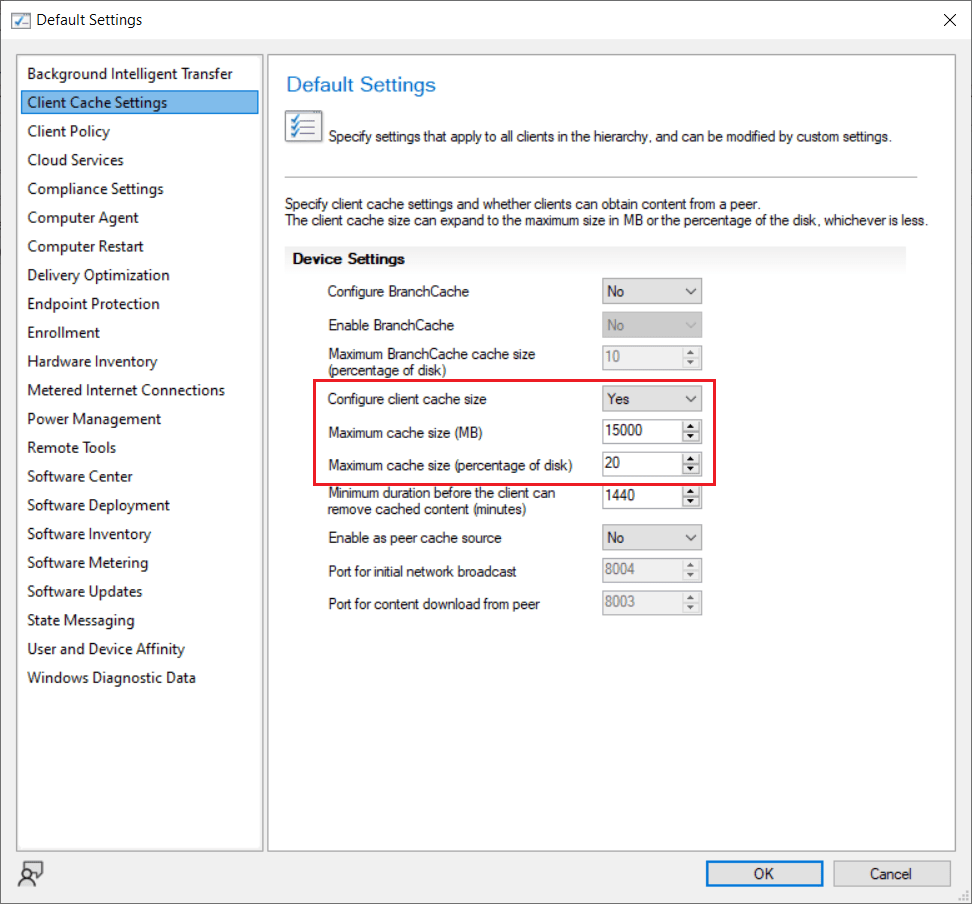
Note:The SCCM client cache size can only be manually changed like this if the cache size is not managed in the default client settings and/or any other applicable client settings assigned to a system (as shown below). See the section Is the client cache size reverting? below for the explanation.
Increase the client cache size with MPA Tools for multiple computers
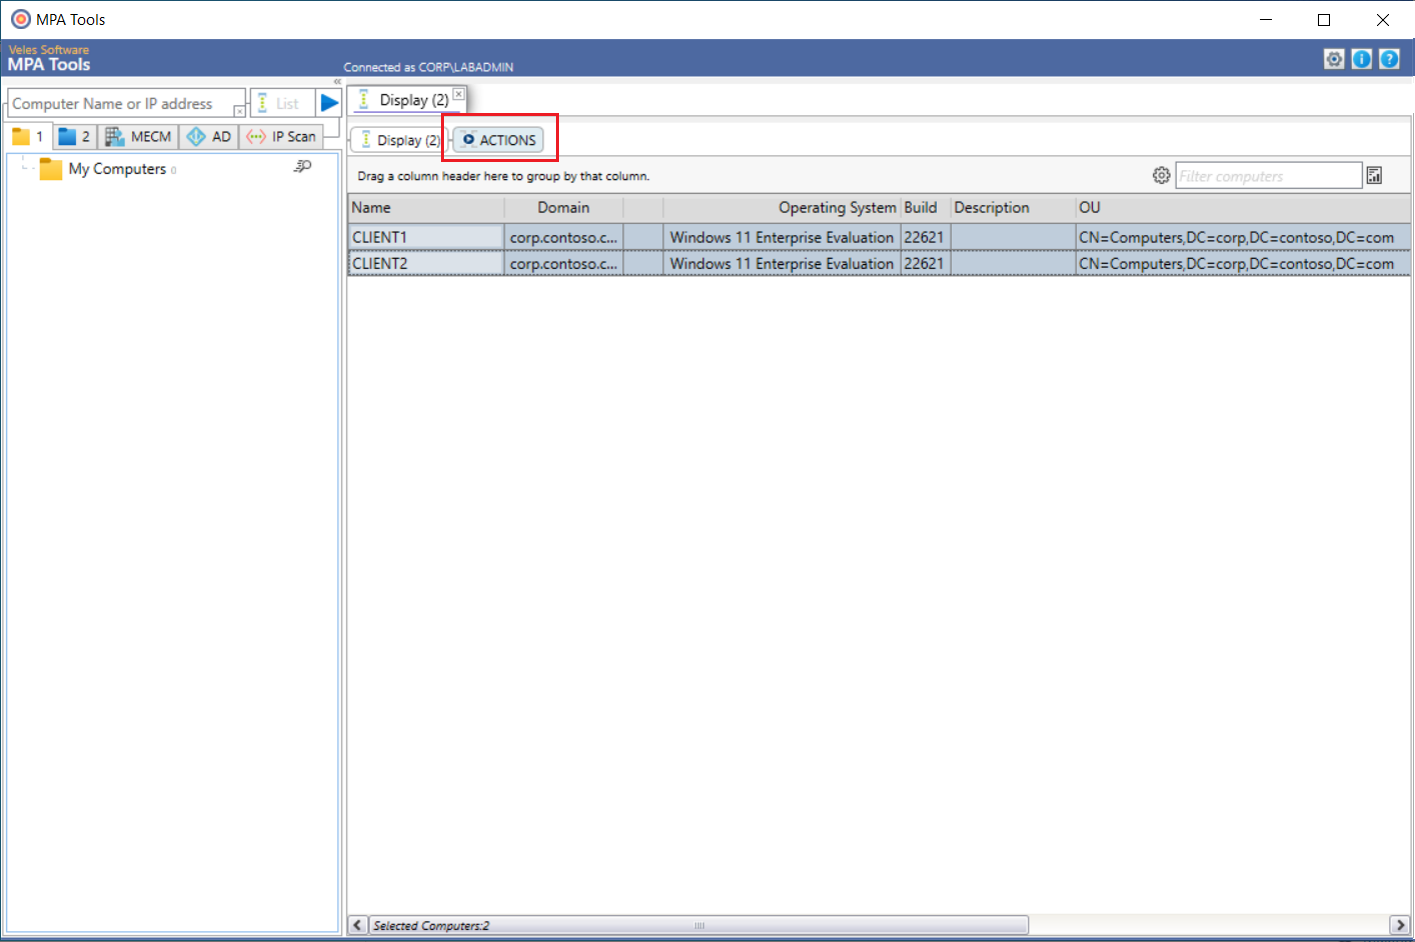
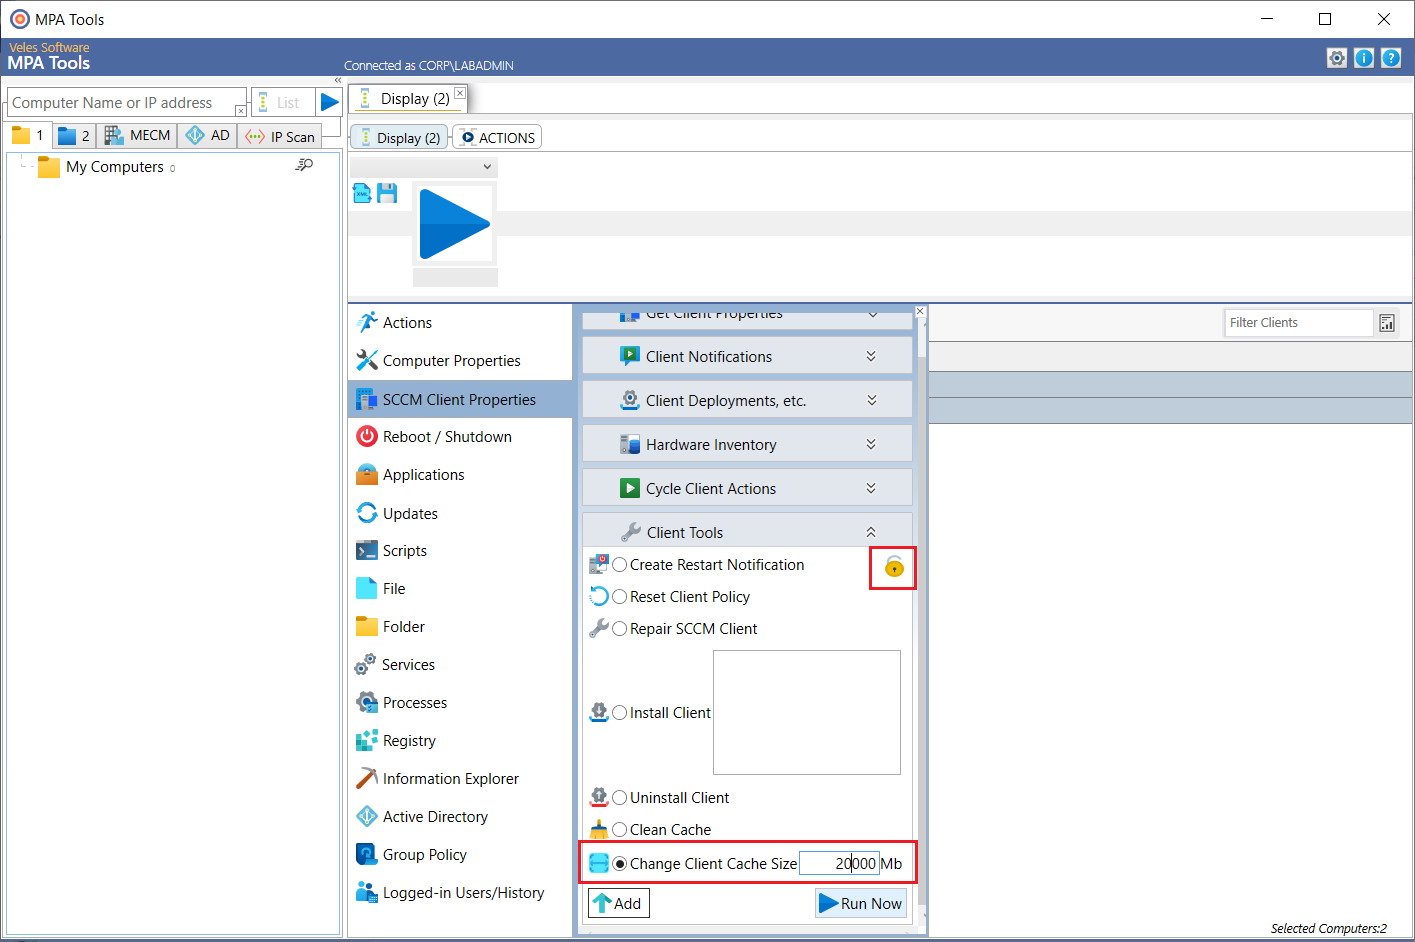
In MPA Tools, select multiple computers and then click the Actions button.
Select SCCM Client Properties from the middle menu. Scroll down to Client Tools and expand the options. Click the lock button to unlock the options, then select the Change Client Cache Size radio button. Then click the Run Now button.
The action status will now appear.
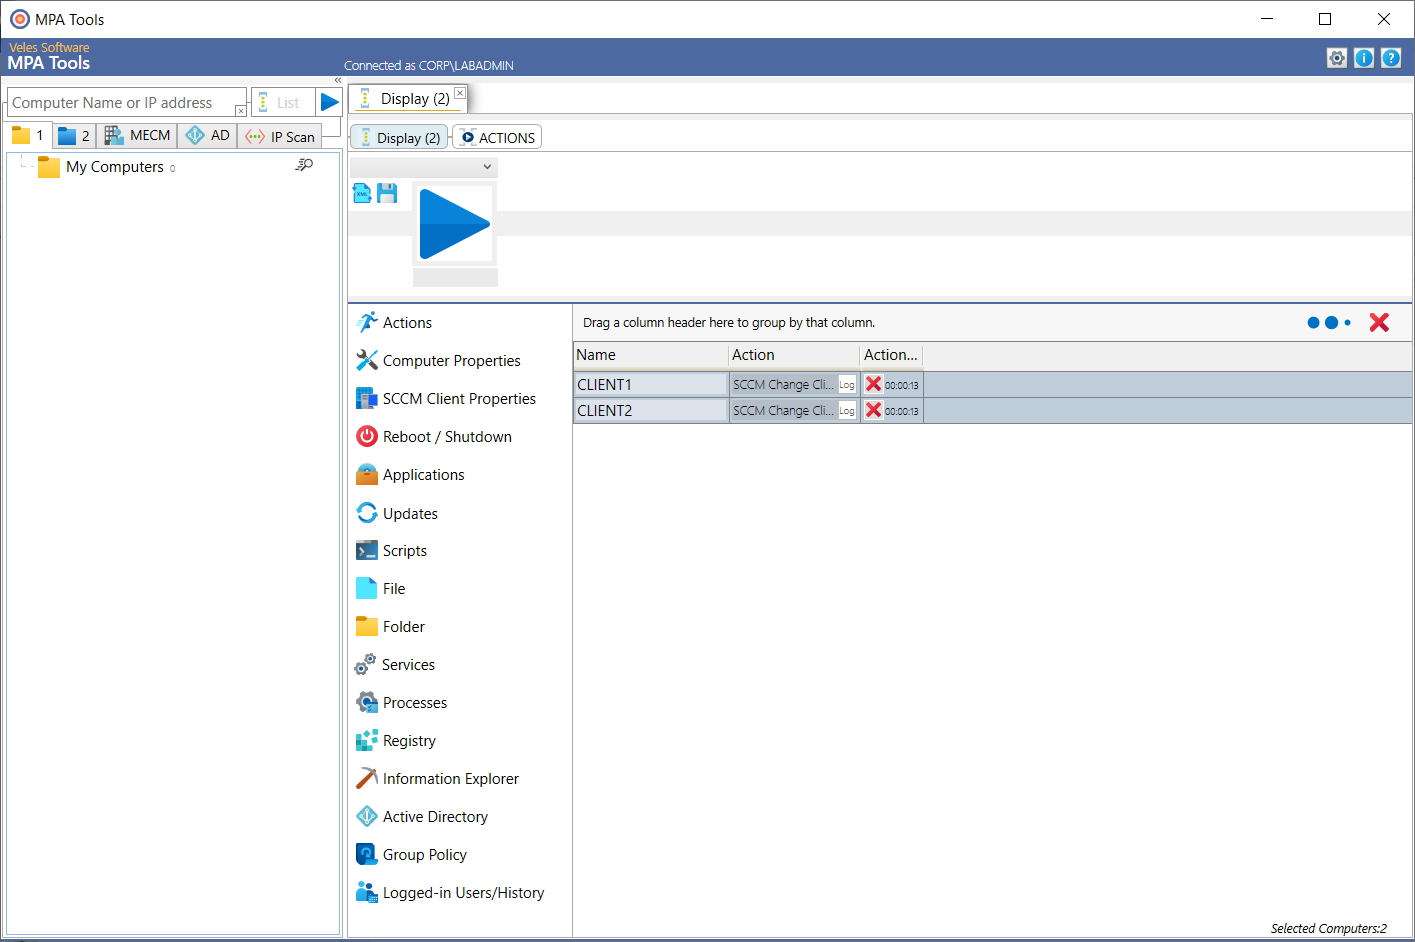
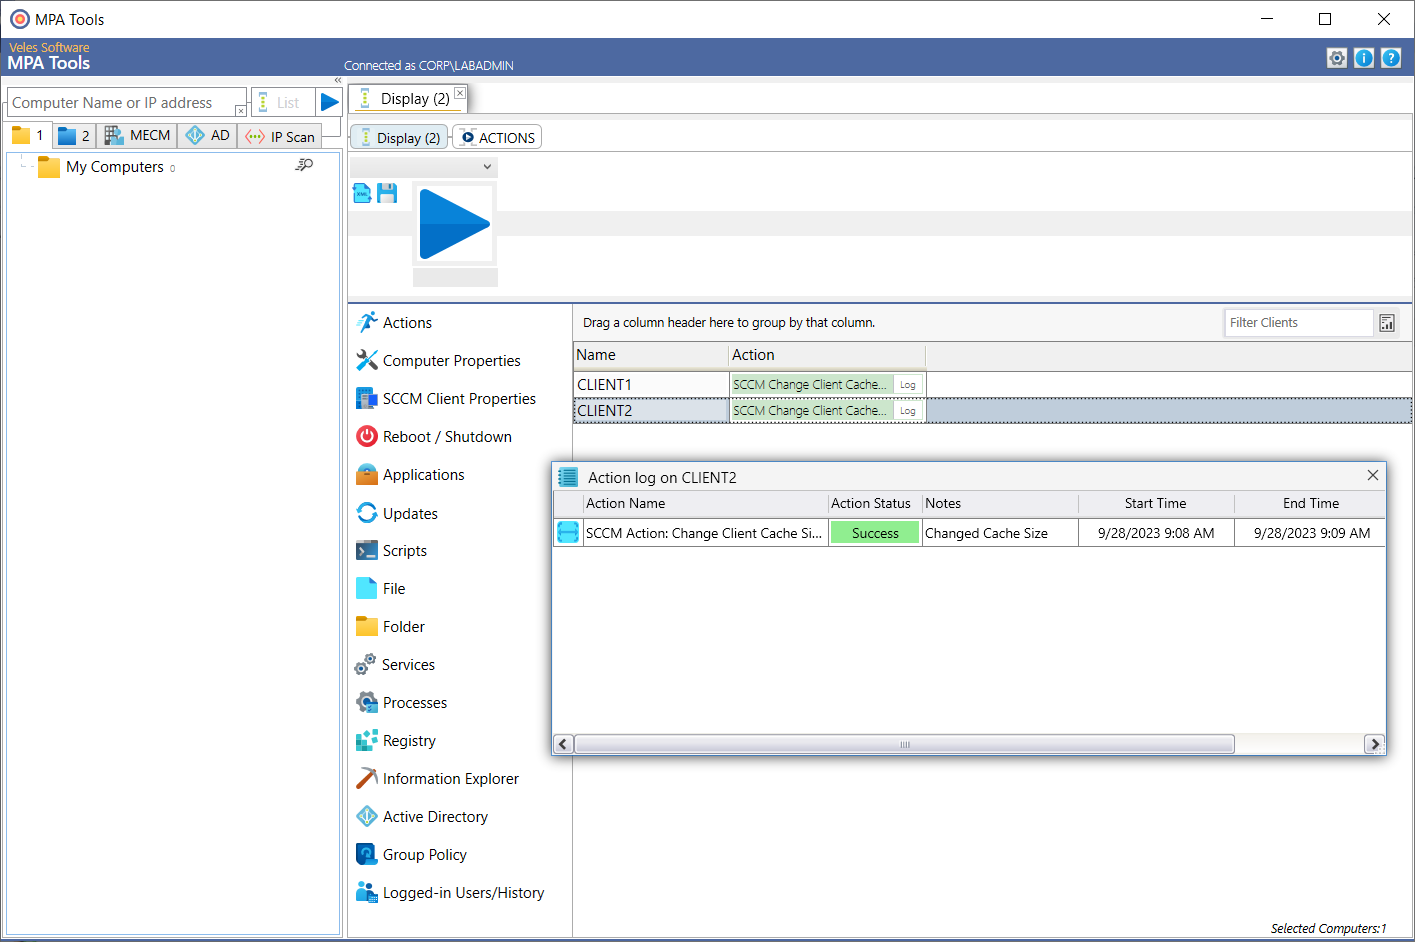
Once the action is complete for each system, we can click on the log button to see the action log and the resulting action status.
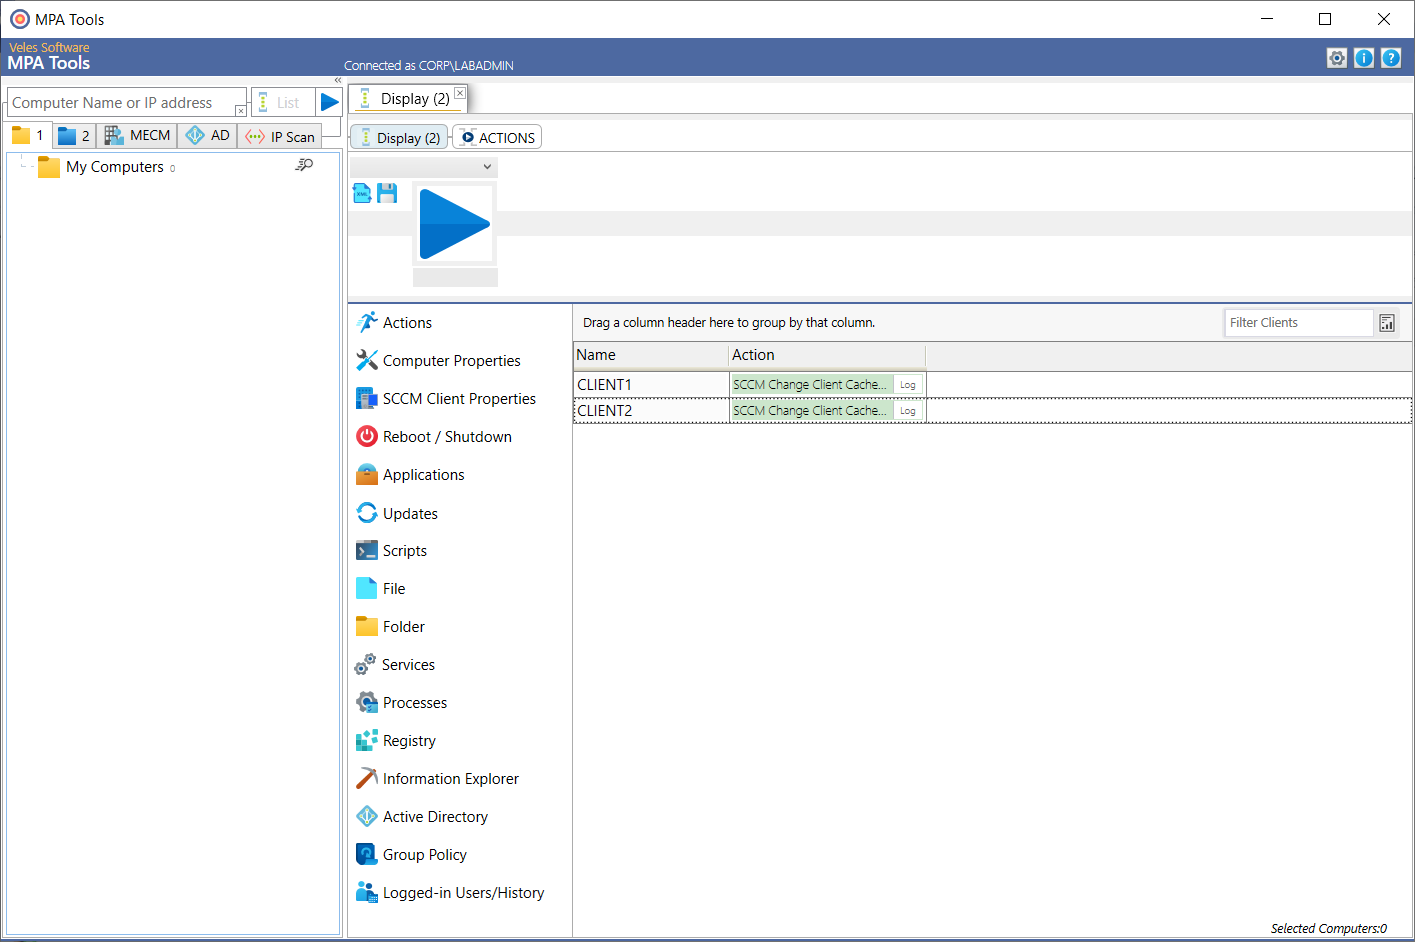
If we click on each action log, we can see that the action status is a success.
How to set the default cache size
There are two ways to set the default SCCM client cache size, namely:
- Use theSMSCACHESIZE parameter in the client installation parameters (ccmsetup) - see the following link for more information:Client installation parameters and properties - Configuration Manager | Microsoft Learn
- Configure the client cache size in the default client settings and/or a separate client settings configuration (if you would like varied cache sizes for different device collections) - see the following link for more information:Client settings - Configuration Manager | Microsoft Learn
Is the client cache size reverting?
If the client cache size is defined in either the default client settings in SCCM (as shown above) or in a custom client setting assigned to a collection that the system is a member of, then the client cache size cannot be changed. And we will explain why…
In order for the client cache size change to take affect, the SMS Agent Host service (ccmexec) has to be restarted. At which point, the client will reevaluate its machine policies and it will pick up the client cache size setting defined in the relevant client setting, and thus overwrite the manual client cache size change. Therefore, any cache size setting defined in the applicable client setting will take precedence over a manual client cache size change.